





The Ultimate AI Render Test in SketchUp
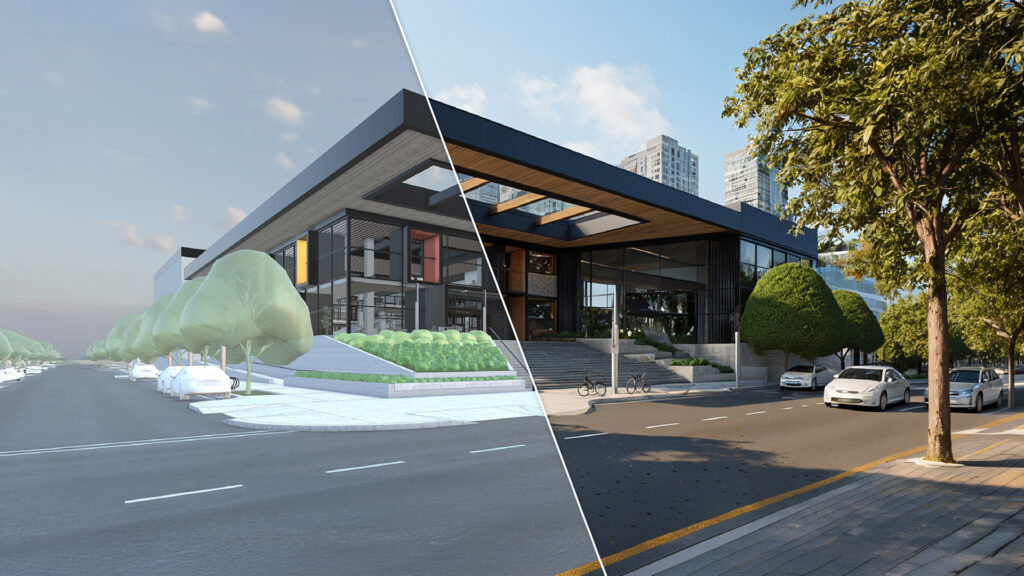
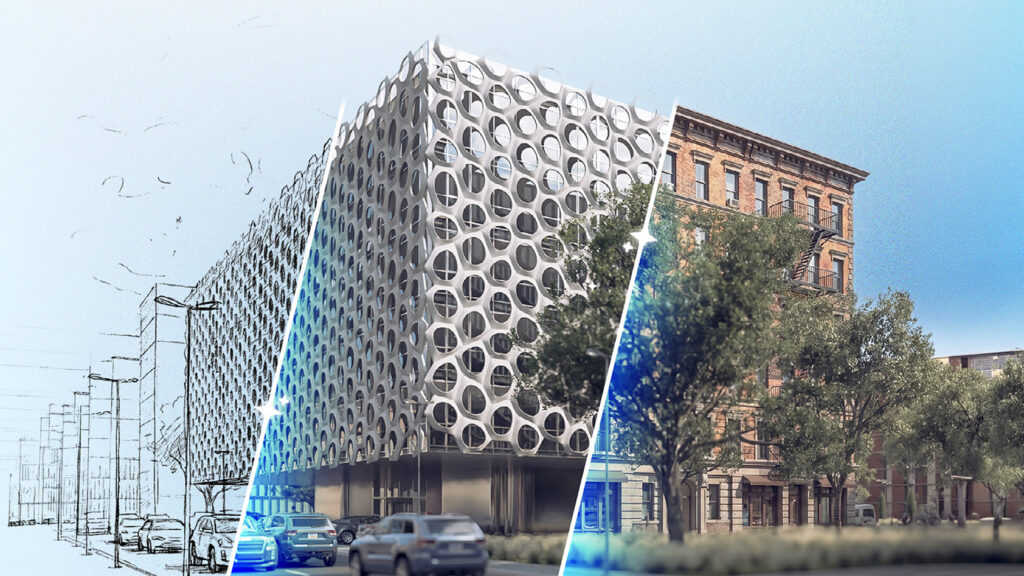
Welcome to the ultimate SketchUp AI rendering test. Prompt vs. Plugin: one SketchUp model, four different workflows.

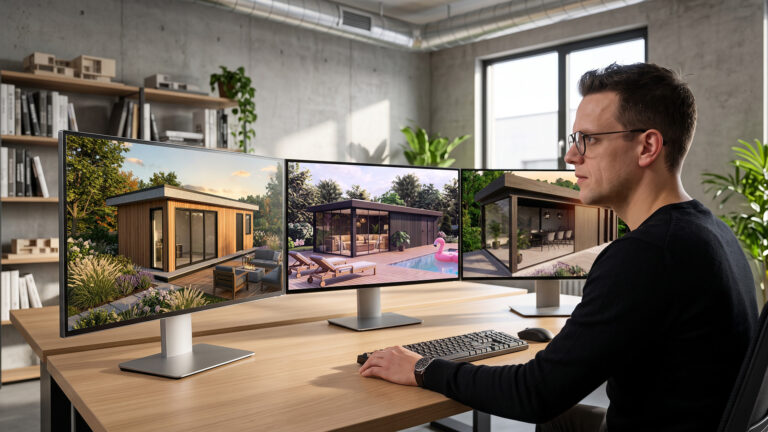
The world of 3D modeling and rendering is at a turning point. Where 3D artists previously spent hours, or sometimes days, manually tweaking lighting, textures, and camera angles, artificial intelligence (AI) now promises to streamline this process down to a single click or a simple text prompt. However, not all AI is created equal. The way the technology is controlled and integrated into your workflow largely determines your creative control, speed, and the overall quality of the final result.
The Different Workflows
To map out the true value, benefits, and pitfalls of these new technologies, this comparative study starts from a single, recognizable baseline: the exact same base model in SketchUp. From that shared starting line, the paths split into four distinct AI methodologies, each led by a different researcher:

The Prompter (Robert)
Explores the boundaries of pure text-to-image and image-to-image generation by completely transforming the SketchUp model through targeted prompts in Google Gemini.

The Native SketchUp User (Soroush)
Stays entirely within the familiar walls of SketchUp, relying on the power and speed of its new, built-in AI Render tool.

The Plugin Expert (Martha)
Tests the synergy of the VizMaker plugin. This method sends the SketchUp viewport directly to an external, node-based desktop application. Within this setup, several specialized AI engines (such as Nano Banana and Flux) are combined with visual tools to achieve a controllable final result.

The AI Engine User (Edwin)
Utilizes Chaos Veras, an advanced AI engine from the creators of V-Ray and Enscape specifically designed to quickly transform 3D models into high-quality, photorealistic renders.
This study isn’t just about “the prettiest picture.” We evaluate the different workflows on crucial criteria such as user-friendliness, render time, control over the final result, revision capabilities, and output consistency.
Which method strikes the perfect balance between human creativity and artificial intelligence? Welcome to the ultimate AI rendering test.
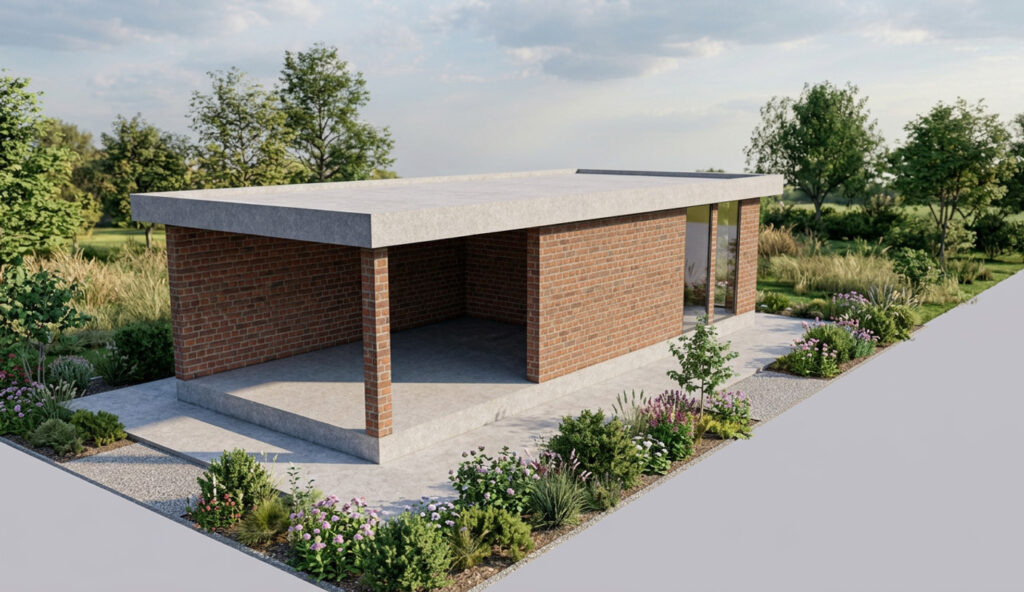
The Starting Point: A Garden Room Concept
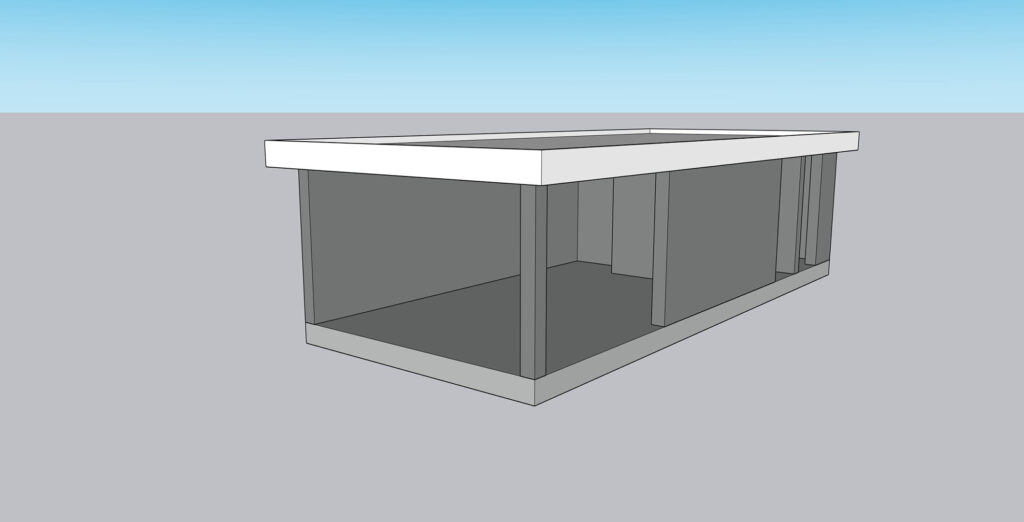
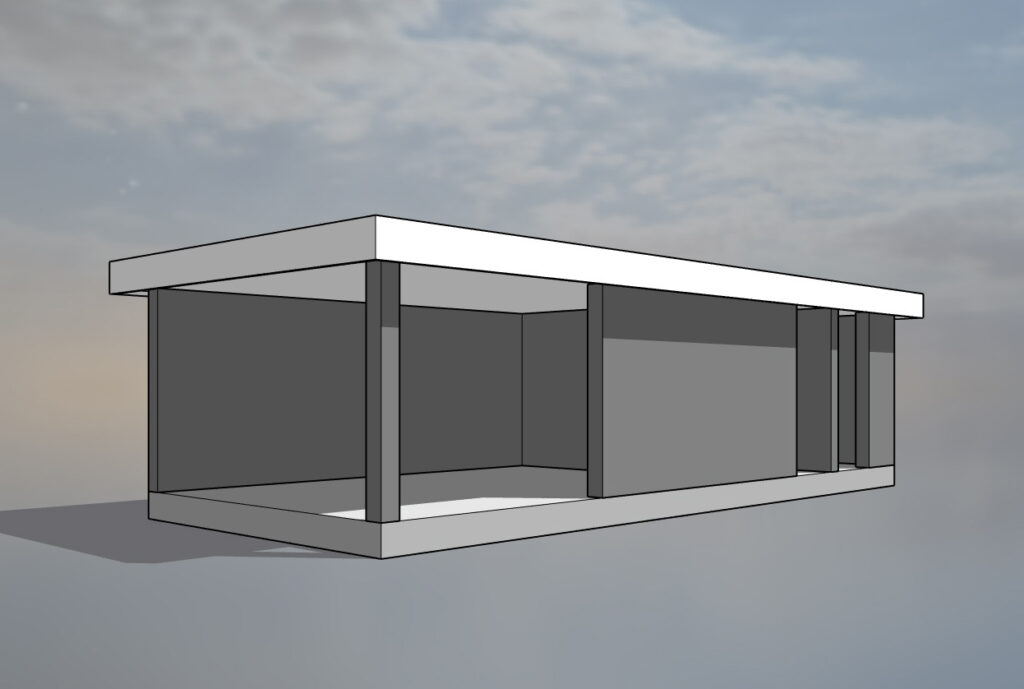
In SketchUp, we modeled a very simple massing study of a garden room. In fact, it consists of just three components:
- The concrete slab on which the veranda is built;
- The walls defining the final layout of the garden room;
- The roof to enclose the space.
The Goal: Visualizing a Stunning Garden Room
The ultimate goal is to visually showcase the final details, such as the selected wall cladding, sliding glass doors, and access doors, and to visualize this garden room set within a beautiful garden. Our four testers will each approach this in their own unique way and share their findings here.
Workflow 1 – The Prompter
Robert is Design8’s Marketing Manager. He’s pretty handy with SketchUp (he actually modeled the Stand Builder CD back in 2008!), but photorealistic rendering is completely lost on him. He used to handle V-Ray tech support, yet when it comes to actually using it, he doesn’t have a clue.
However, for his daily tasks, he frequently relies on Gemini: Google’s AI engine that also provides access to Nano Banana. Together with Gemini, he drafts copy and regularly generates images to support promotional efforts. Robert views this technology not only as a major threat to traditional rendering software, but even to the specialized AI rendering engines currently on the market. In his workflow, he illustrates why this fear is justified on one hand, yet completely unfounded on the other.
Preparing the Model in SketchUp
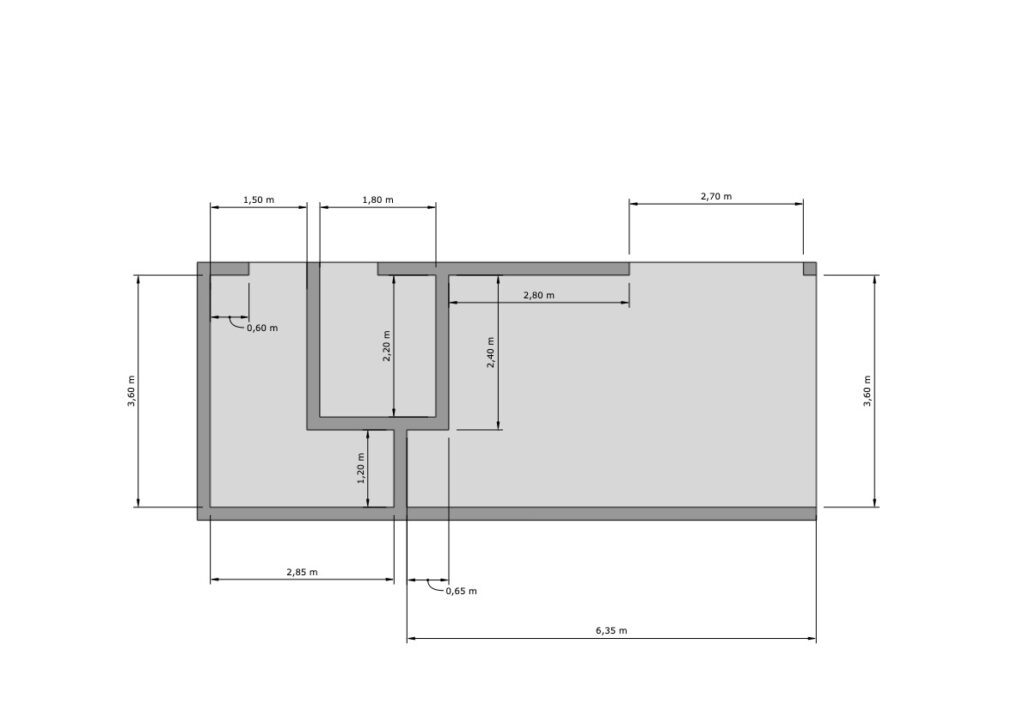
“To be completely honest, I didn’t go any further in SketchUp than the three components we already had. However, I did create a dimensioned drawing in LayOut for reference, so that the AI engine might get a sense of the garden room’s exterior dimensions.”, Robert explains, describing his straightforward workflow in SketchUp and LayOut.
Brainstorming with Gemini
Robert’s next step is uploading both the 3D massing visualization and the dimensioned drawing from LayOut to Gemini. Both are simply straightforward JPG images, nothing more, nothing less.
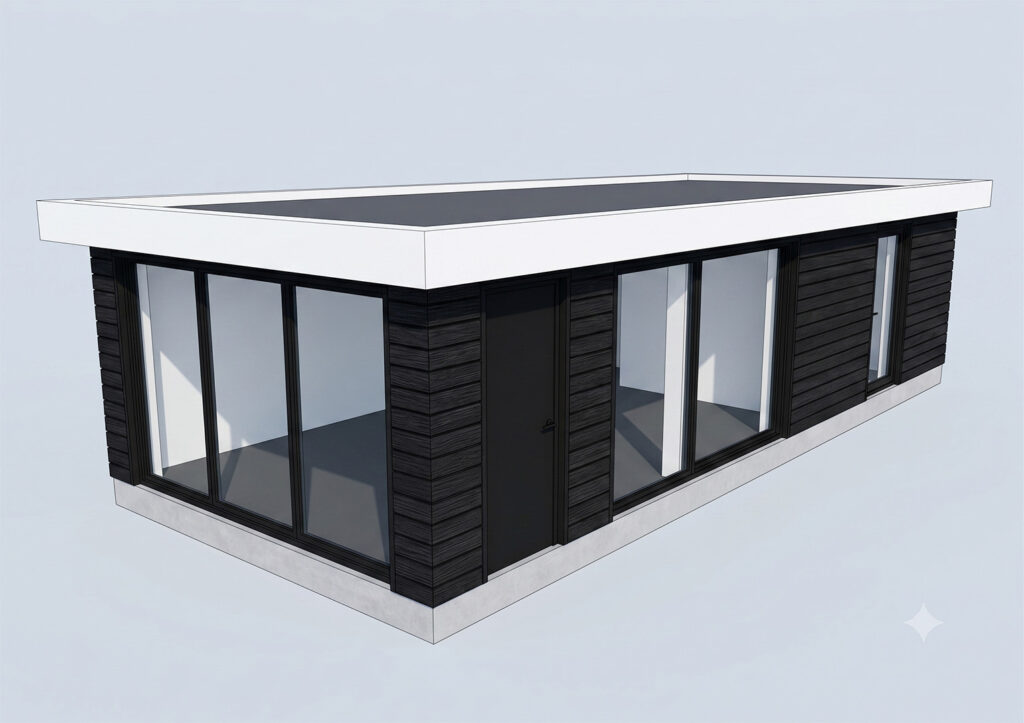
The first prompt Robert enters: ‘Can you create a 3D render based on these two drawings? Style: black overlap siding (rabat). Large openings are sliding glass doors, small openings are an access door.‘
The result is a SketchUp-style visualization where the window sections and doors aren’t quite in the right positions yet:
Making it Photorealistic
Now the task is to make the garden room photorealistic, complete with a garden and the correct layout of sliding doors and access doors. For this, Robert uses the following prompt:
‘Please make it photorealistic with a garden around it. And then extend the sliding doors on the long side all the way to the left, so that you actually only have a post there.‘
With this prompt, we are actually getting quite a long way in the right direction:
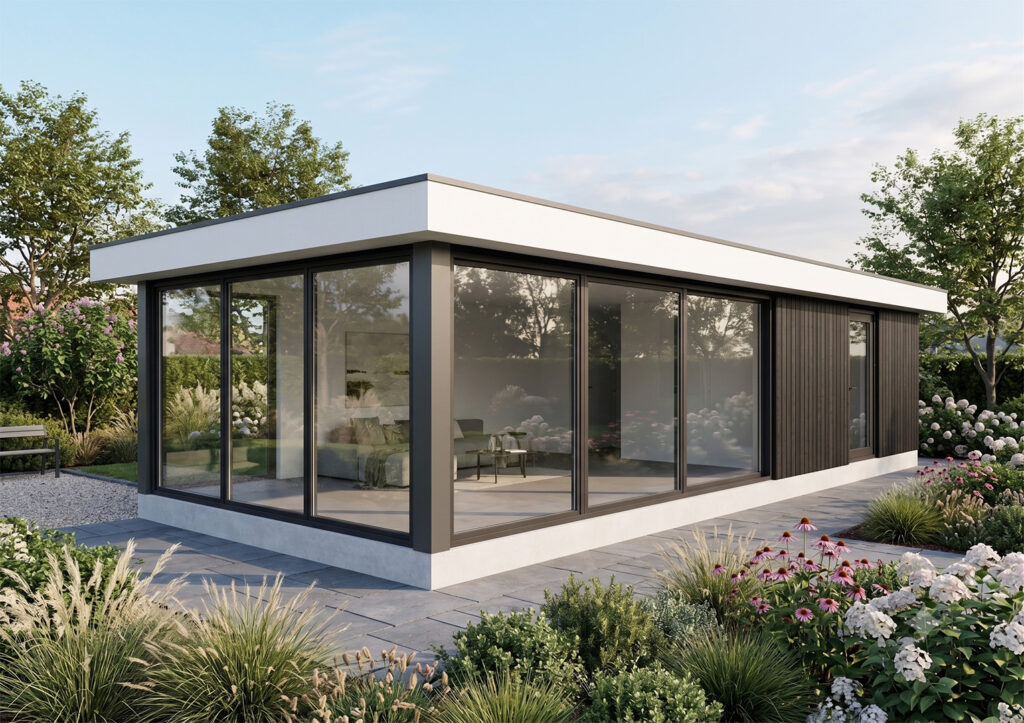
In terms of look and feel, this is the garden room we originally had in mind. However, we’re still missing an access door on the right side, and the window sections aren’t quite what we had envisioned either.
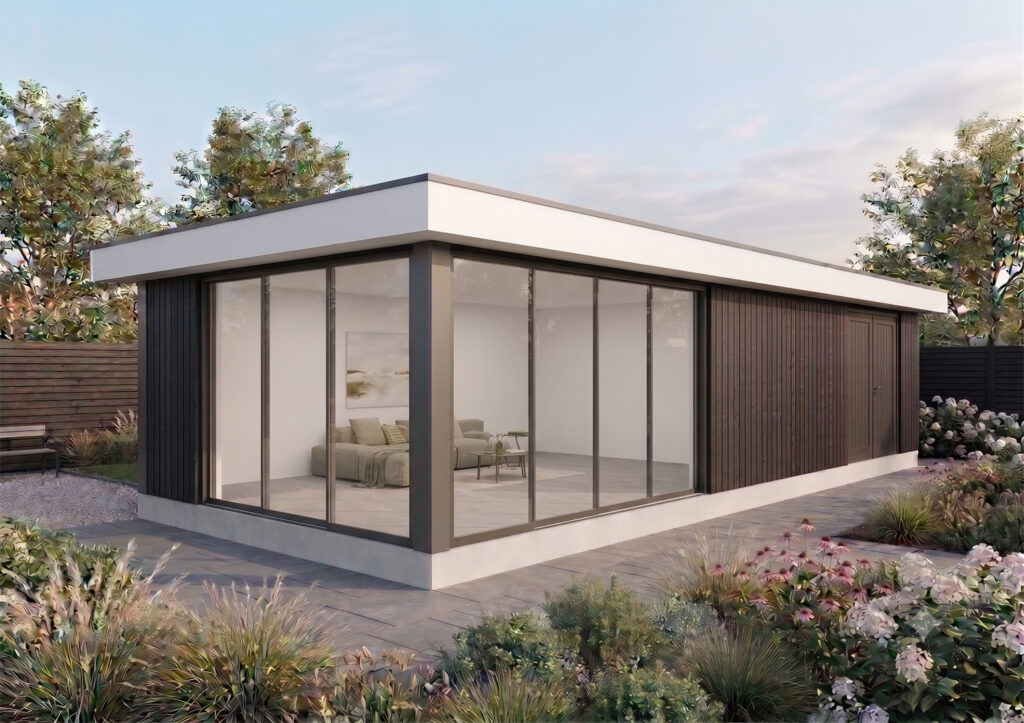
In total, Robert had to enter 7 more prompts to reach what was, for him, the best possible result. “Every now and then, Gemini doesn’t quite get what I mean or maybe I just don’t explain it properly myself. So I needed nine attempts in total to arrive at a result that I was 90% happy with. In each prompt, I actually try to adjust only one or two details at a time to avoid being too drastic and sending Gemini down the wrong track. So first: ‘add an access door on the right.’ And then: ‘please make the back wall completely solid.’ And so on.”, Robert explains. “While this does take a bit of extra time, it gave me a reasonable degree of control to achieve a great result.”
Conclusion Based on Prompting Alone
For a rendering novice like Robert, this is actually quite a strong result: “For me, this would be a perfect conceptual visual to hand over to a contractor to build this garden room. They’d likely only need the architectural drawing with dimensions anyway. However, it isn’t exactly what we originally had in mind. For instance, you can see a narrow black wall was added to the narrow side of the veranda. That’s a detail I just couldn’t manage to ‘prompt away’ in Gemini.”
“So, to some extent, I still lack full control over the original geometry. I noticed this during the intermediate prompts as well. The geometry isn’t always respected; windows and doors occasionally ended up in the wrong spots, and the original geometry never had that wall on the narrow side in the first place.”, he explains regarding the downsides of relying solely on prompts based on two images.
Still, with minimal effort, you can achieve a solid result. All in all, it took Robert 50 minutes to land on a result he was happy with.
| Advantages | Disadvantages |
|---|---|
| No rendering knowledge required | Geometry is not respected |
| Fast prompt response time | Required 9 attempts |
| Great result for a conceptual visual | Not 100% satisfied with the final result |
| Limited creativity since you are only prompting | |
| Paid subscription required |
Workflow 2 – The Native SketchUp user
Soroush gets to work with SketchUp AI Render. AI Render is built directly into SketchUp, so you don’t need a separate rendering application or plugin. It uses generative AI to transform your SketchUp models into photorealistic or stylized images based on your model’s geometry and a simple text prompt.
Activating SketchUp AI Render
To activate SketchUp AI Render, Soroush right-clicks the top ribbon and selects “AI Render”.
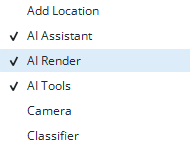
The ‘AI Render’ icon appears.

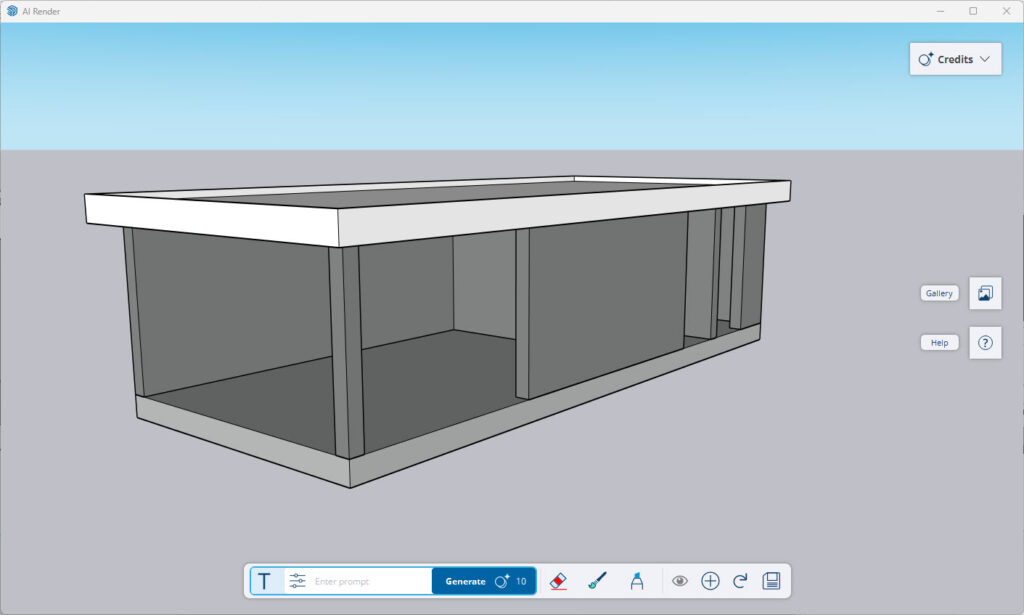
After clicking the icon, the ‘AI Render‘ window appears:
Creating an Image with AI Render
To generate an image, Soroush first needs to select one of the default presets. For each preset, it is possible to add both a prompt and a negative prompt. Additionally, he can adjust how much influence the prompt has on the final result and to what degree the AI should respect the geometry of the SketchUp model.
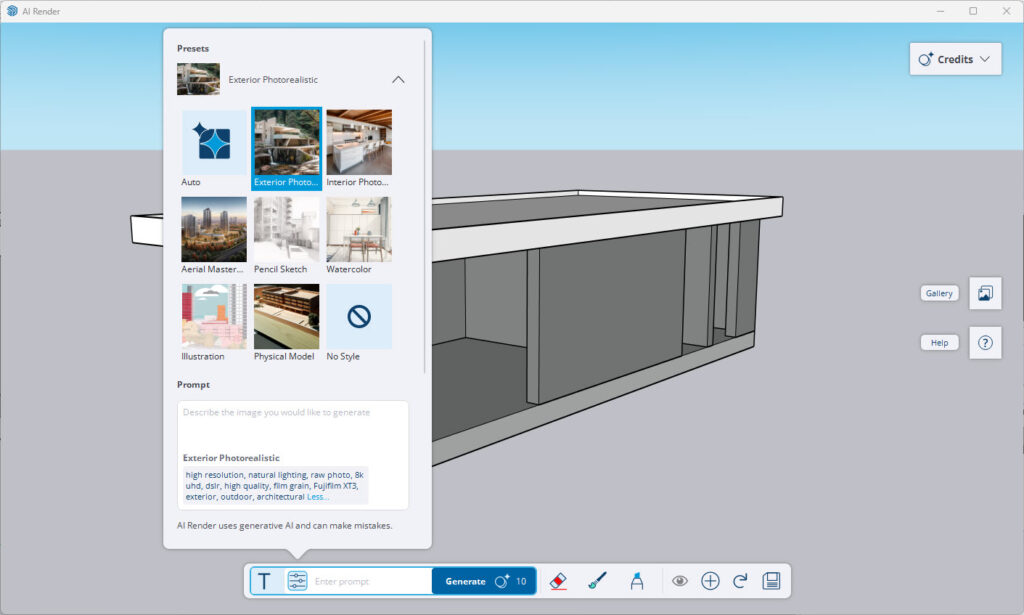
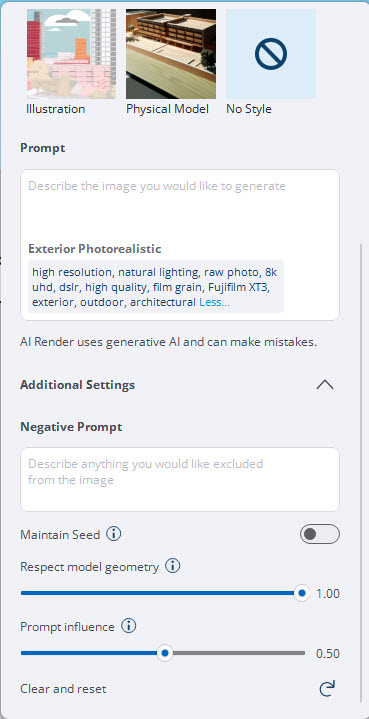
Soroush wants to create a render of this space as if it were a modern garden room. For his first render, he chooses the Exterior Photorealistic preset, as it is well suited for realistic outdoor visualizations.
The first result is promising, but does not yet fully align with his vision. The space appears to be situated in the middle of an empty landscape, and the materials used do not yet form a cohesive whole. Therefore, Soroush decides to refine the prompt further to better match the surroundings and the materialization.
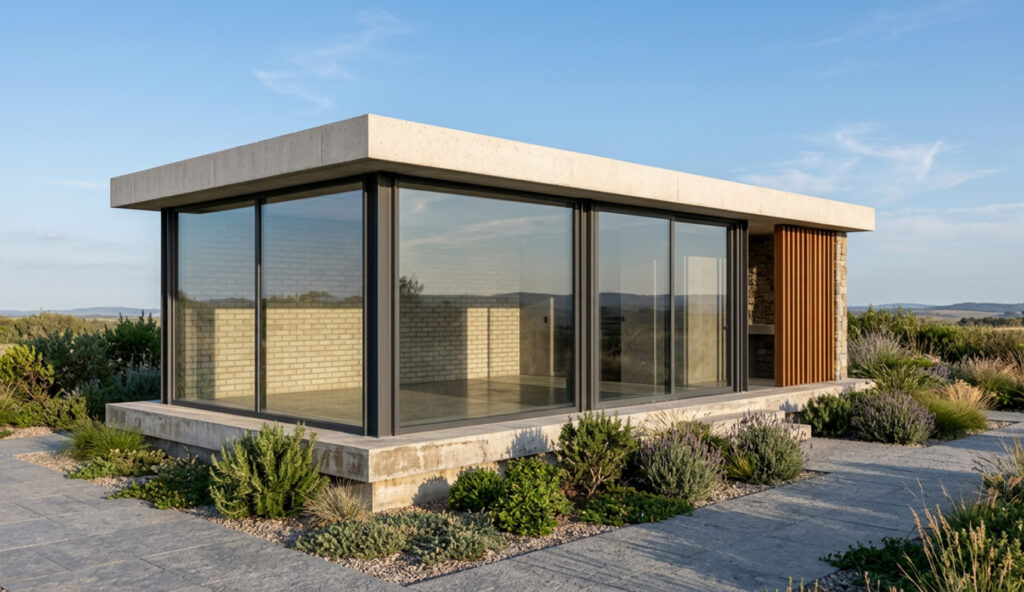
To give the AI more context, Soroush first decides to add materials to the SketchUp model. Next, he generates a second render using the same Exterior Photorealistic preset to see how the additional information affects the result.
Starting Over
To start over, Soroush uses the Refresh button to reload the active SketchUp model into AI Render. He can then choose to add his prompt to the Exterior Photorealistic preset or use the Auto preset and enter his prompt there.
For the prompt, Soroush asks ChatGPT to write a description that helps AI Render generate a modern garden room. ChatGPT suggests the following prompt:
‘Create a photorealistic image of a modern backyard studio. The walls, which are white in the model, should appear as natural cedar vertical siding with black aluminum trim. The large opening on the front façade should be a floor-to-ceiling sliding glass door, while the smaller opening on the side should be a solid matte-black entrance door. Surround the studio with a landscaped garden featuring ornamental grasses, flowering shrubs, and mature maple trees. In the foreground, include a wooden deck with contemporary outdoor furniture and a fire pit. The scene should be lit by warm golden-hour sunlight, creating soft shadows and a welcoming atmosphere.’
Below is the result using the Exterior Photorealistic preset:
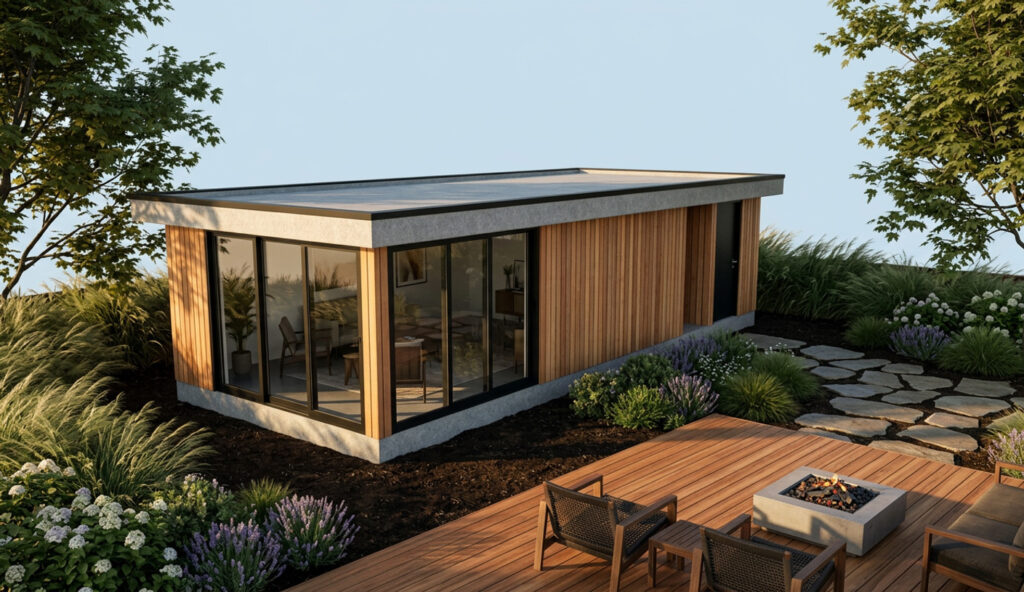
The result using the Exterior Photorealistic preset deviates from the original camera angle. The garden room now appears to sit on a hill, and the sky looks quite bleak, meaning the render doesn’t quite capture the warm, inviting atmosphere from the prompt.
Auto Preset
Below is the result of the ‘Auto‘ preset combined with the same prompt:
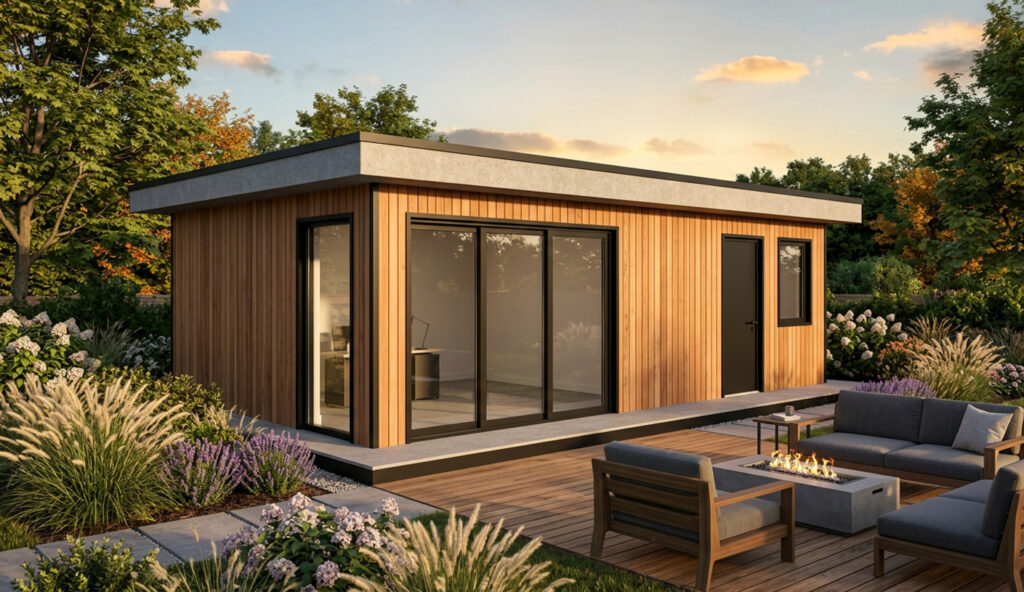
With the Auto preset, the original camera angle is preserved. Additionally, the AI creates a clear, inviting sky and a logical entrance to the garden room, making the result look more convincing than the previous render.
Soroush decides to develop both renders further using AI Render‘s additional editing features. This allows him to keep the strong points of each result while refining the less successful parts to achieve a compelling final visualization.
‘Exterior Photorealistic’ Preset
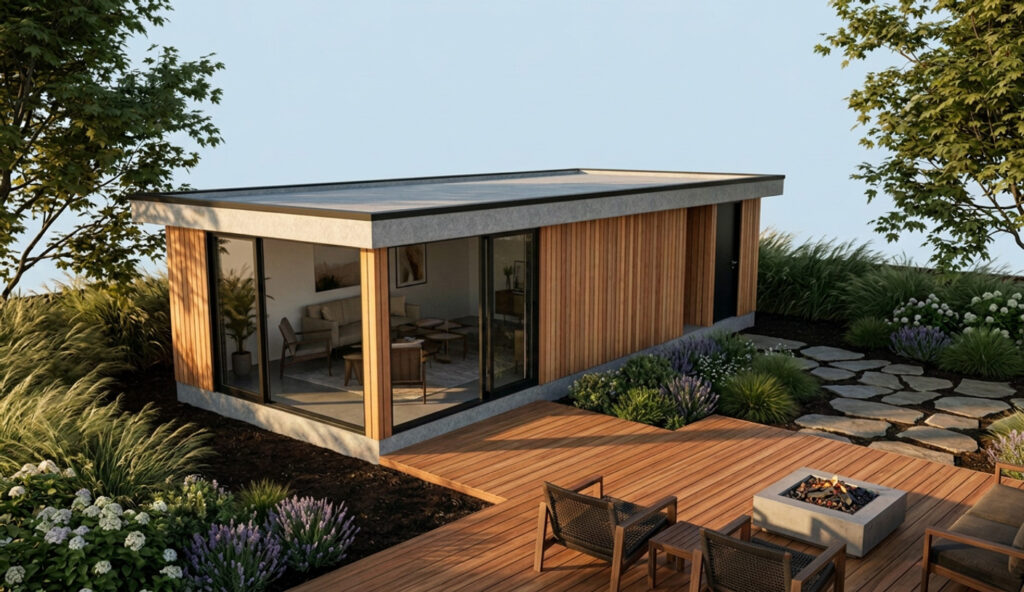
For the project with the Exterior Photorealistic preset, Soroush uses the ‘Regenerate parts of the image using a mask and a prompt‘ feature. Using a mask, he selects the parts of the image he wants to adjust and provides the following instruction:
‘Connect the wooden floor to the studio and change the window to an opening rail window.’
This way, the entire render does not need to be regenerated, allowing him to refine only the desired elements.

Below you can see the result after regenerating the selected parts of the image using a mask and an additional prompt:
Further Enhancement
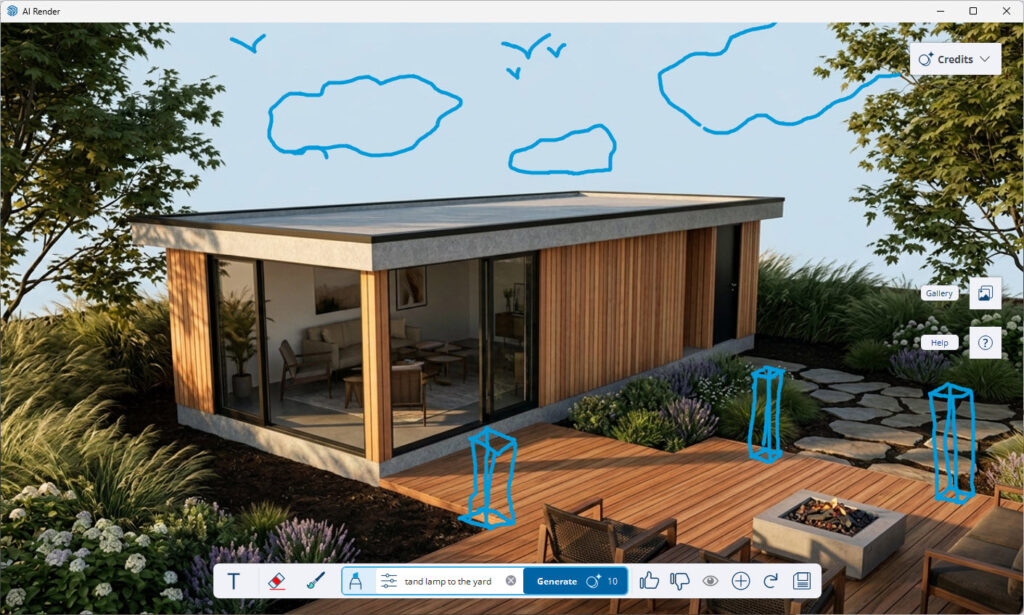
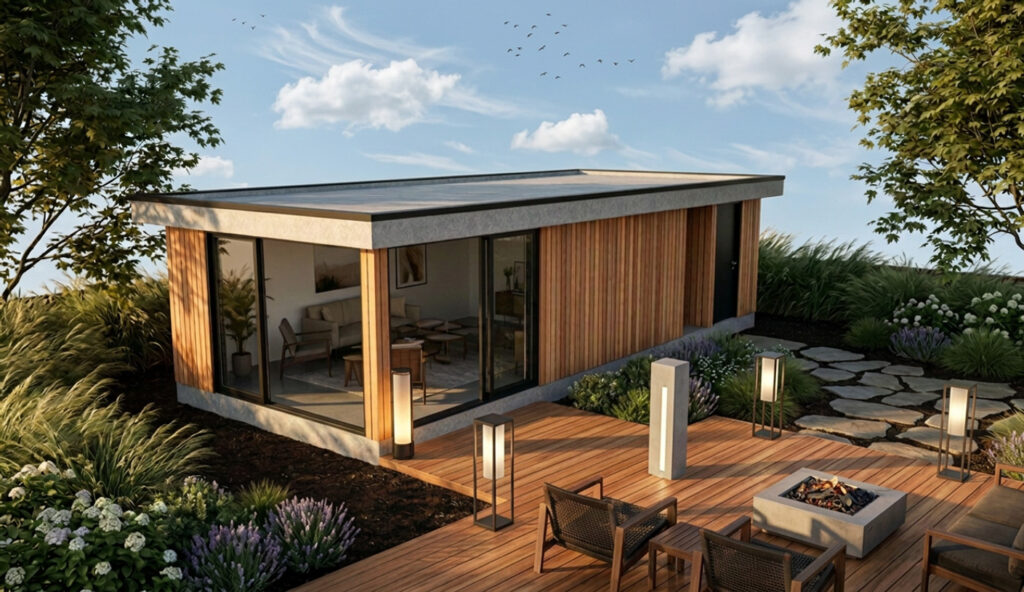
Soroush wants to further enhance the render by adding a few birds and soft clouds to the sky, as well as a couple of modern, freestanding garden lights along the terrace. For this, he uses the “Generate artifacts using a sketch and a prompt” feature. By using a simple sketch to indicate where the new elements should be placed and adding a short description, AI Render can integrate these objects naturally into the existing image.

With a simple sketch, Soroush indicates where he wants to add clouds, birds, and a modern standing garden lamp. Then, he uses the following prompt:
‘Create some clouds and birds in the sky. Add a modern standing lamp to the yard.’
AI Render uses the sketch as a guideline for the location of the new elements and combines it with the prompt to integrate them naturally into the existing render.
Below you can see the updated render, in which the additional elements have been successfully added to the image:
Deleting Unwanted Objects
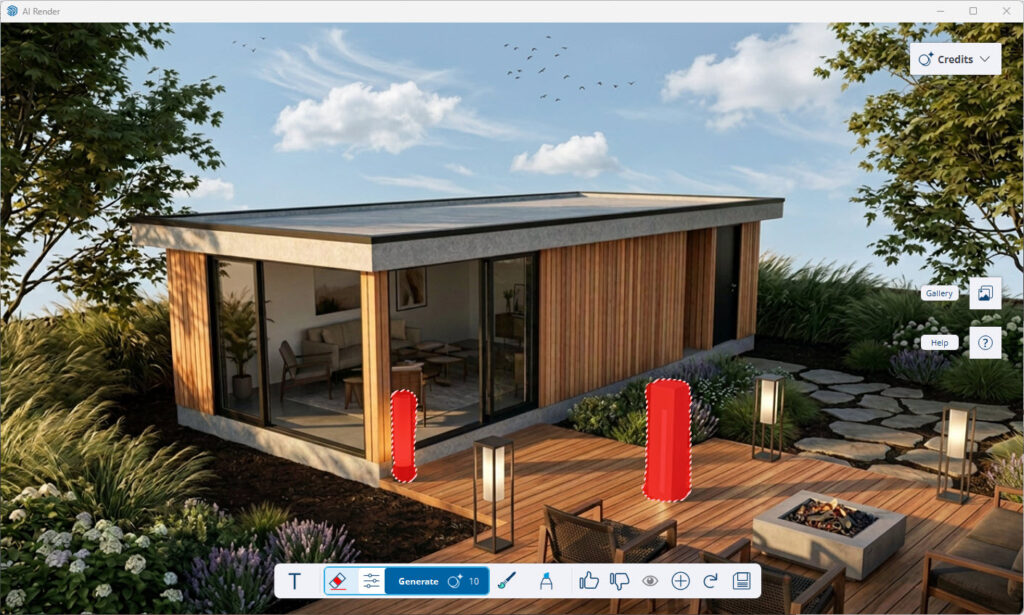
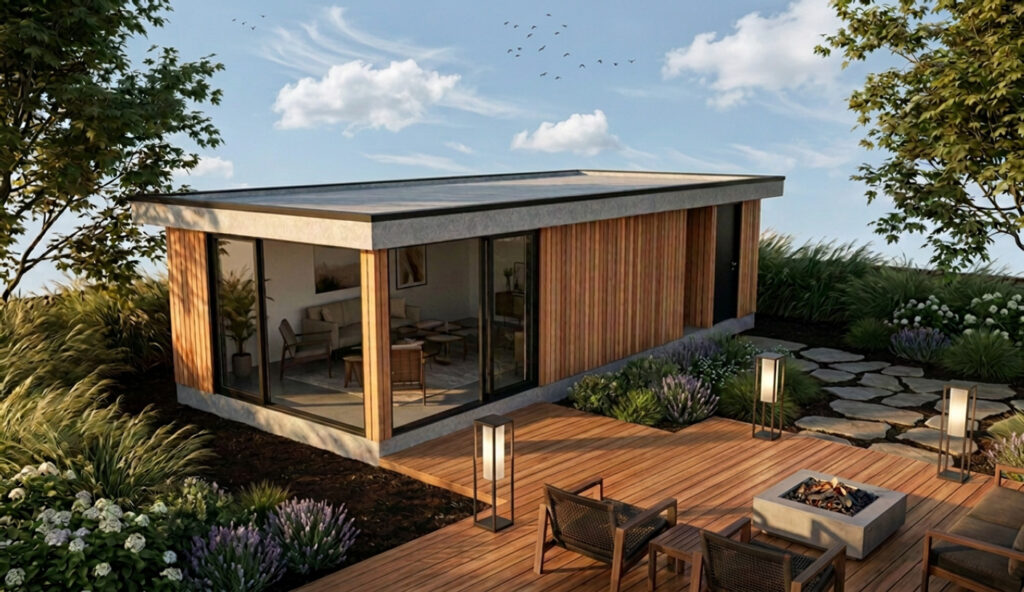
The clouds and birds are a great addition and enhance the atmosphere of the render. The garden lights, however, do not meet his expectations. Therefore, Soroush uses the ‘Delete‘ function in AI Render to remove the unwanted lamp, without changing the rest of the image

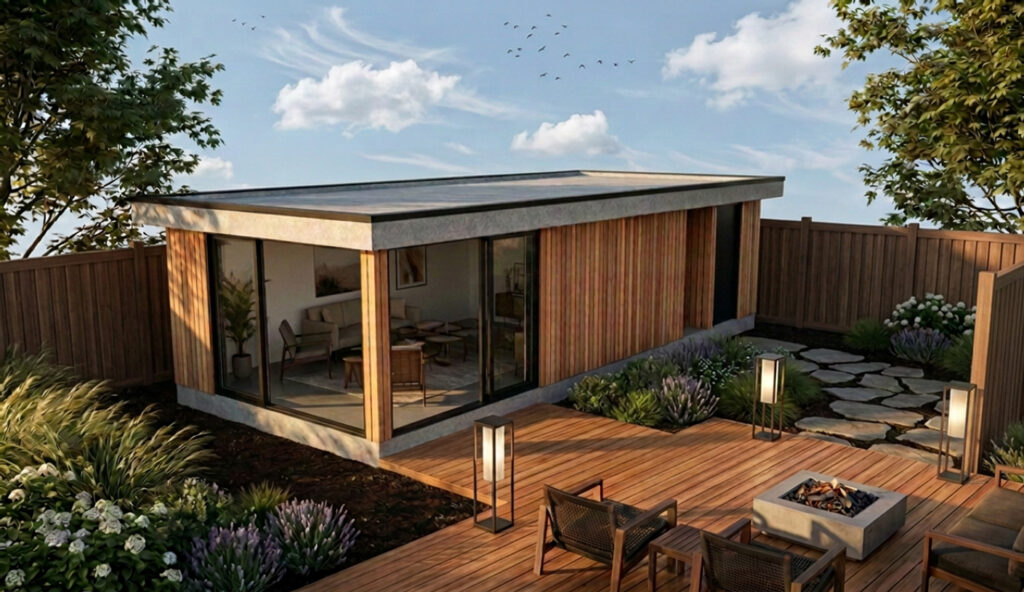
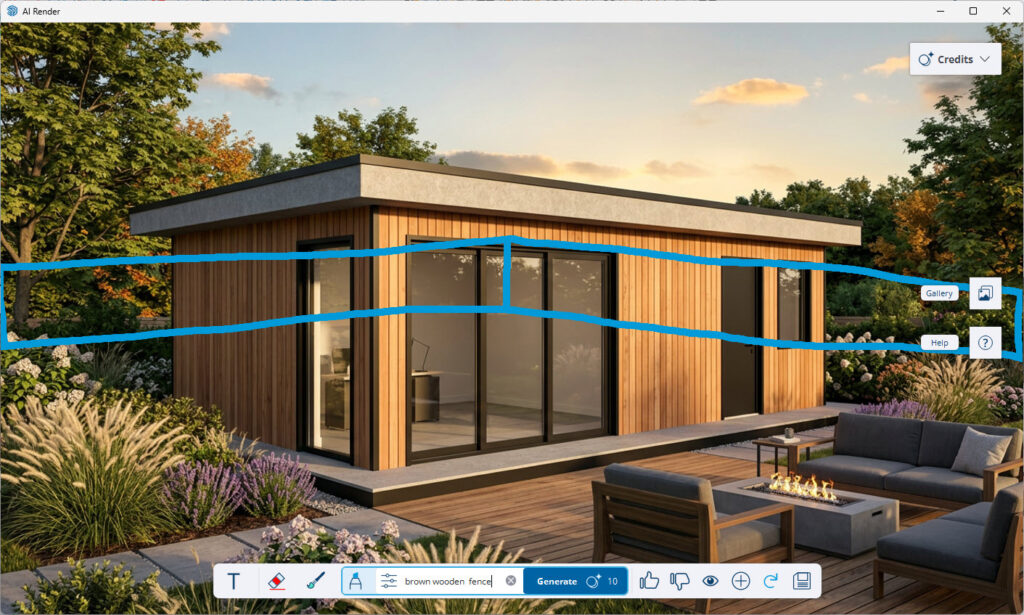
Soroush is happy with the result so far but wants to refine the visualization even further. To make it clear that the garden room is located in a private space, he wants to add a wooden fence behind the studio. For this, he again uses the function ‘Generate artifacts using a sketch and a prompt‘. With a simple sketch, he indicates where the fence should go, after which AI Render integrates it naturally into the existing environment.
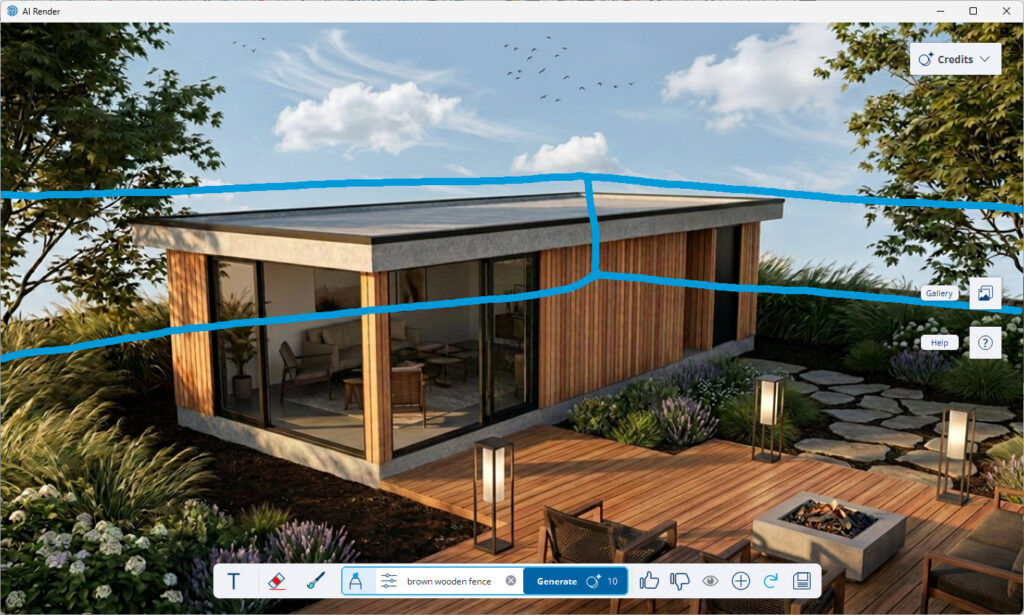
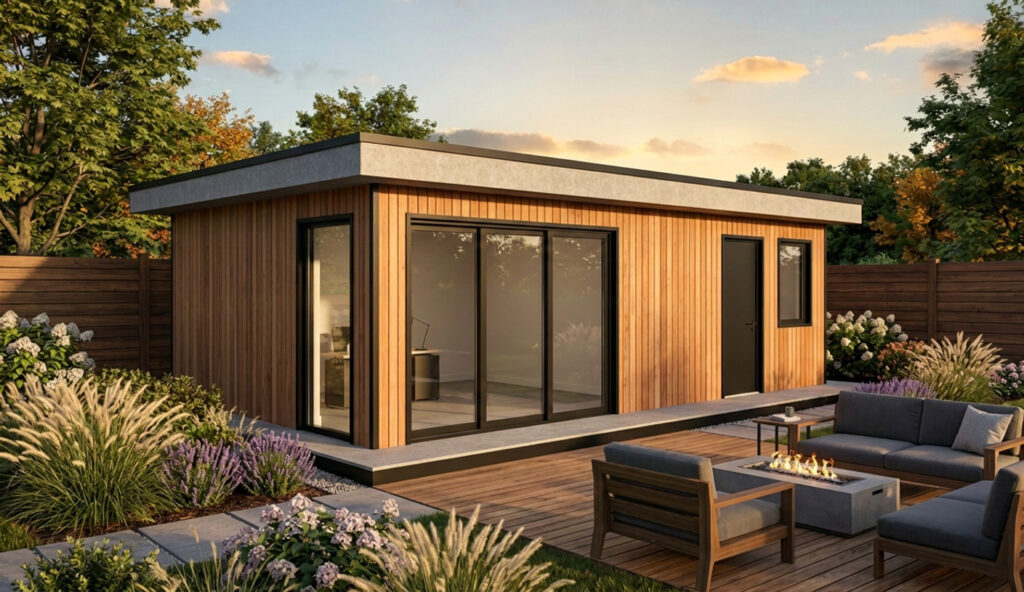
Below you can see the final render, in which all adjustments are combined into a compelling visualization of a modern garden room:
Continuing with the ‘Auto’ preset result
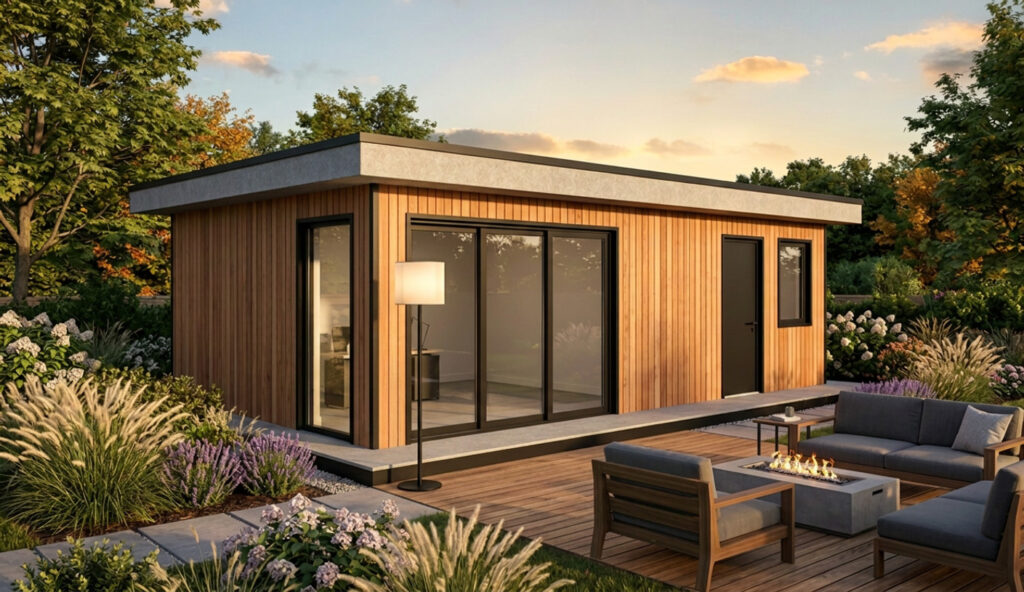
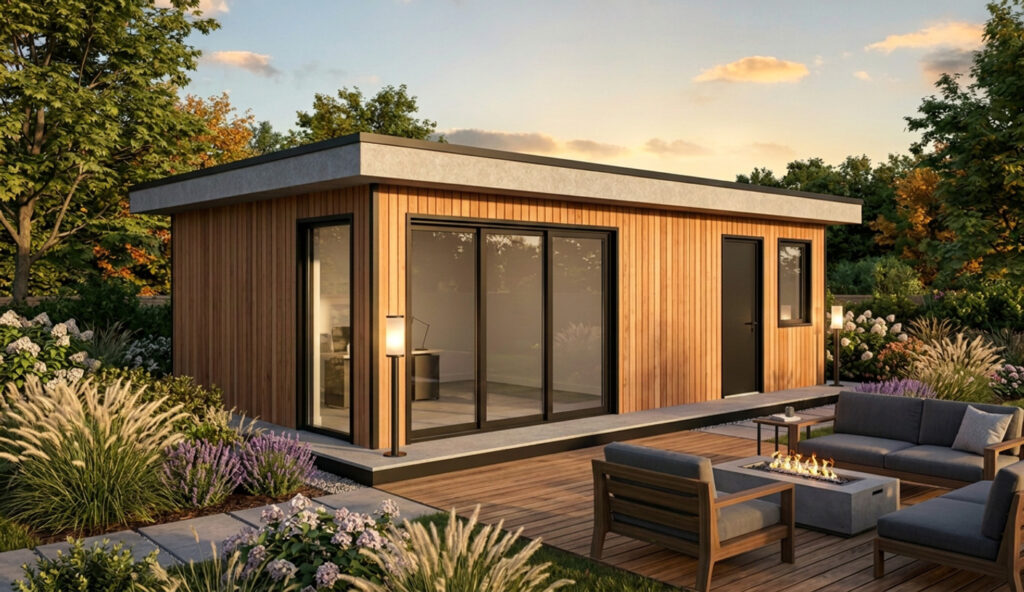
The first result is very successful, so moving on with the previous result from the ‘Auto’ preset. Soroush feels that the garden could use some additional lighting. Therefore, he again uses the “Generate artifacts using a sketch and a prompt“ feature. With a simple sketch, he indicates where the standing garden lights should be placed, after which AI Render naturally adds them to the render.
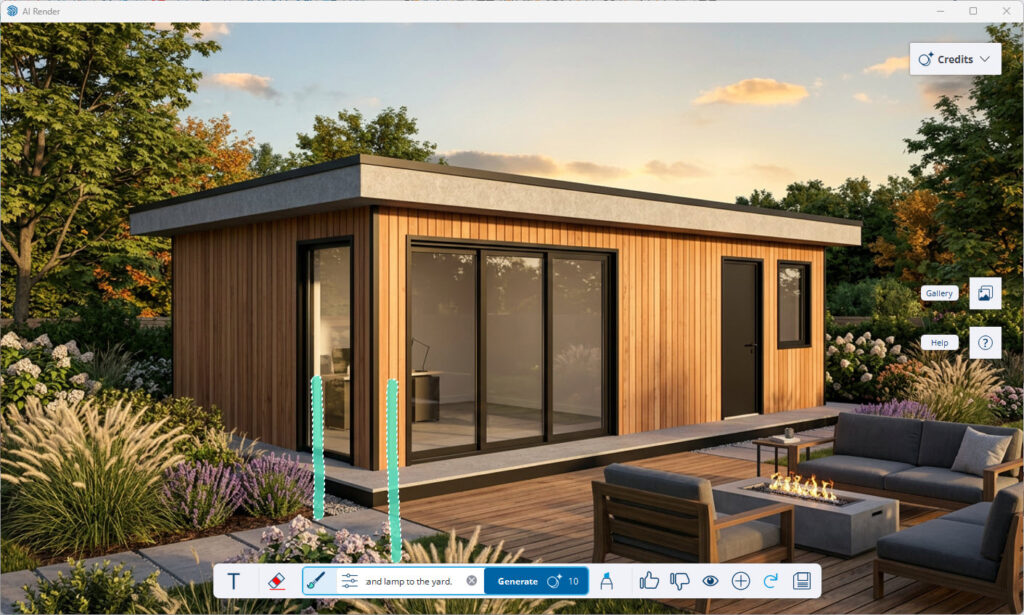
Soroush tries to add the standing garden lights three times, but unfortunately, none of the results meet his expectations. In all three attempts, the lights are not placed in the location he indicated with the sketch. Furthermore, in two out of the three attempts, AI Render generates only one lamp, even though the prompt and the sketch clearly indicate two standing garden lamps:
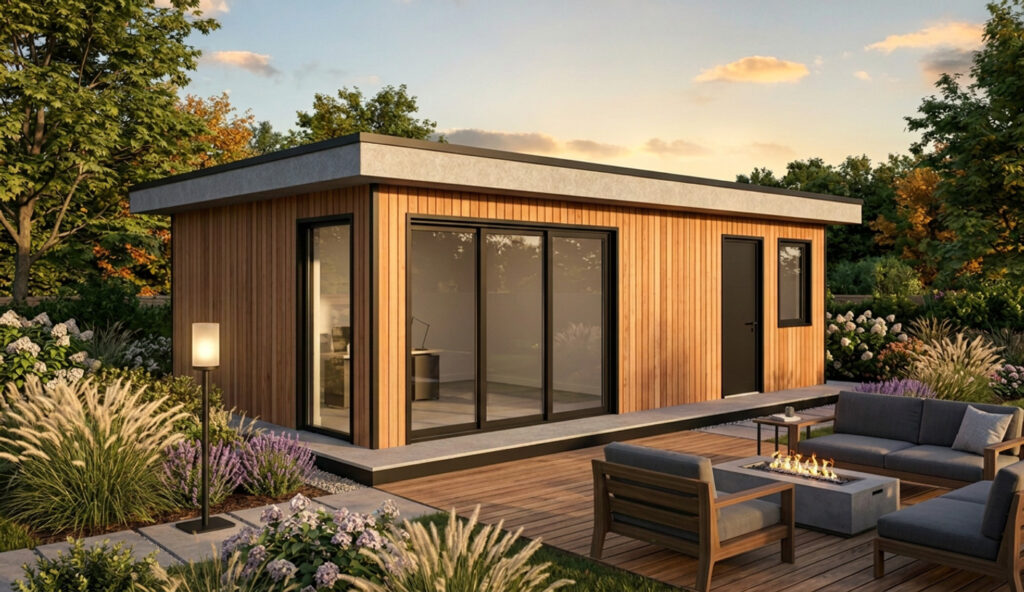
Ultimately, Soroush decides not to add the garden lights and to keep the first render. As a final adjustment, he uses “Generate artifacts using a sketch and a prompt“ to add a wooden fence behind the studio to better define the private space.
Below you can see the final result. This took Soroush about 15 minutes of his time.
| Advantages | Disadvantages |
|---|---|
| Integrated into SketchUp | Limited number of presets with simple prompt descriptions |
| Includes monthly AI credits with each subscription (Pro: 150, Studio: 200) | Unused credits do not roll over, and a $11.99/month subscription is required to purchase 1,500 additional credits |
| Material application: You can add the desired material to an object in the SketchUp model and ask the AI to enhance it | Limited control over generated materials and objects |
| Simple workflow | Image editing often requires multiple attempts due to limited control over materials, objects, and positioning |
| All renders are generated using the Nano Banana 2 AI model | |
| Add the generated image as a SketchUp scene |
Workflow 3 – VizMaker (Windows only)
Martha gets to work with VizMaker (coming soon via Design8). This is a standalone app connected to SketchUp via a small extension. With the push of a button, this extension essentially takes a SketchUp screenshot and sends it to the VizMaker application.
Installation and Startup
First, of course, install the program. This can be done simply via the Windows App Store. Once inside the program, we are presented with an empty workspace. Martha opens the 3D model in SketchUp, chooses a view she likes, and clicks the ‘First, of course, install the program. This can be done simply via the Windows App Store. Once inside the program, we are presented with an empty workspace. Martha opens the 3D model in SketchUp, chooses a view she likes, and clicks the ‘Export to VizMaker‘ button:’

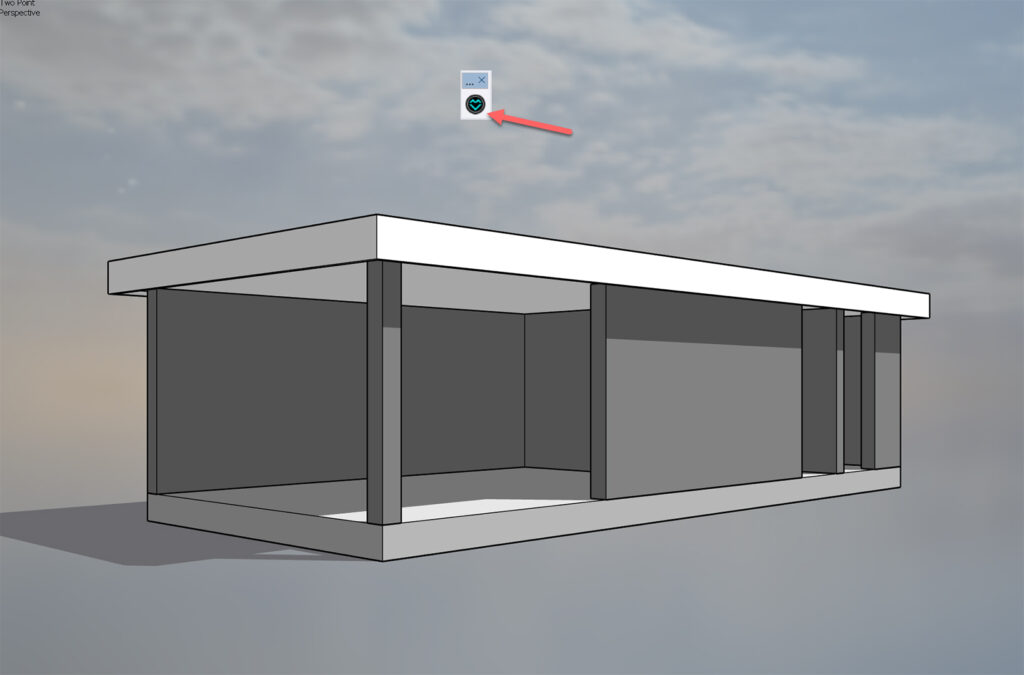
In VizMaker, the SketchUp image is now loaded as a tile in the otherwise empty workspace. Martha starts with an exploratory round by first using one of the prompt templates. She chooses the ‘View to render‘ preset to select an initial setup.
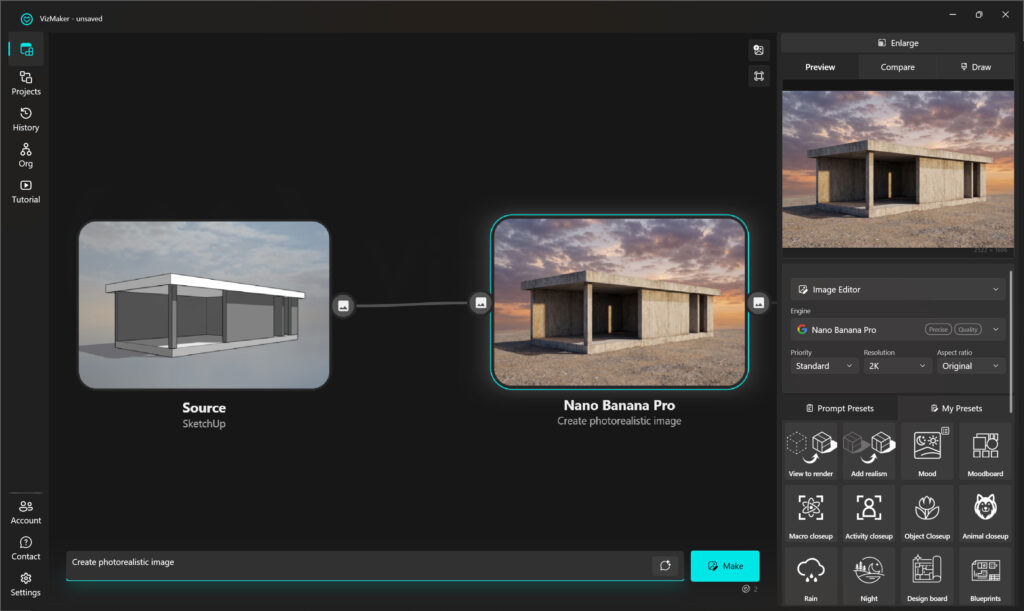

We then click the ‘Make‘ button to generate the image. Right below the button, we see a coin symbol and a 2. This lets us know that it costs 2 credits. How many credits an action costs varies by edit type, engine, and resolution.
The Start
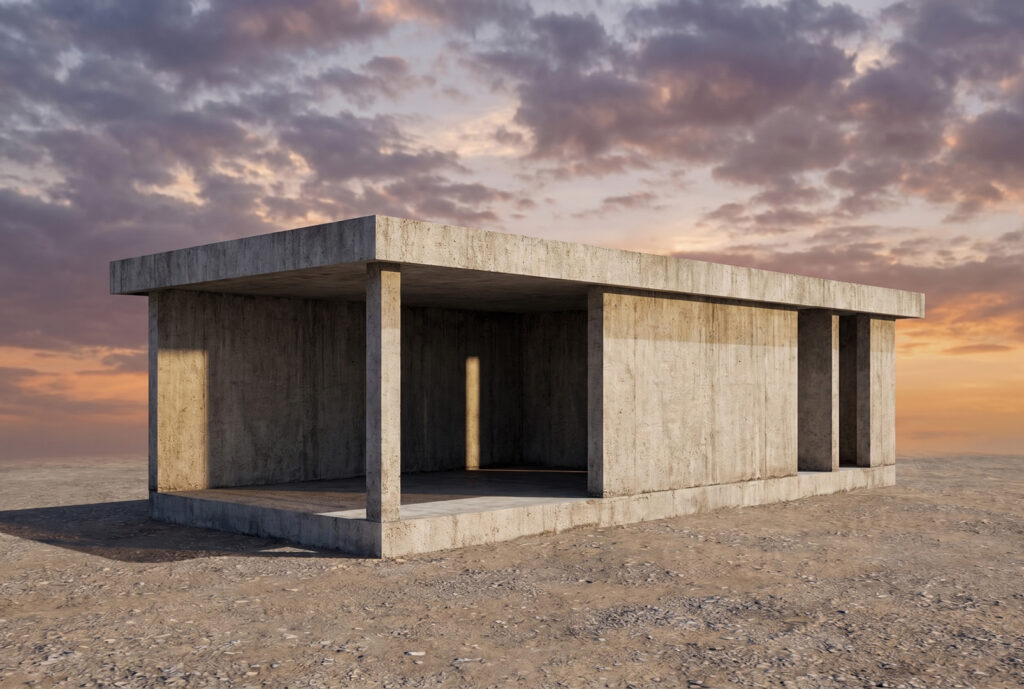
The first result isn’t a hit right away. Which makes sense, because neither the model nor the prompt is detailed. That needs to be improved.
First, let’s go for an improved prompt:
‘Create a photorealistic image of a garden house. The walls that are gray in the model are black vertical Danish cladding in the visualization, black fascia boards, the small openings on the right side of the house are for solid doors, the large openings on the left side are for glass sliding doors. In the background, we see a wooden fence and a few trees behind it. In the foreground, we see a swimming pool and a terrace.’
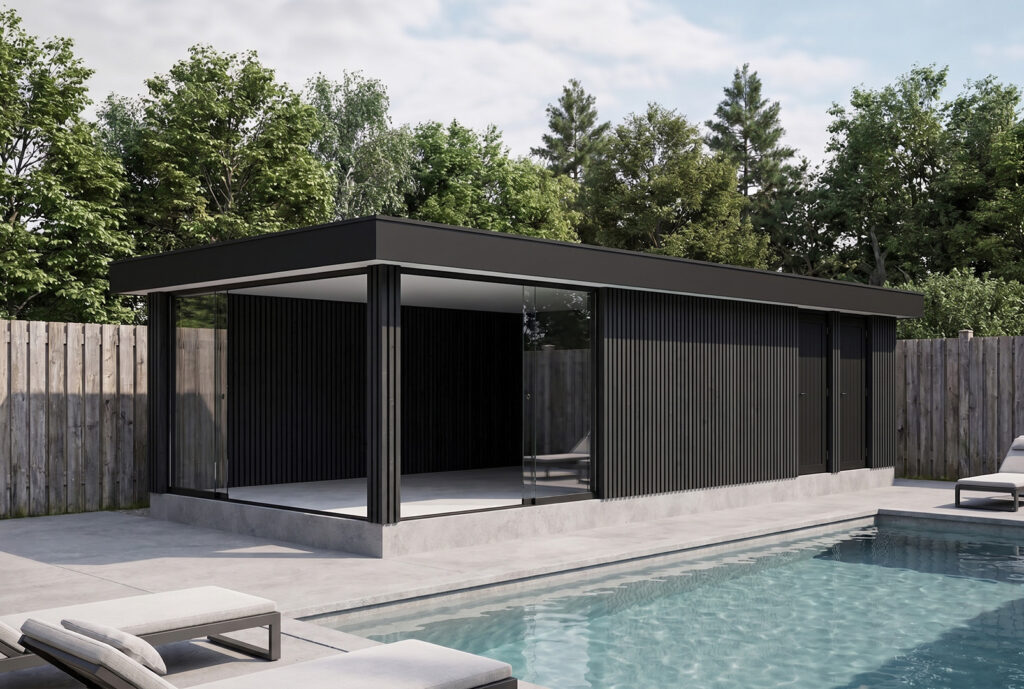
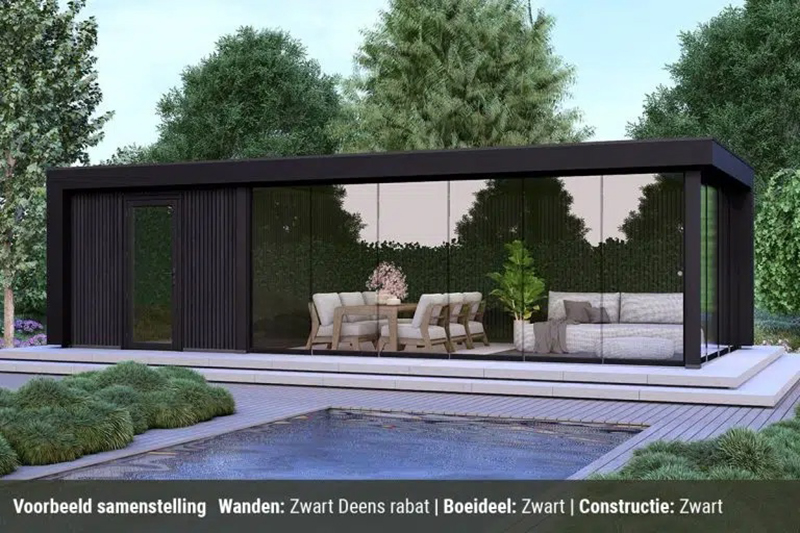
In reality, however, Martha wants the result to be much more specific. She finds an image on the internet from a supplier of these types of garden houses. She drags this image into the workspace as well. She then selects the SketchUp image again and drags the reference image onto the result tile. The prompt:
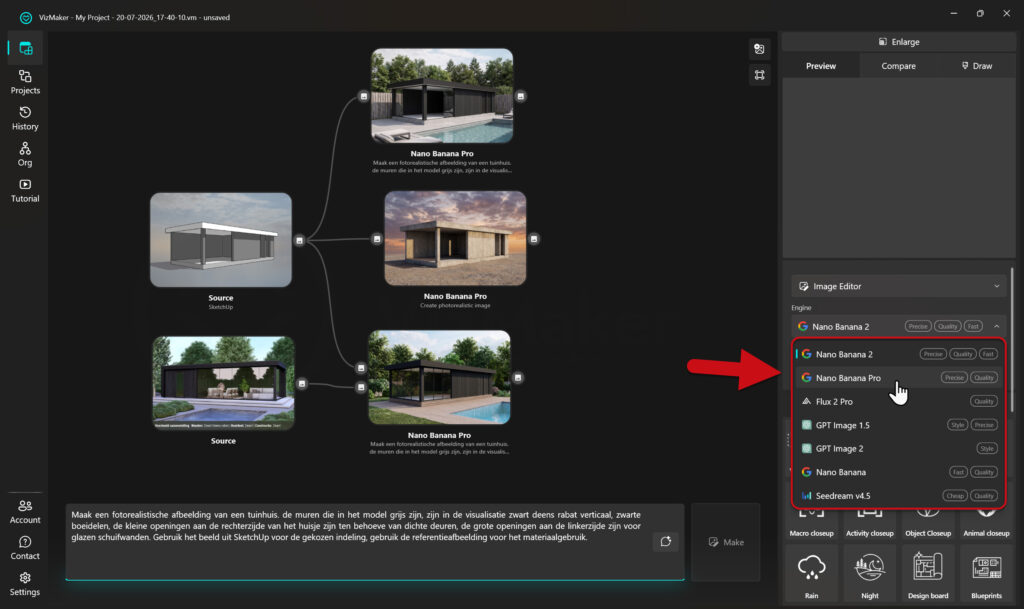
‘Create a photorealistic image of a garden house. The walls that are gray in the model are black vertical Danish cladding in the visualization, black fascia boards, the small openings on the right side of the house are for solid doors, the large openings on the left side are for glass sliding doors. Use the SketchUp image for the spatial layout. Use the second image as a reference for the use of materials.’
On the right side of the screen, you can choose which engine you want to use to generate your image. Today, Martha chooses Nano Banana Pro to keep the comparison with the other programs as equal as possible. Nano Banana is known for interpreting 3D spaces relatively well.
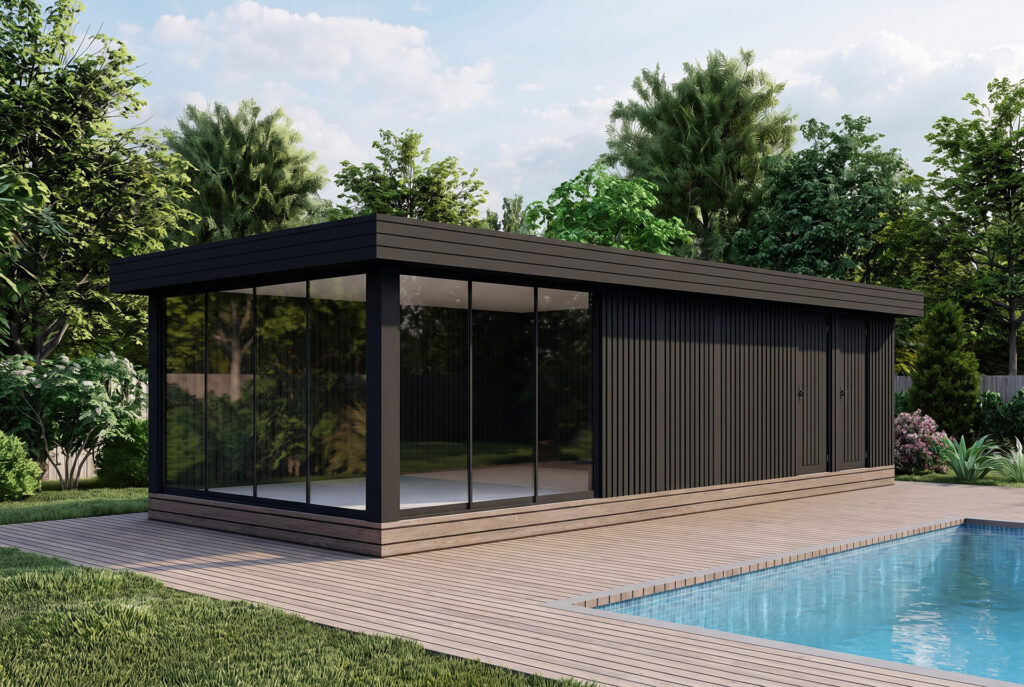
Editing
That result is great, but the plinth under the building is too high. The roof trim needs to be smoothed out and given an aluminum trim at the top, and the grass on the bottom left should actually just consist of decking boards.
Martha is going to take a closer look at that. With the ‘Enlarge‘ button, she can display the generated image in the main part of the screen. The flowchart with the tiles then briefly moves to the small window in the top right.
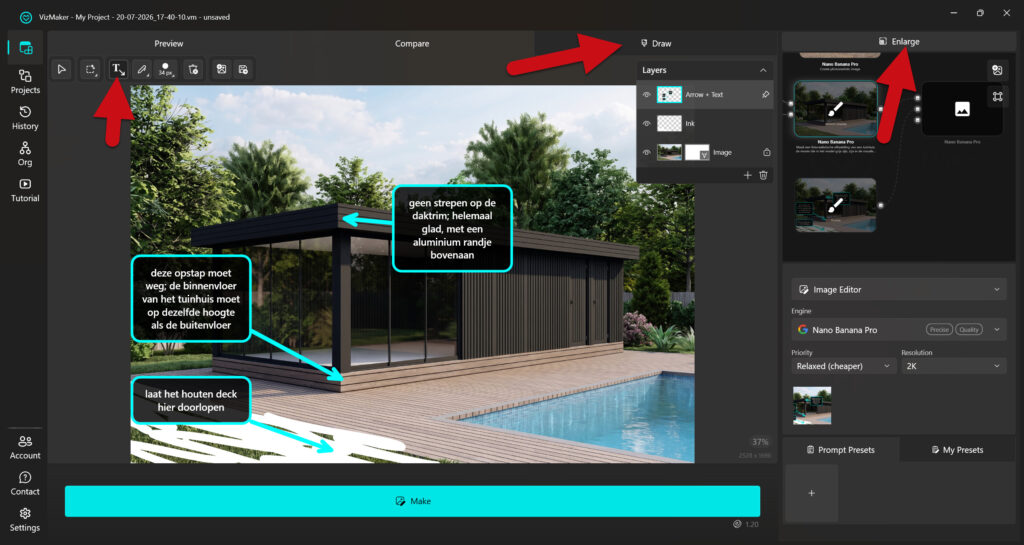
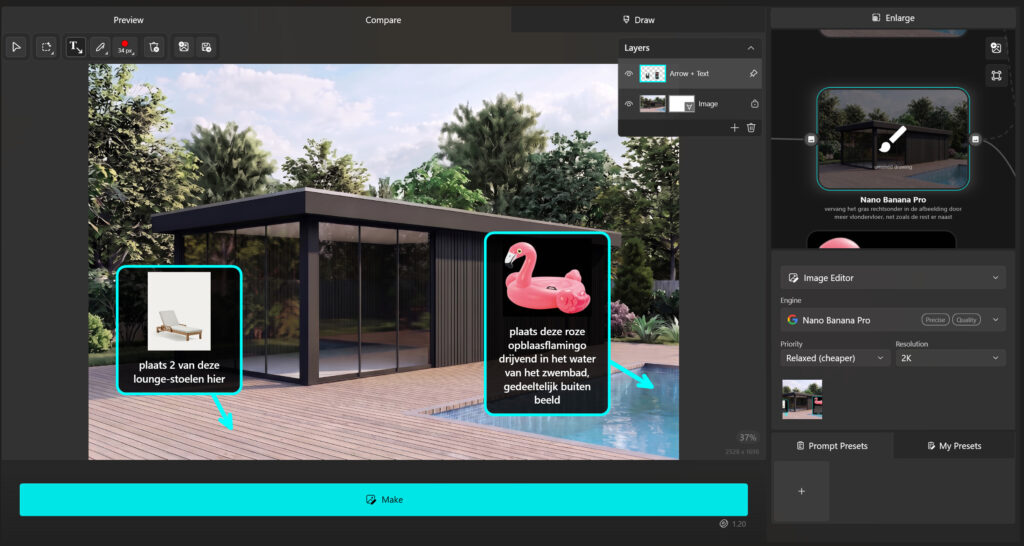
With the drawing tools, Martha marks the areas she wants to change. VizMaker allows you to type the prompt directly onto the image at the specific location where it applies. This works better at some times than others; you can also choose to mark something on the image with a red arrow or a small cross to indicate where a change should be made. Afterward, you can type a prompt yourself and reference the drawn markings.
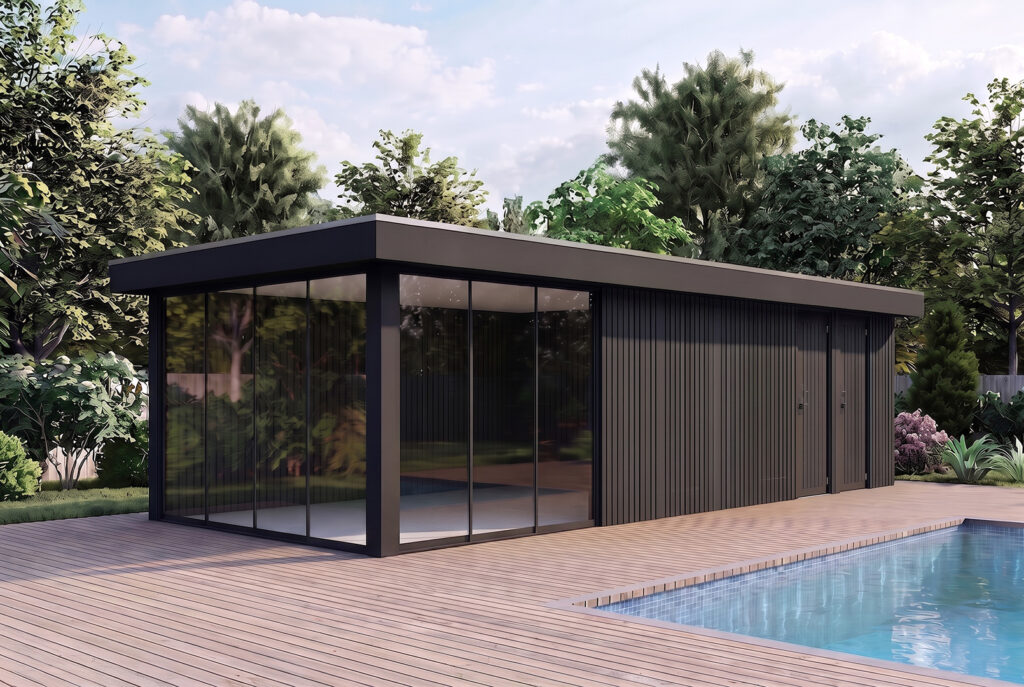
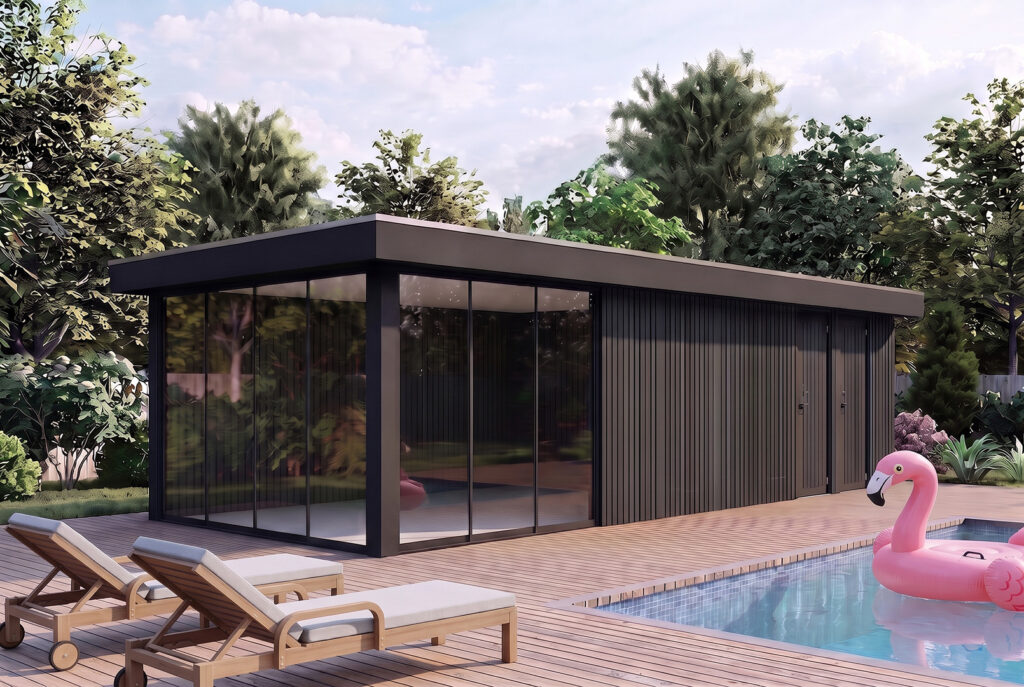
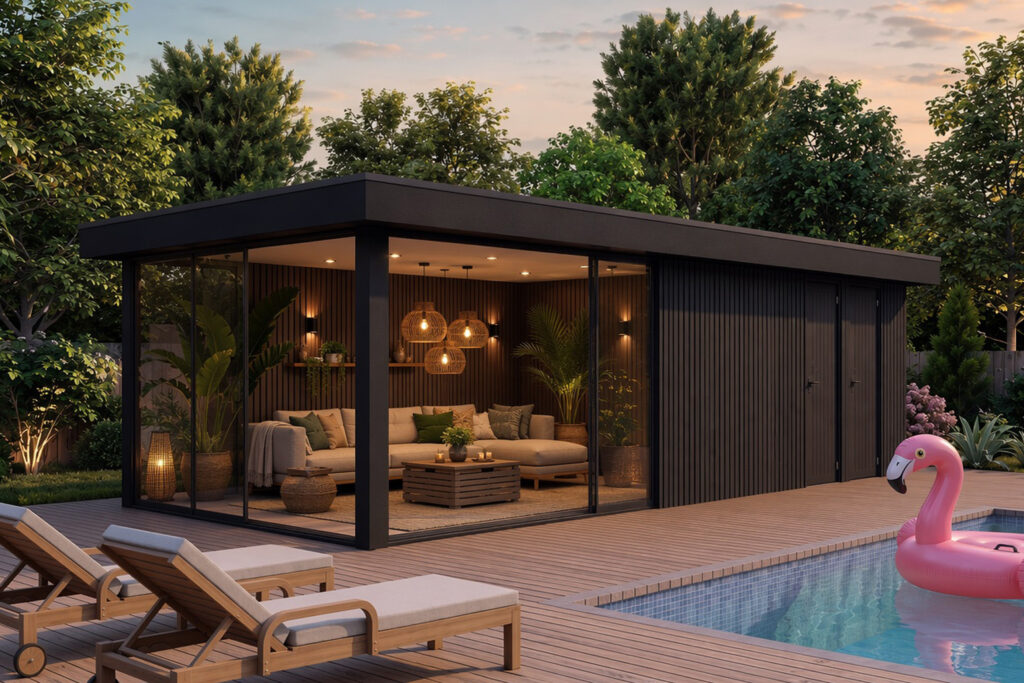
Okay, the foundation is set. Now to add just a few objects: an inflatable flamingo and some garden chairs. Martha chooses to do this as a flowchart, using the prompt:
‘Add the flamingo as a floating object in the pool at the bottom right, making sure it falls partially outside the frame. Add the lounge chair twice in the bottom left corner of the image.‘
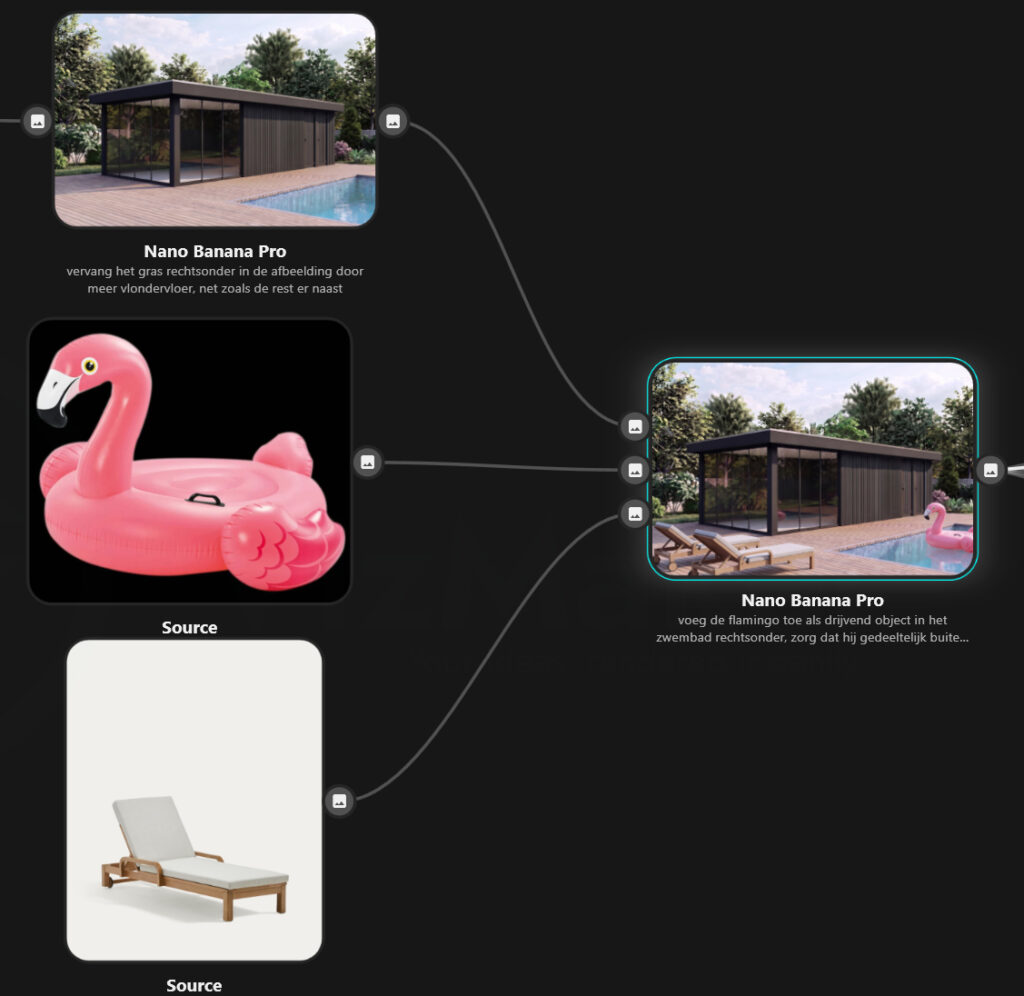
An alternative workflow can be using annotations including an image:
The result is comparable in both cases:
Comparing the Different Engines
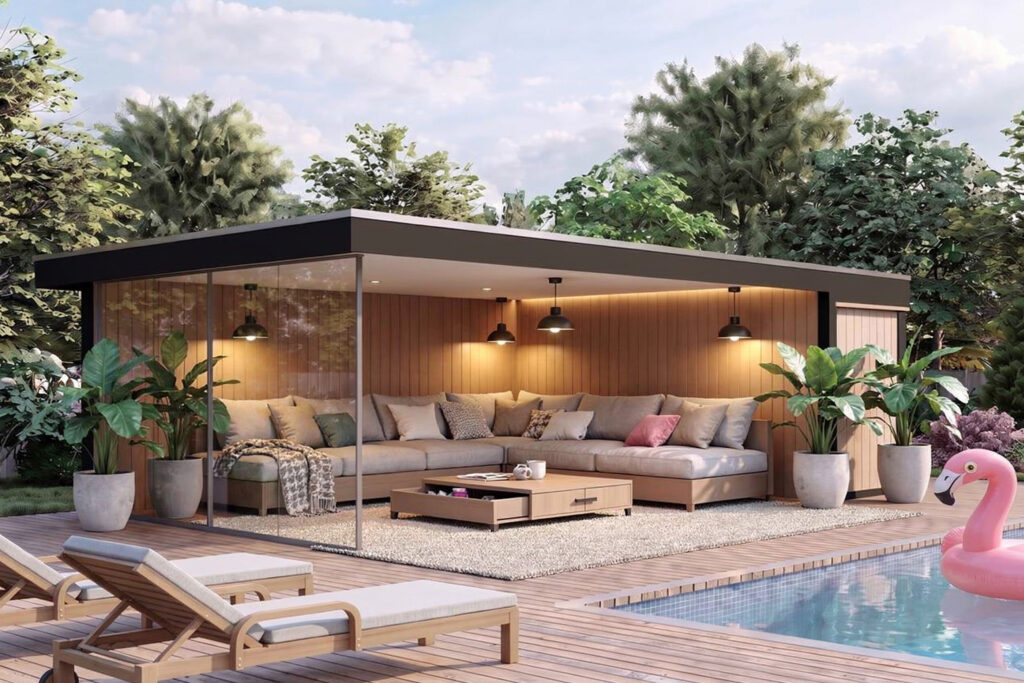
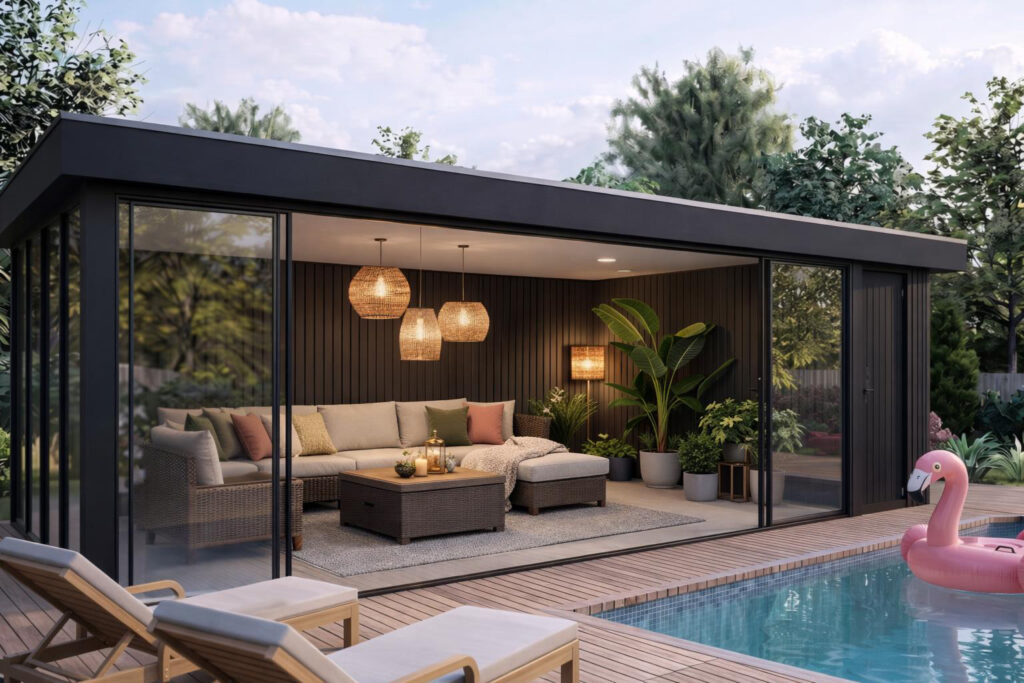
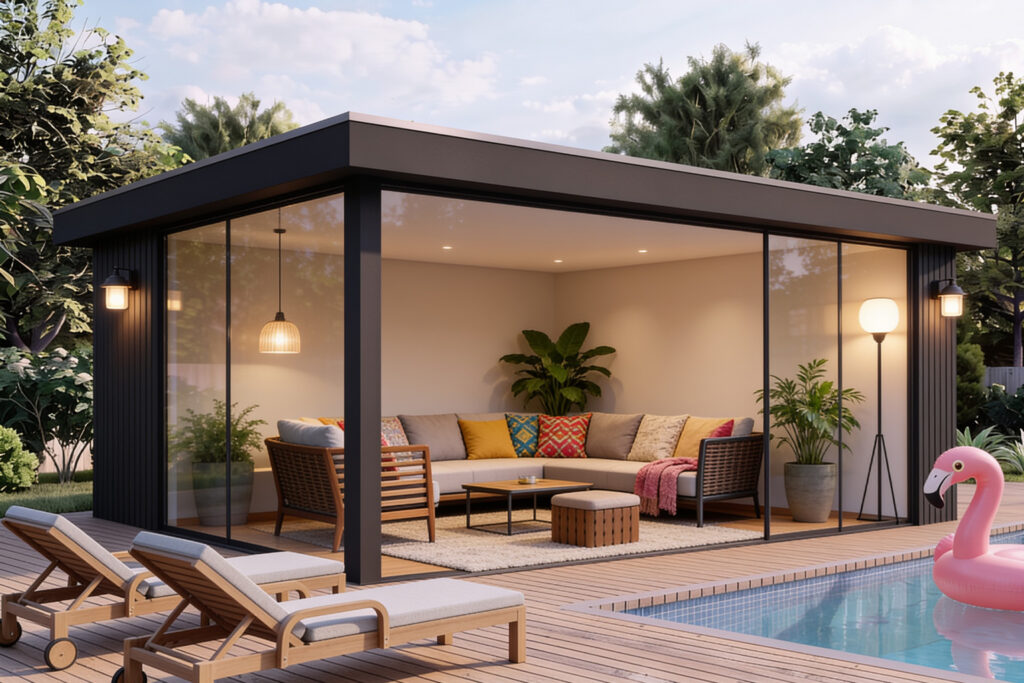
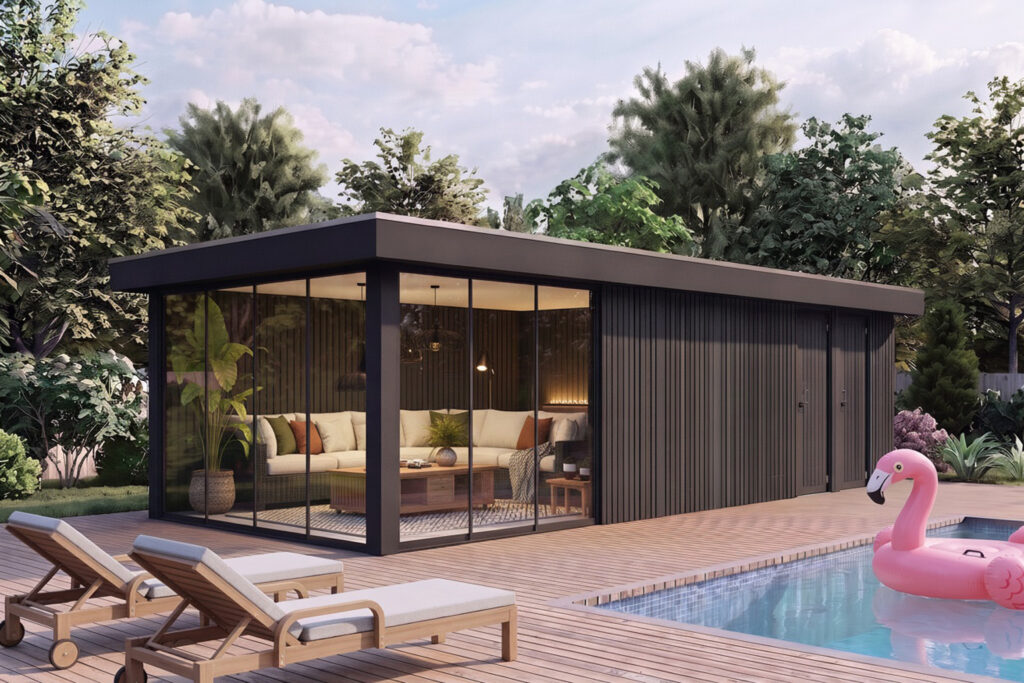
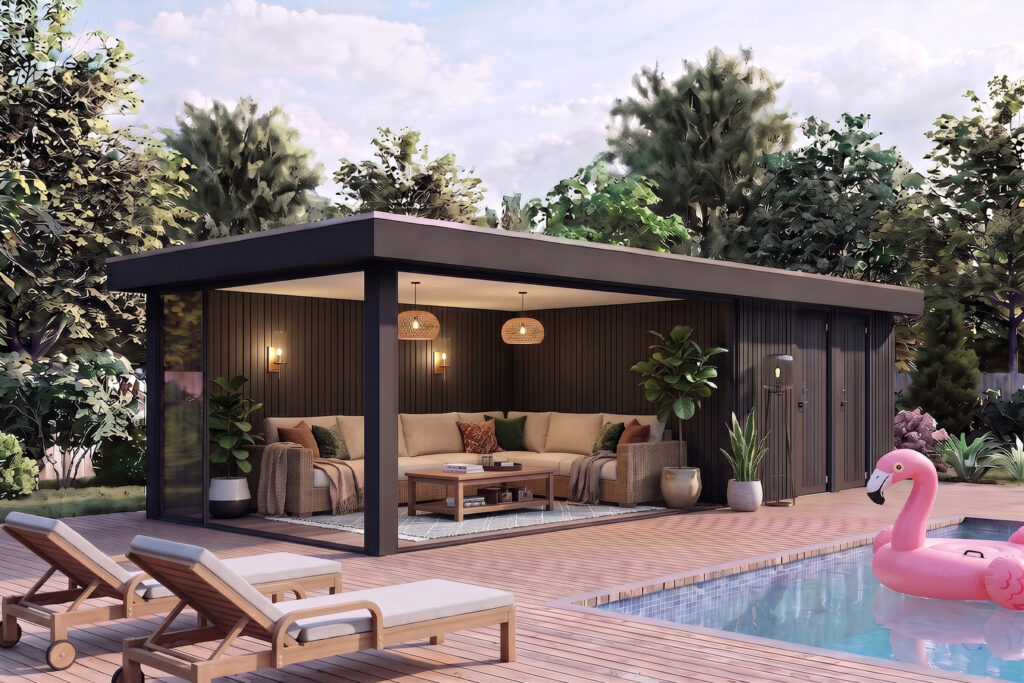
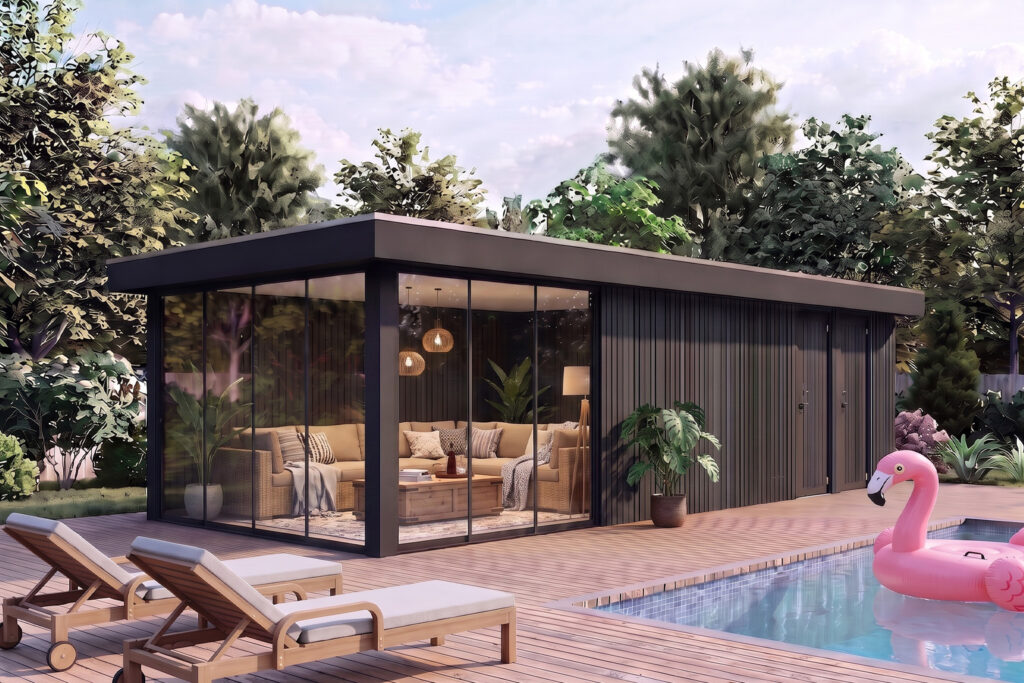
Unlike most AI solutions, VizMaker does not rely on a single dedicated AI engine; instead, it offers the choice to apply different engines depending on the situation. Martha is going to run a test to see which engine delivers the best result when adding an interior to the garden room.
We get to work with the following prompt: ‘Maintain the current perspective and place a seating area inside the garden house. Take the following recommendations into account: Furniture and Comfort: Lounge sofa or set: Choose a deep corner sofa or relaxed armchairs that fit the size of the space. Material: Go for stylish wood, wicker, or aluminum with thick, soft cushions. Multifunctional: Place a nice coffee table or ottoman that doubles as storage or an extra seat. Atmosphere and Decor: Rug: Lay down an outdoor rug or a fine low-pile rug for warm feet and a cohesive look. Cushions and throws: Use decorative cushions in nice colors and soft blankets for chilly evenings. Indoor greenery: Place large houseplants or green planters to strengthen the connection with the garden. Lighting and Warmth: Lighting: Hang atmospheric pendant lights or choose dimmable wall lamps and standing outdoor lamps.’
Next, Martha chooses to submit this prompt to every engine available within VizMaker.
We get the following results:
Creating a 3D Object
Martha is satisfied with the result. However, she wants to take an extra bonus step; in the visualization, we added a photo of an inflatable flamingo and a garden chair. She actually wants to incorporate these objects into the 3D model as well. To do this, Martha uses the “3D model creator” mode. Here, she can still choose between Trippy AI and Meshy AI. She goes for the latter, adjusts a few settings regarding polygon count and symmetry, and then clicks the ‘Make‘ button. This costs slightly more credits than the images: 8 credits per operation.
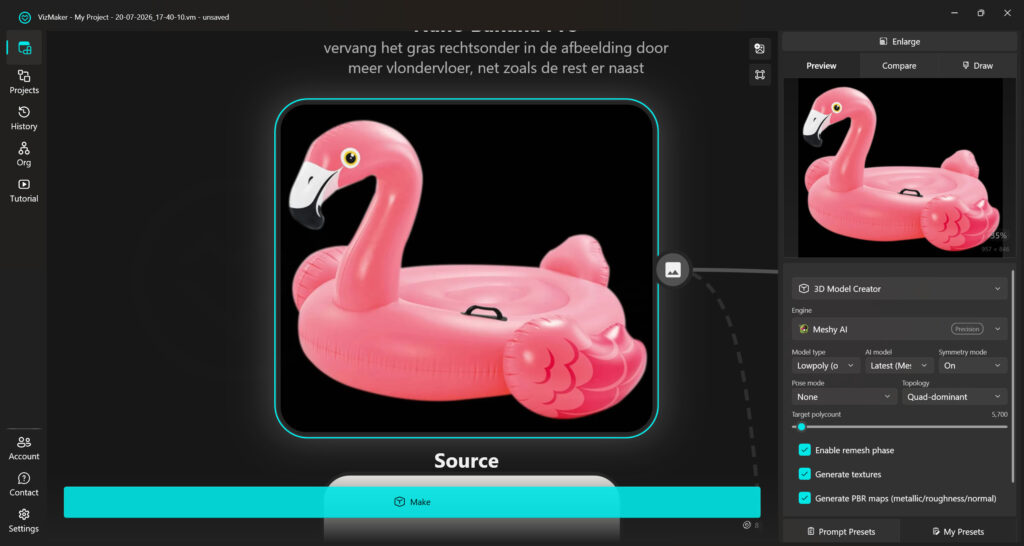
Next, she uses this standalone image to let VizMaker generate a 3D model. She presses the “Make” button and downloads the model after a few seconds. The model can be saved as a GLB or OBJ file. These files can be imported into SketchUp; use GLB to utilize SketchUp’s native importer. After importing, you will need to clean up the model by exploding it and optionally using ‘Smooth/Soften Edges‘. If you use an import and optimization extension such as Skimp, you can choose whichever file format you prefer. During import, it is automatically cleaned up and, if necessary, the polygon count is reduced.
A Video as the Icing on the Cake
When creating video in VizMaker, you can also choose from different engines. Martha creates a video using Gemini Omni.
The prompt:
‘Static camera angle. A magical wooden chest sits in the center of the room. The chest opens with a soft golden glow and floating magical particles. Furniture and light fixtures playfully pop out from inside the chest, quickly scaling up and smoothly settling into their exact positions in the room. Whimsical motion effect, realistic lighting, seamless morph transition.‘
| Advantages | Disadvantages |
|---|---|
| Visual interface | Only works on Windows |
| Versatile capabilities: 2D, 3D, and Video | Learning curve: It takes time to master the pros and cons of the different engines |
| Wide variety of choices due to multiple engines | Requires credits |
| Transparent costs: The credit cost is displayed directly next to the ‘Make’ button | Large variation in costs, depending on the chosen engine, size, quality, etc. |
| Better integration with 3D software than, for example, Gemini, because an extension within the 3D application creates a bridge | Integration feels more detached than programs like Veras or SketchUp AI Render, because it is a standalone app |
| Annotation tools: You can sketch on an image and even type prompts directly onto an image like a speech bubble | |
| Many presets available |
Workflow 4 – Chaos Veras
Edwin gets to work with Chaos Veras. Veras comes bundled with a render engine such as Enscape or V-Ray. It is also possible to use Veras as a standalone app within your CAD package or directly in the browser. The application uses generative AI to transform 3D models, sketches, and 2D images into photorealistic renders and animations.
Getting Started with Chaos Veras
For the garden room, Edwin prefers launching Veras from within Enscape. He downloads and installs Enscape via my.chaos.com.
Edwin already works with Enscape, but sometimes isn’t fully satisfied with the final result. Veras goes that extra mile for him and completes the look.
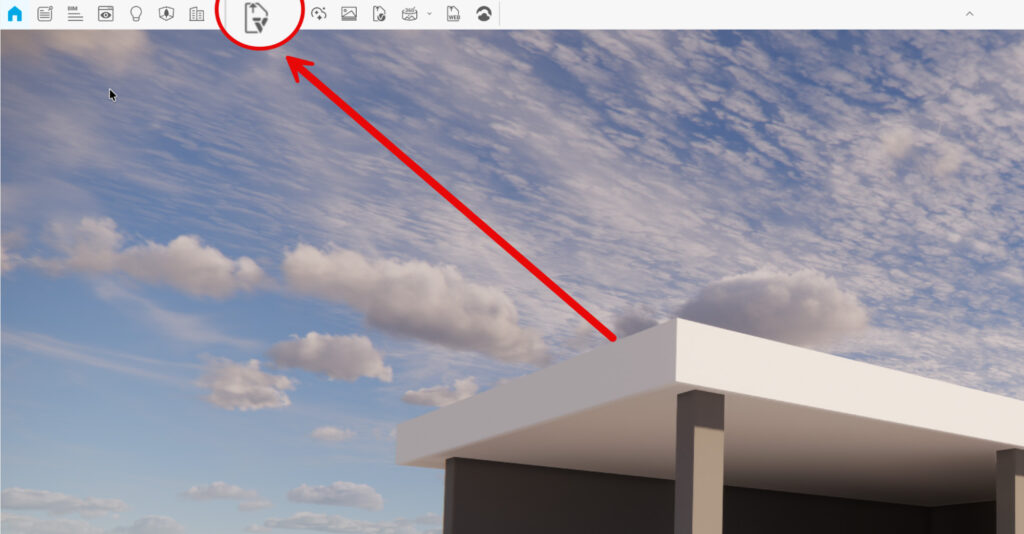
Edwin opens the 3D model in SketchUp. Next, he opens Enscape and then Veras by clicking the Veras button inside Enscape:
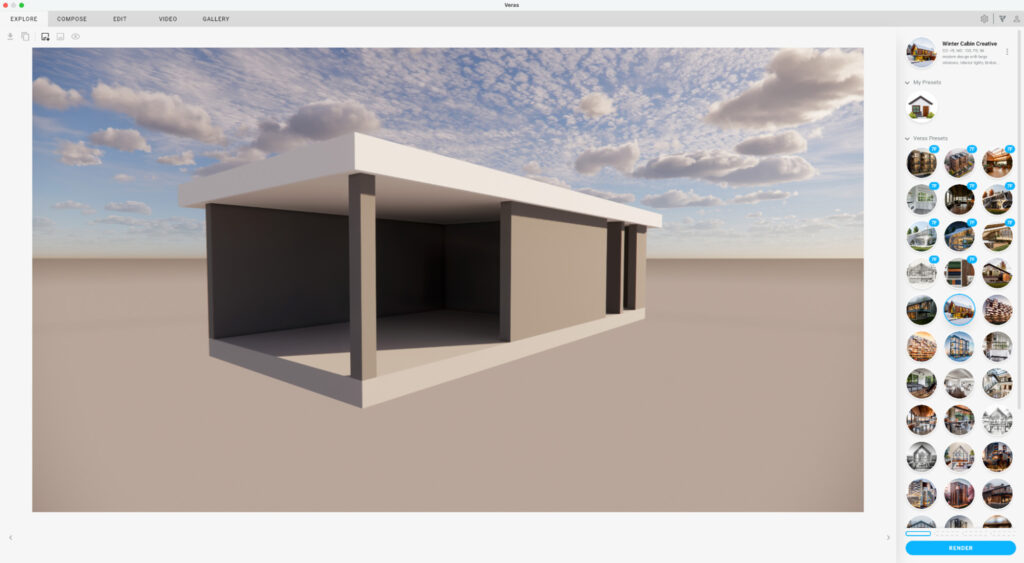
As soon as Veras opens, the image of the garden room appears on the screen, with a selection of presets on the right side. Because Edwin is still unsure about the final style of the garden room, he decides to experiment first with the various standard presets offered by Veras. The required prompt is already prefilled for this.
Different presets
Edwin tried out several presets and created three different renders.



And wow! What amazing results are coming out of this already!
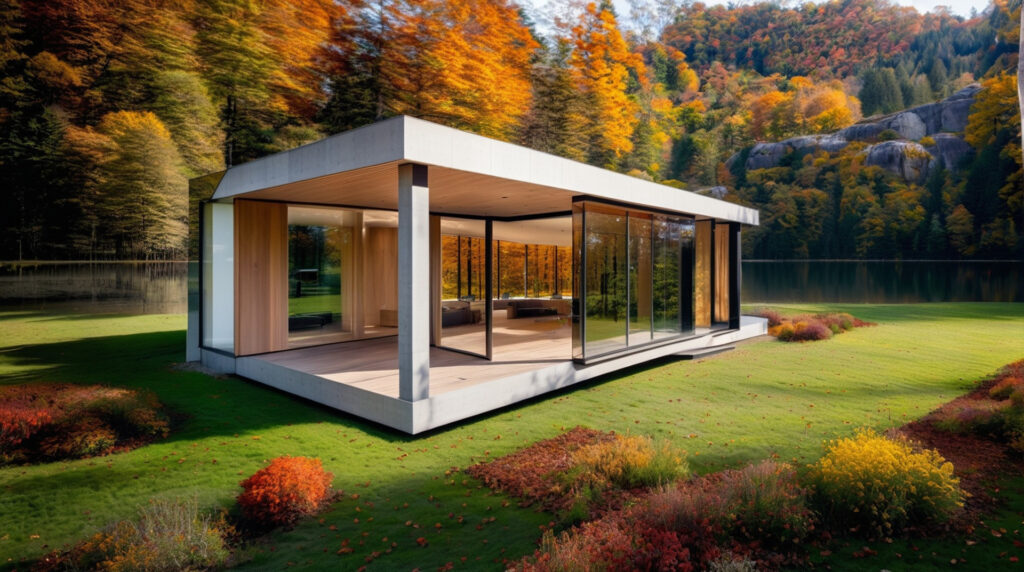
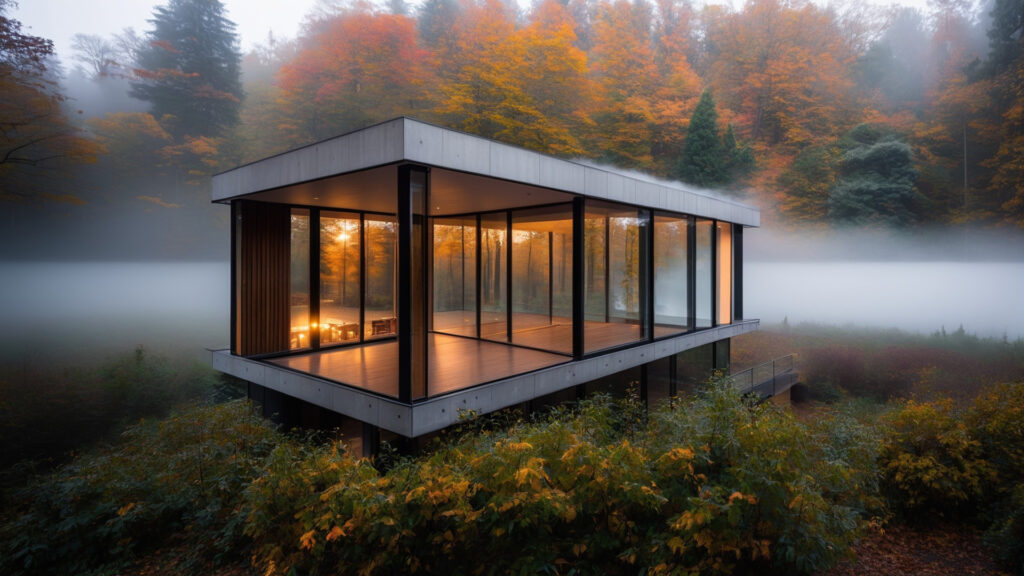
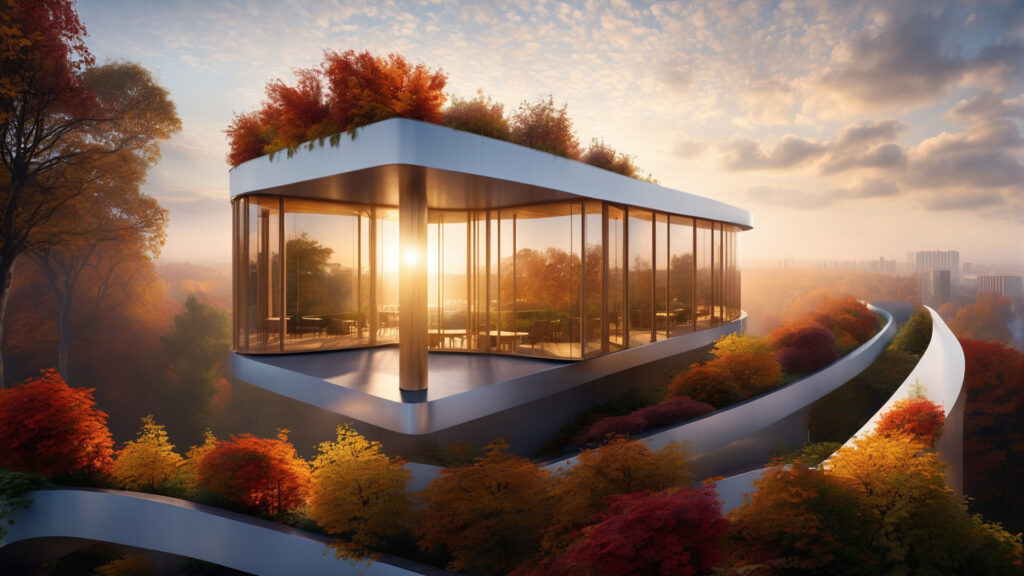
Still, Edwin isn’t satisfied. After all, he wants a garden room, not a futuristic piece of art. The standard presets give a very different impression than the goal he has in mind. So he pulls up a reference image to adjust his prompt as needed. In the Compose tab, he drags multiple images in as reference images and enters a prompt.
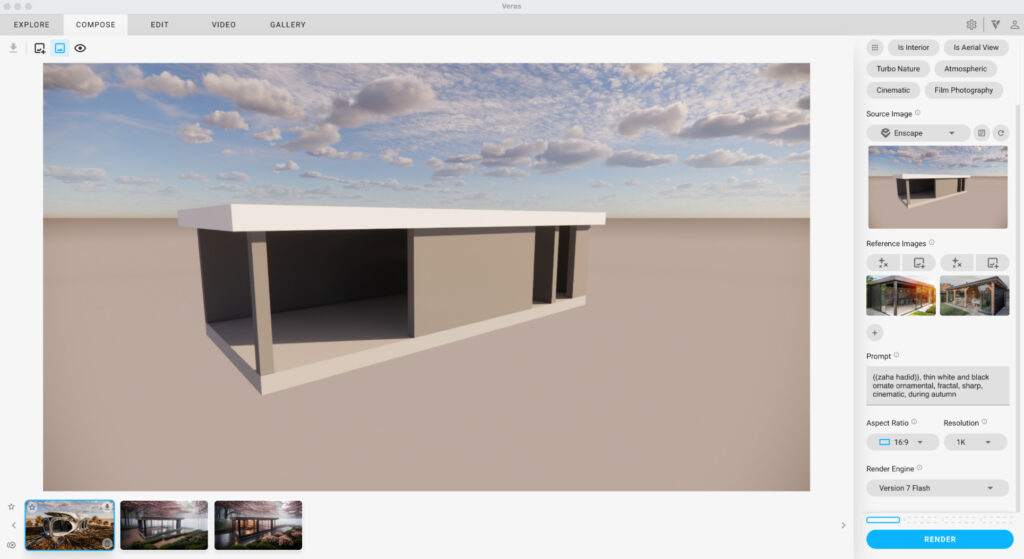
The prompt reads:
‘Make two different garden rooms. Use the first image for the roof and the second image for the materials. Second render vice versa.’
This is to test whether the result aligns with his expectations. Then, he presses the Render button.
On the right side of the screen, you can choose which engine you want to use to generate your image. Edwin always chooses Render version 7 Flash to get the best result. It costs him credits, but he feels it is definitely worth it because it offers a very realistic result. By default, Veras renders with Nano Banana Pro. Let’s see how it turned out.
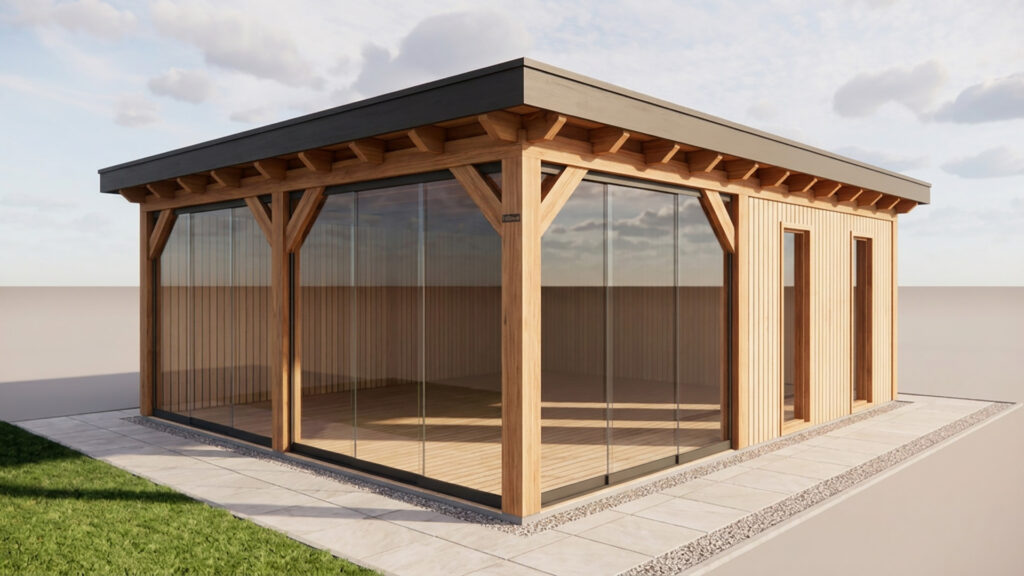
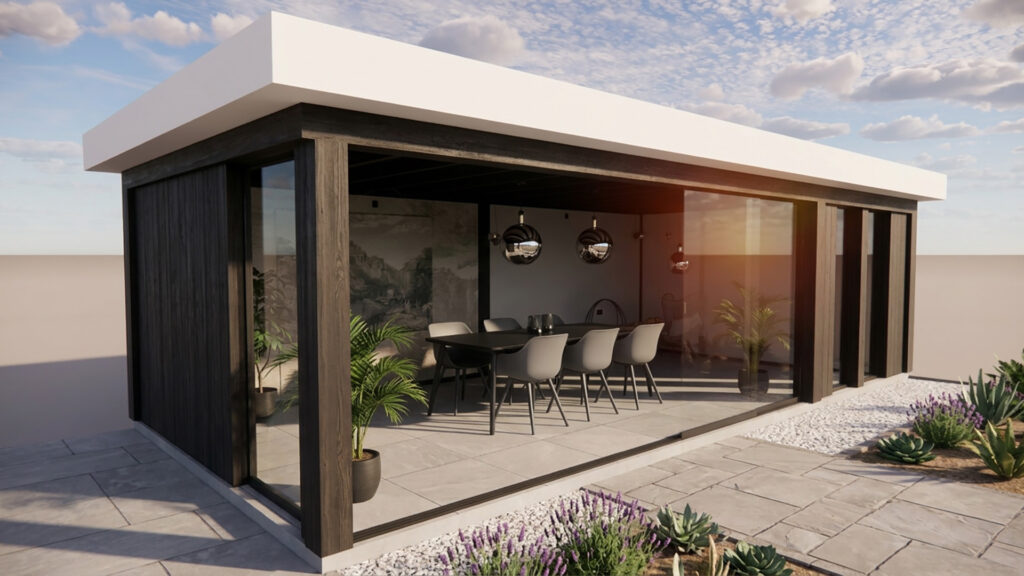
Still, he finds the renders a bit sparse. The first render mainly lacks interior detailing. With the second render, Edwin is getting more enthusiastic.
Editing by material, surface, or object
dwin finds the roof trim still too white. Fortunately, in Veras you can easily select the material, surface, or object to modify only that specific part. It is exactly the control he is looking for. Edwin chooses “Select by material“.
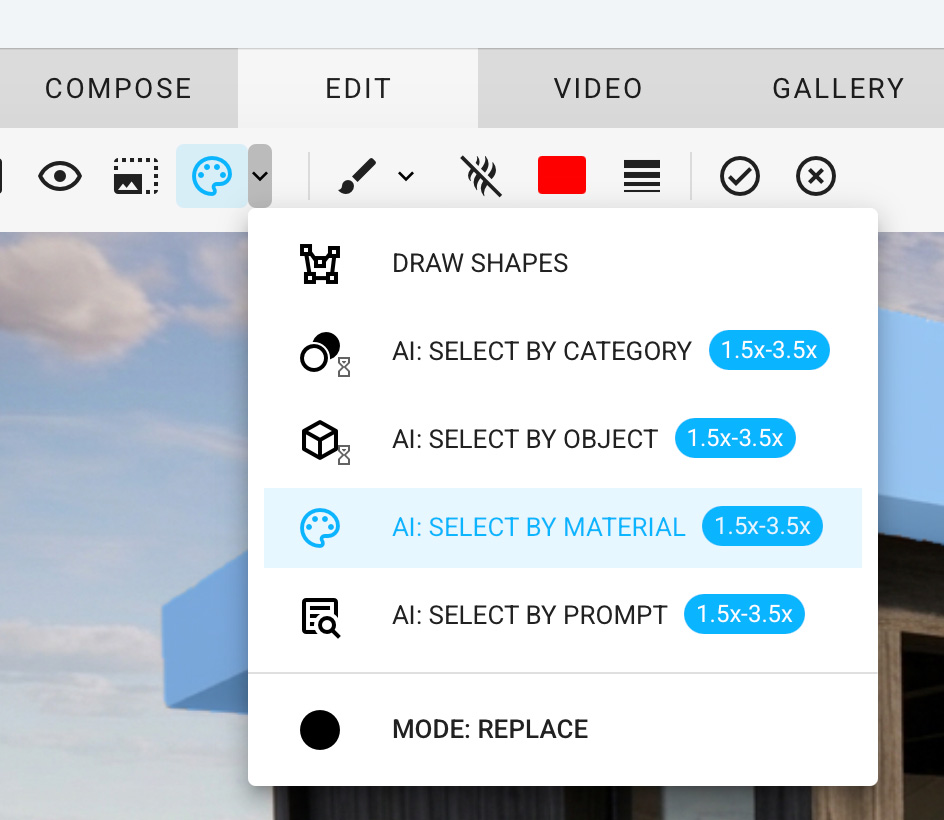
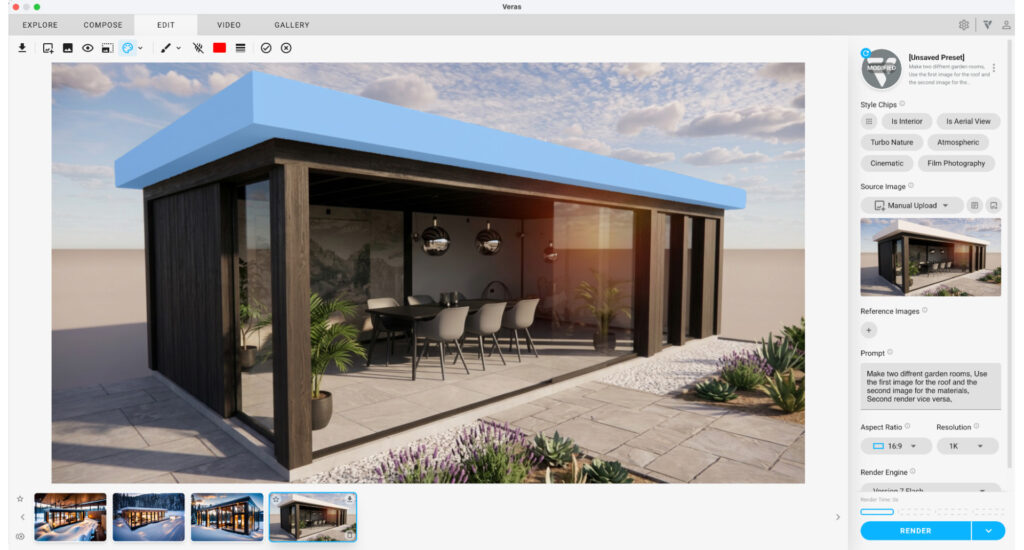
Edwin enters a prompt for the roof trim and immediately adds some trees in the background as well:
‘Make the selected roof trim the same material as the columns, but seamless. Add some trees in the background. I like green.’
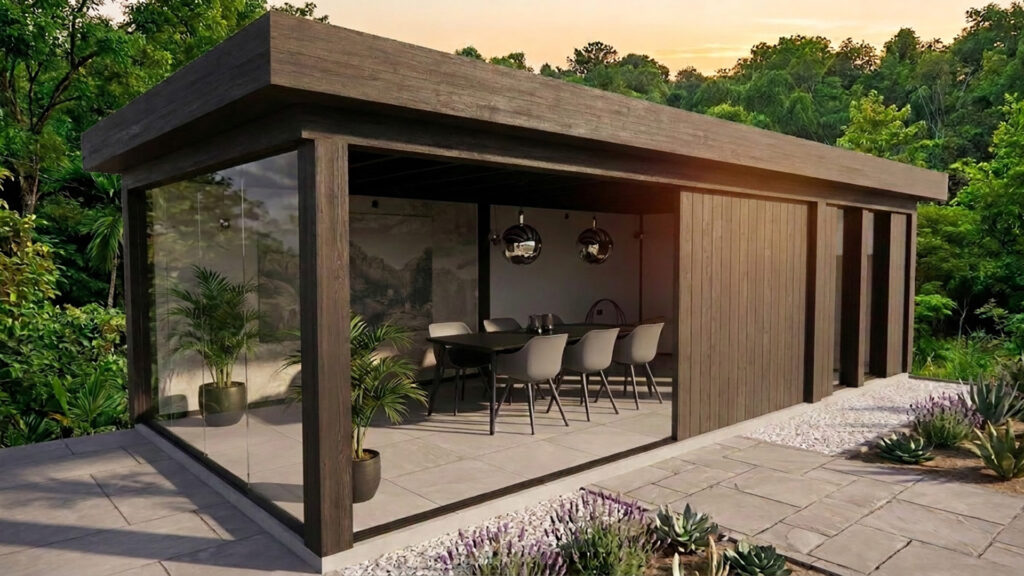
Edwin discovers: with a few simple presets you can quickly achieve results. If the result isn’t quite what you are looking for, you can use reference images.
It took Edwin 15 minutes to reach a desirable result. Nice and fast! If you truly want to fine-tune everything, it will naturally take longer.
The advantage of Veras is that you can quickly make selections. This allows you to make targeted, fast changes that bring the final result directly to your liking.
Video as an extra eye-catcher
Edwin wants to give his final result a bit of extra attention. To do this, he creates a short video using the new Google Veo.
He chooses Veo Lite. The prompt reads:
‘Cinematic 360-degree panoramic spin of a stunning, brightly lit garden room filled with lush plants, cozy seating, and warm golden hour light.’
This video completely completes his presentation and takes only a few extra minutes.
| Advantages | Disadvantages |
|---|---|
| Very fast concept visualizations | Requires knowledge of your render software |
| Respects geometry from your CAD package | Varying consistency |
| Uses materials from your render software | Render 7 engine costs credits |
| High quality, render-level final result | Requires knowledge to operate Veras properly |
| Integrated into design software | Less suitable for technical documentation |
| Easily create variations | |
| Strong for client presentations | |
| Render Engine 6 available as a backup when credits run out |
Which workflow suits you?
The test with our four researchers proves that artificial intelligence has permanently changed the world of 3D visualization. Still, there is no ‘one-size-fits-all’ solution: the right workflow depends entirely on your role, the desired level of control, and your technical background.
A quick comparison of the four AI methodologies at a glance:
Google Gemini
- Best for: Quick concepts and presentation visuals without requiring rendering knowledge.
- Strongest point: No 3D software experience required; instant results from text-to-image.
- Biggest pitfall: Geometry of the 3D model is easily altered or compromised.
SketchUp AI Render
- Best for: SketchUp users who want to stay quickly within their familiar working environment.
- Strongest point: Seamless integration into your viewport, directly from your familiar 3D model.
- Biggest pitfall: Limited control over generated materials and individual objects.
VizMaker
- Best for: Creative power-users and Windows designers.
- Strongest point: Maximum flexibility: combines 2D, 3D object generation, video, and multiple AI engines.
- Biggest pitfall: Steep learning curve and separate connection with SketchUp.
Chaos Veras
- Best for: Professional 3D artists and architects.
- Strongest point: Preserves exact geometry and elevates V-Ray/Enscape renders to a top level.
- Biggest pitfall: Requires basic knowledge of existing render packages and costs AI credits.
The Final Verdict
- Looking for a quick ‘mood impression’ without complex settings? Then the Prompter method or SketchUp AI Render is ideal for exploring an idea with the client or contractor within minutes.
- Looking for the ultimate balance between geometric precision and high-end image quality? Then Chaos Veras stands head and shoulders above the rest, provided you already work with Enscape or V-Ray.
- Want to push the boundaries of AI with video, 3D objects, and multiple AI models? Then VizMaker offers an impressive and versatile playground for the advanced designer.
AI is not replacing human creativity anytime soon; rather, it enhances it. By choosing the workflow that aligns with your skills and project goals, you can transform a simple massing study into a compelling final result in no time.