The digital transformation of an Italian dream
Pin-sharp precision thanks to a 3D scanner and SketchUp
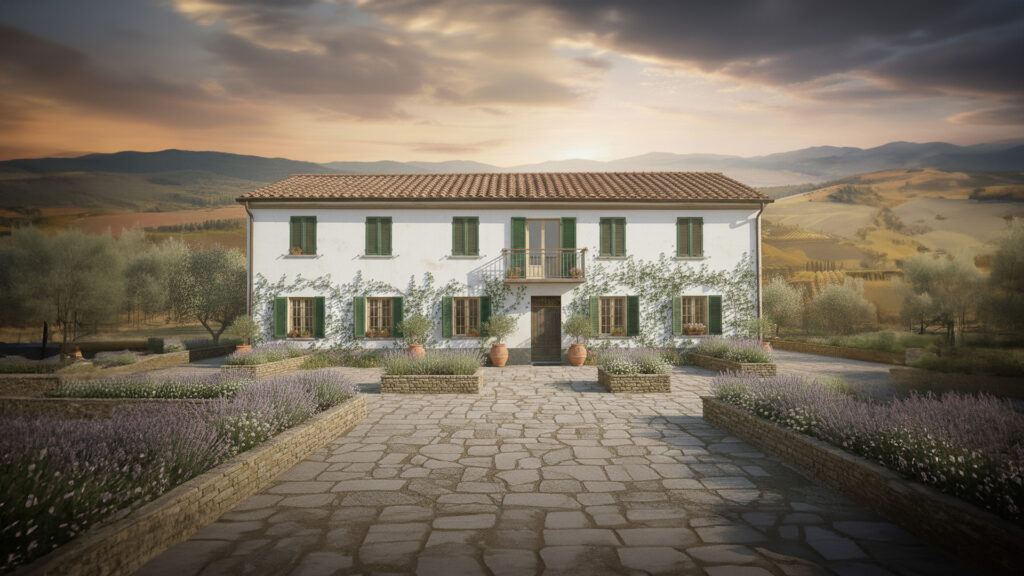
In the rolling hills of Italy, countless characterful farmhouses are waiting for a second life (or third, fourth, fifth?). For many Northern Europeans, restoring one of these historic properties is the ultimate dream, but the reality is often far messier than the fantasy. How do you renovate a building while preserving its authentic charm when not a single wall is straight? And how do you bridge the distance between a building site and a client living across the border?
In Italy, we tackled this challenge using the most advanced techniques available. A farmhouse was first captured with a 3D scan and then processed in SketchUp to produce an accurate, digital 3D model. This enables step-by-step planning of the renovation and a full consideration of the future residents’ experience throughout the design process. We spoke with Davide Bianco, the Italian Geometra overseeing this project on the ground.
Start with the solution: a 3D scan!
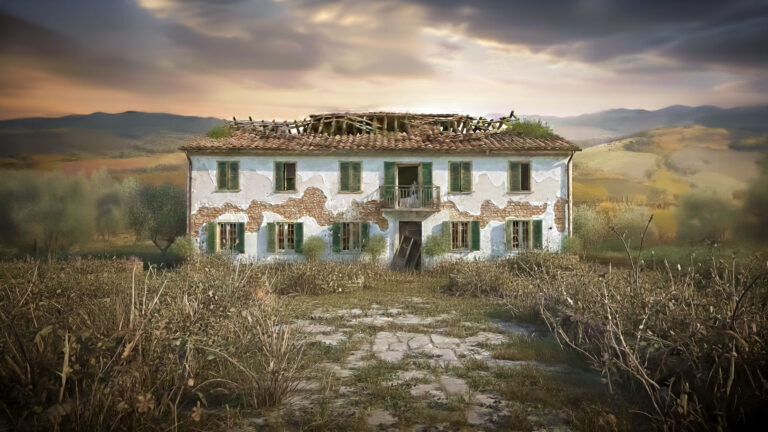
In Italy, we come across a farmhouse from a time… well, which time exactly? Systematic documentation only really took hold in Italy over the last 50 years or so, and this particular building is older than that, or at least was constructed in phases. The result: no architectural drawings, no records, nothing beyond an elderly neighbour who can still recall a thing or two about how it all came together back in the day.
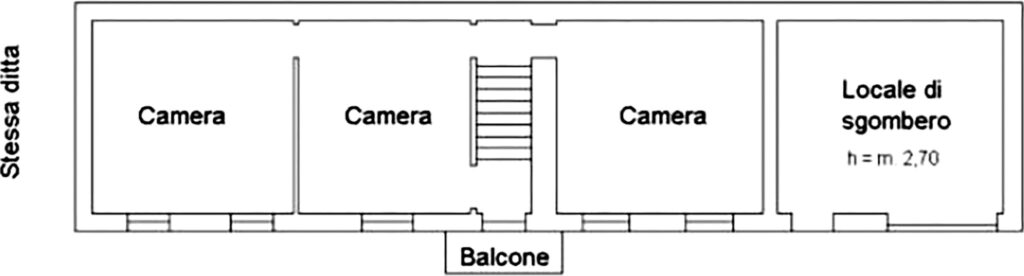
The land registry, perhaps? In Italy, a building’s floor plan is registered alongside its intended use, as that determines how it is taxed. It stands to reason, then, that floor plans rarely reflect reality, and this case was no different.
It may not be the first thing that springs to mind, but having a building like this 3D-scanned is an excellent idea. Scan a property in 3D, and you instantly have every relevant measurement at your fingertips.
Geometra
The land registry process, and in fact everything involved in a building renovation in Italy, is handled by what is known as a Geometra. Literally translated, this means Surveyor, but the responsibilities extend well beyond that. Geometra Davide Bianco is more akin to a site supervisor, and he spoke to us about this project.
“I rarely come across a situation where a building corresponds exactly to its land registry entry. Whether the property is old or not. Sometimes it becomes clear even right after a renovation is completed that what was actually built differs from what was designed and registered. You have to work with accurate data, and you want to keep your clients properly informed. Digitising is therefore a must.”
Measure twice, cut once?
So there is one ritual that keeps coming back around: measuring. Measure, measure, and measure again. Because knowledge comes from measurement, right? Davide finds it deeply frustrating: “It takes an enormous amount of time, and in the end, it still isn’t accurate enough. It’s difficult to predict in advance exactly which measurements you’ll need, and once you’re back in the office, it can be hard to picture how things looked in three dimensions. Photos help to a degree, but you inevitably forget to measure something, and then you have to go back. Distances between projects here can be quite considerable, so yes, that costs a great deal of extra time and is genuinely frustrating.”
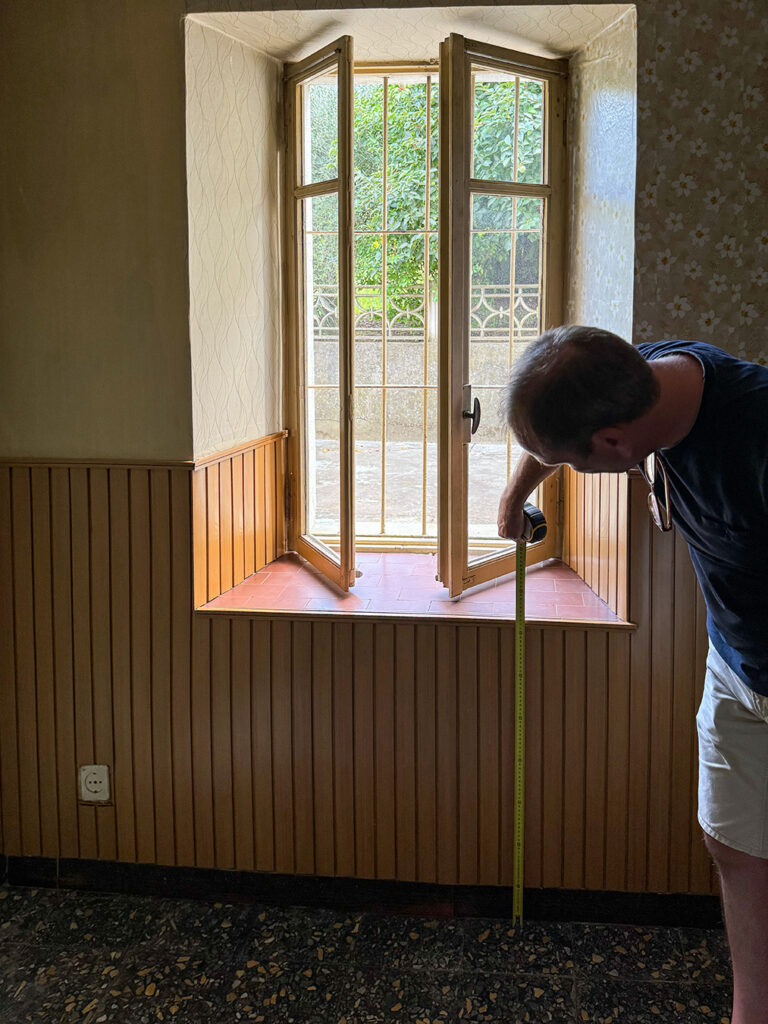
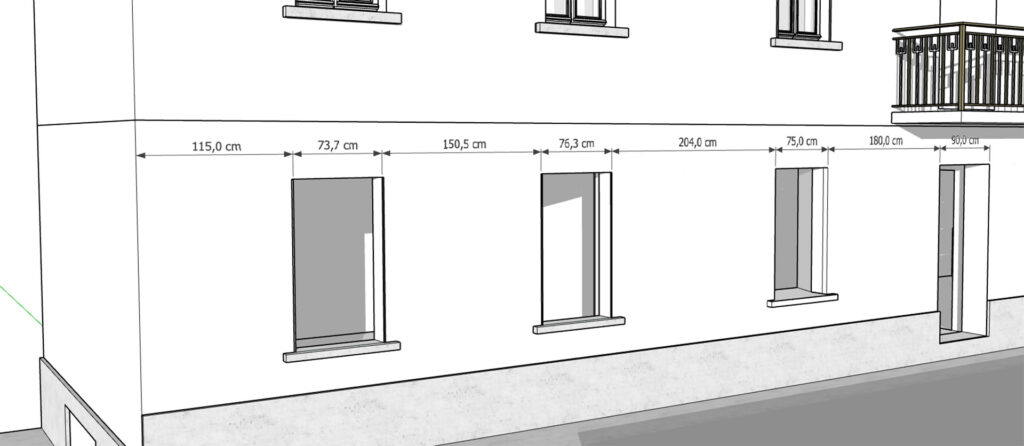
There are further drawbacks to a tape measure as well. The distances between window openings, doors and roof eaves, for instance, are often far too large to measure in a single go.
And what do you use as a reference point when the floor slopes? A laser measure, then? Better, but it has its own limitations too. Davide: “Two opposite walls or a ceiling height are no problem with one of those. But measuring the distances between two window frames along a wall simply doesn’t work, especially if you’re on your own.”
And, crucially, the spatial relationship between the different parts of the building is easily lost. The property has often been extended over many decades, meaning the various sections do not always flow seamlessly into one another. You have to go outside to reach the next part, which has no internal connection, and taking accurate measurements quickly becomes a real challenge.
There is often no alternative but to take chain measurements. You measure distances between reference points and write them all down. You draw from one measurement point to the next, and that is how your model takes shape. The problem, however, is that you will inevitably make measurement and rounding errors, and those errors carry forward to the next point. And these buildings are rarely constructed straight to begin with. The measurement errors accumulate, with the result that by the time you have gone all the way around, there can be a discrepancy of several decimetres between where you started and where you ended up.
The floor levels present another challenge, particularly on this project. Years of extensions and alterations have left the front and rear of the house at four different floor heights. A step up at the entrance, a step down inside, another level change into the barn, then lower again into the outbuilding and back up into the garage, all connected by small steps and sloping floor sections. What makes it even more complex is that while the spaces are adjacent, they share no openings. In fact, there is a wall between them that is 60 cm thick.
Good luck working out whether your measurements add up and how the floor levels relate to one another. Drilling a perfectly horizontal test hole through 60 centimetres of solid wall is not a realistic option either.
So where do you measure? What is truly level? The question always comes down to the same thing: “What is actually correct?”
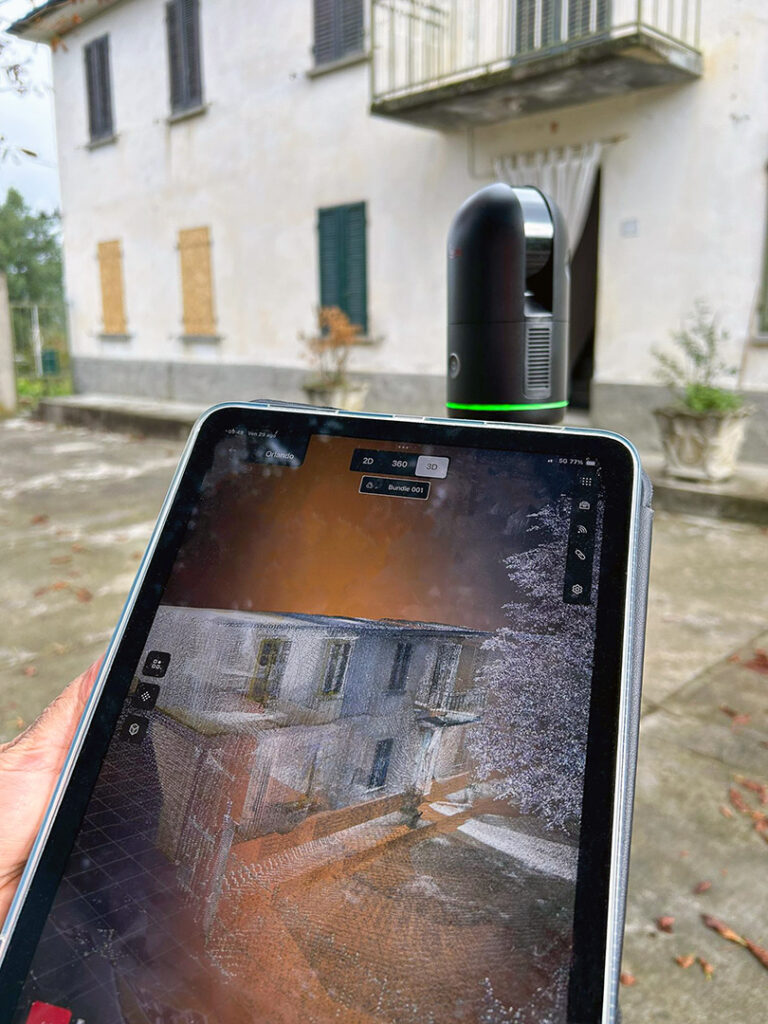
The solution: 3D scanning
Enough about the problems. Time to talk about the solution: 3D scanning! This is now the approach that Geometra Bianco takes as a matter of course.
“Yes, it was an investment, but I have to say: it has been absolutely worth it. Because the scanner is not needed on every project, I share it with Geometra Elisa Testore. We not only save time that way, but the quality of our work has also improved considerably. We never have to return to a site to take additional measurements, and we now produce more accurate calculations for better-priced quotes. It saves time, materials and money. And it simply makes for a more enjoyable way of working, which is not a small thing either.”
Point Cloud
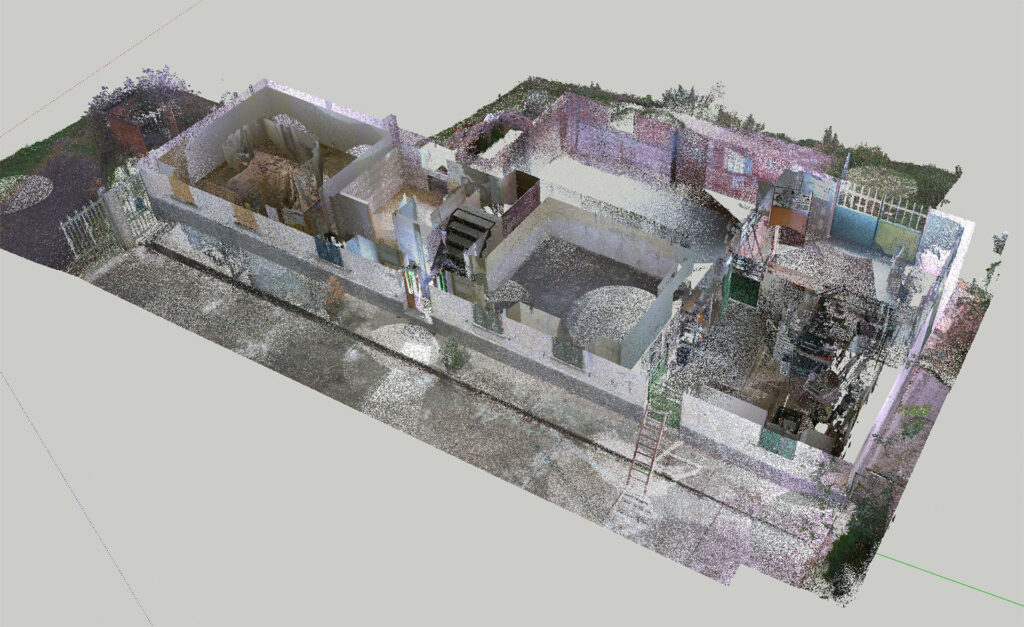
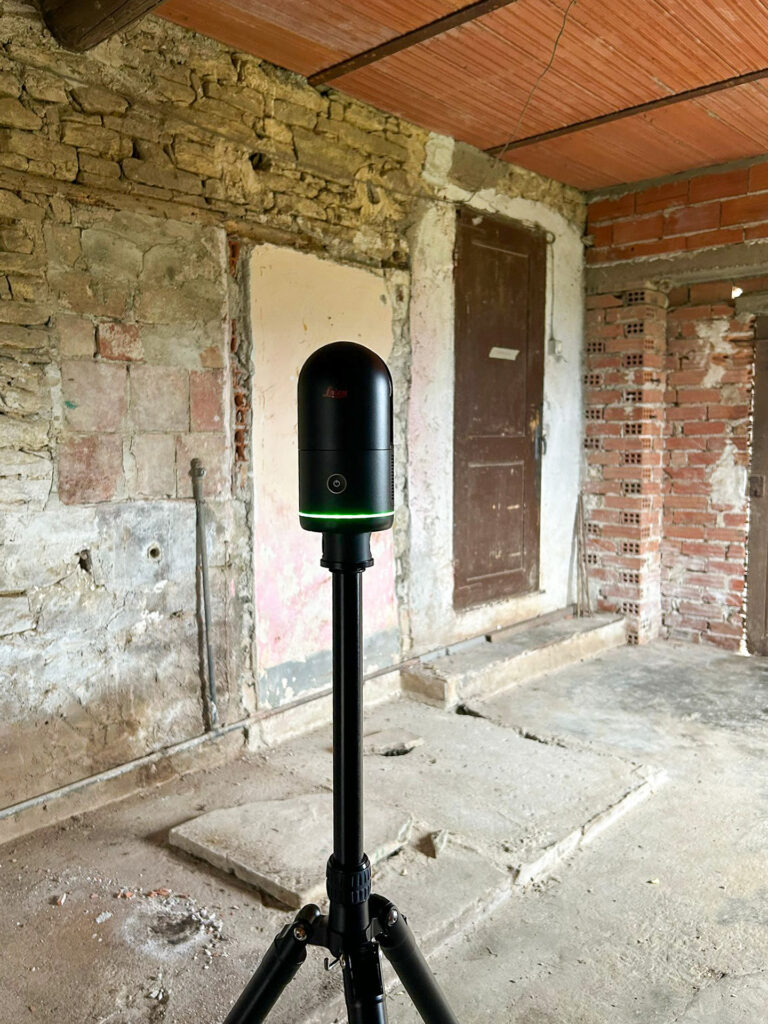
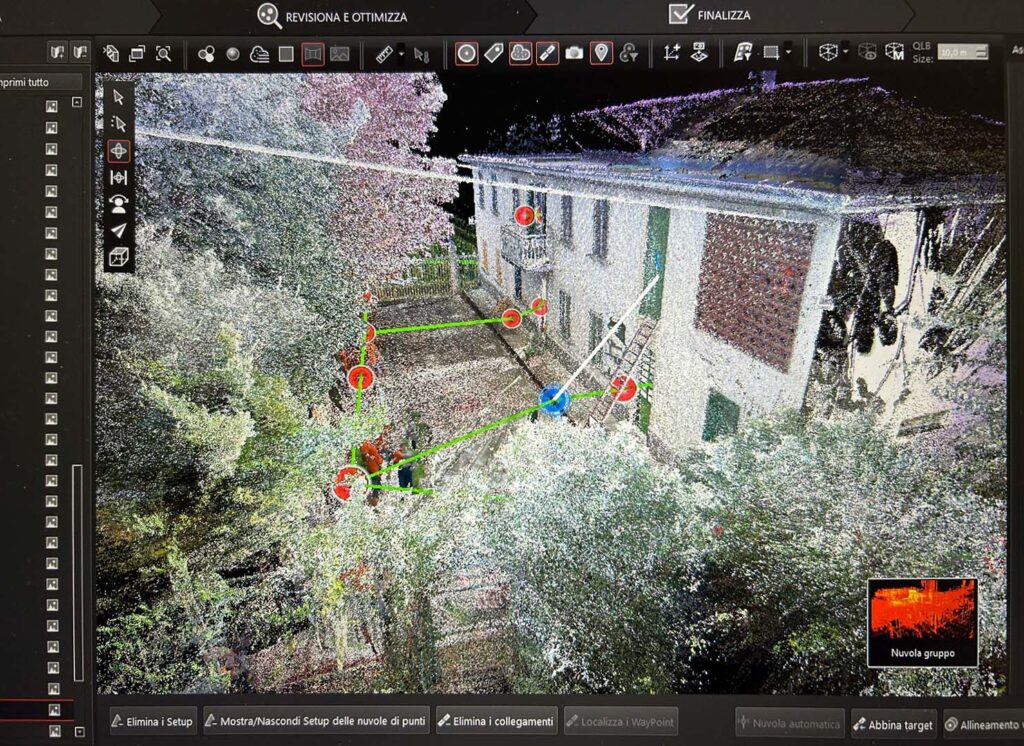
How does it work? The 3D scanner is placed in a room, where it fires 360 degrees of laser beams in all directions and records exactly where each beam strikes a surface. The result is a cloud of points in three-dimensional space: the point cloud.
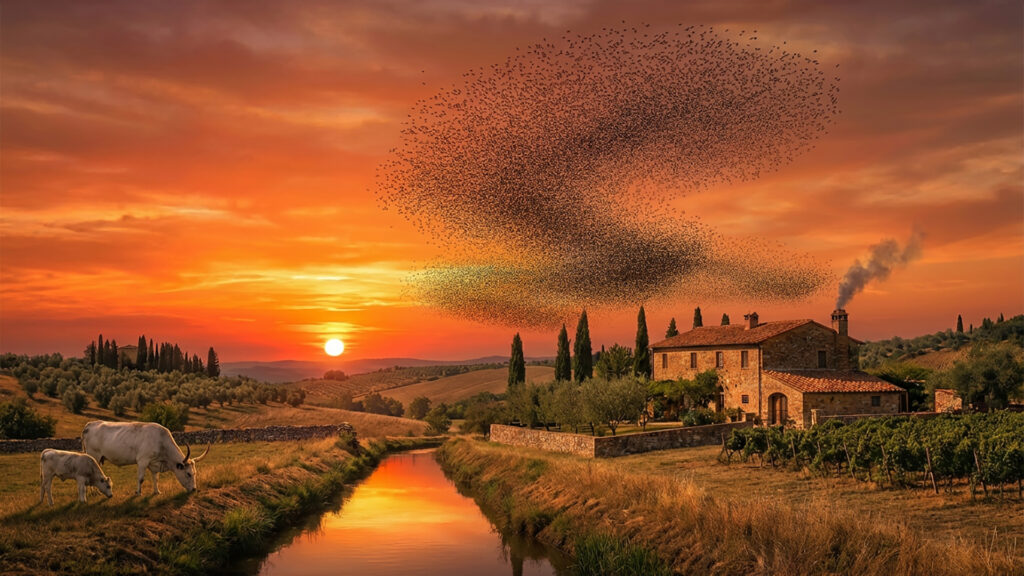
A point cloud appears solid from a distance, but if you zoom in far enough, you find yourself flying between individual points. Think of it like a flock of birds.
To measure the entire property, the scanner is moved from room to room. Because the scanner records its own position each time, all of the individual clouds can ultimately be merged into a single, coherent whole.
What happens after the scan?
Once the scanning is done, the point cloud needs to be processed in the scanner’s software. From there, you can go in one of two directions.
The first is to use the cloud purely for measurement purposes. In this case, the cloud replaces what would otherwise be dozens of measurement points typically taken with a tape measure and laser. Incredibly useful, as you can now measure between any of the millions of individual points. This is possible even with free viewer software.
But the second option is where the real magic happens: converting the point cloud into a geometric 3D model. This allows you to model and design based on accurate, real-world geometry.
Davide: “The software that comes with the scanner cannot generate a 3D model on its own. So you need an additional tool. And that is precisely where SketchUp turns out to be incredibly fast and cost-effective. With SketchUp Studio, you can process point clouds into 3D models straight out of the box. Incredibly fast, straightforward and accurate!”
SketchUp can snap directly to the points in the cloud, allowing you to build a 3D model quickly and precisely that matches the scan exactly. There are also dedicated functions available, such as automatic detection of floor planes, walls and roofs.
Scan Extensions
Thanks to SketchUp’s open architecture, a wide range of third parties have brought what are known as SketchUp Extensions to market. Extensions add additional functionality to SketchUp. For processing scans, we highlight two options, though both are Windows-only.
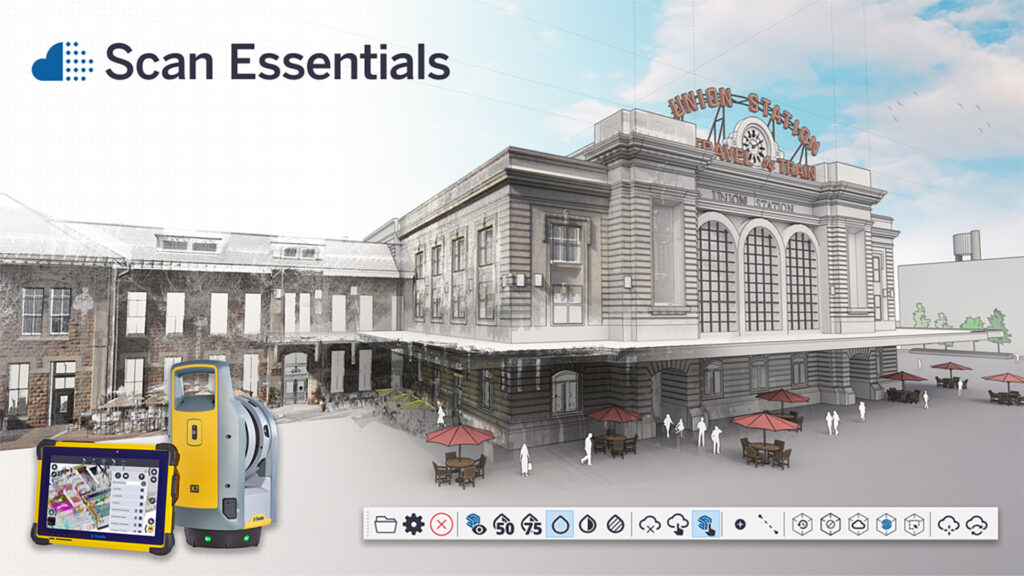
Trimble Scan Essentials for SketchUp
This extension was developed by Trimble, the company behind SketchUp itself. It is not sold separately, but is included as part of SketchUp Studio, ProAdvanced or ProScan. SketchUp Studio also includes the Revit Importer and V-Ray. The Trimble Scan Essentials extension processes and optimises your 3D laser scans so that they can be used seamlessly within SketchUp. The result is accurate, reliable 3D models and designs produced in a fraction of the usual time.
Undet
Undet is a SketchUp extension developed by Terra Modus in Lithuania. It is somewhat more feature-rich than Trimble Scan Essentials, though that also makes it slightly more complex to use. Undet is well worth considering if you work with point clouds on a regular basis. One feature in particular stands out: the Undet Browser. This functions as a 360-degree panorama viewer that synchronises in real time with your SketchUp view, allowing you to navigate your SketchUp model alongside the corresponding photographs simultaneously. You can also click on points within the panorama that are then placed directly into your SketchUp model, which is extremely handy.

Check
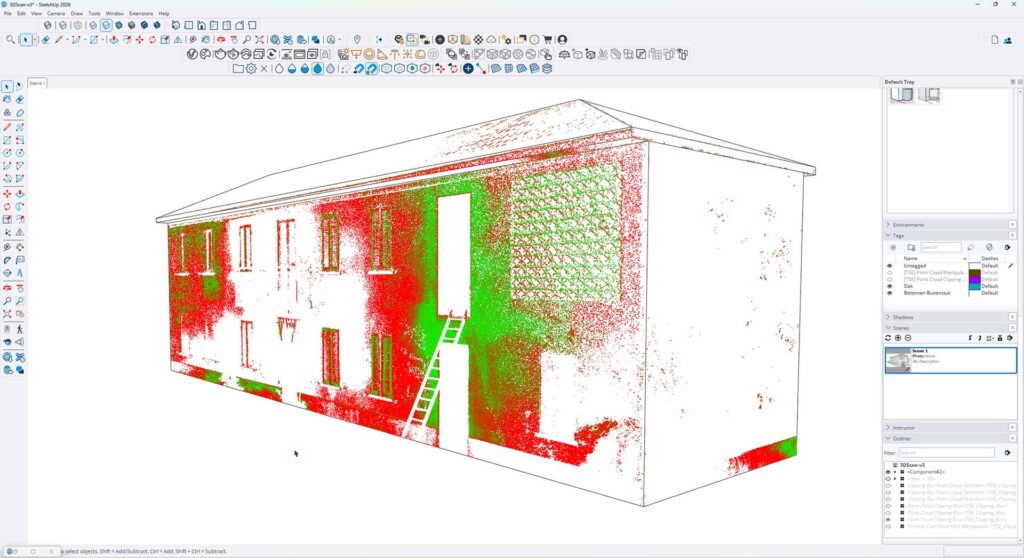
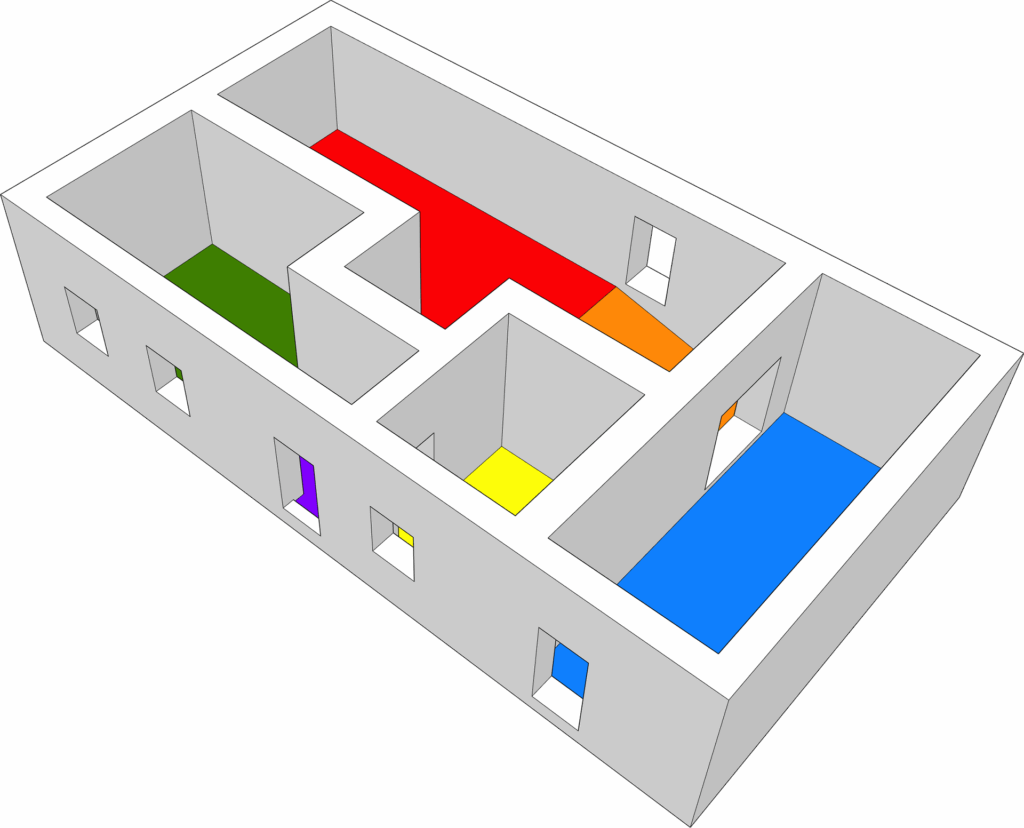
There are, of course, tolerances to account for. In Davide’s case, his scanner works to within a few millimetres over 10 metres, which is precisely the level of accuracy needed for construction and certainly for renovation work. To verify how closely your generated geometry aligns with the point cloud, you can run what is known as a Model Inspection. Areas that fall outside a tolerance threshold you define yourself are then highlighted in red.
Textures
As we all know, a digital photograph is made up of pixels. Since a point cloud can also be thought of as a cloud of pixels, it is, in effect, a 3D photograph. Zoom out far enough, and you can look around inside a three-dimensional image. This makes a rather special additional feature possible: the 3D point cloud can be projected onto your 3D model, bringing it to life with realistic colour and texture derived directly from the scan.
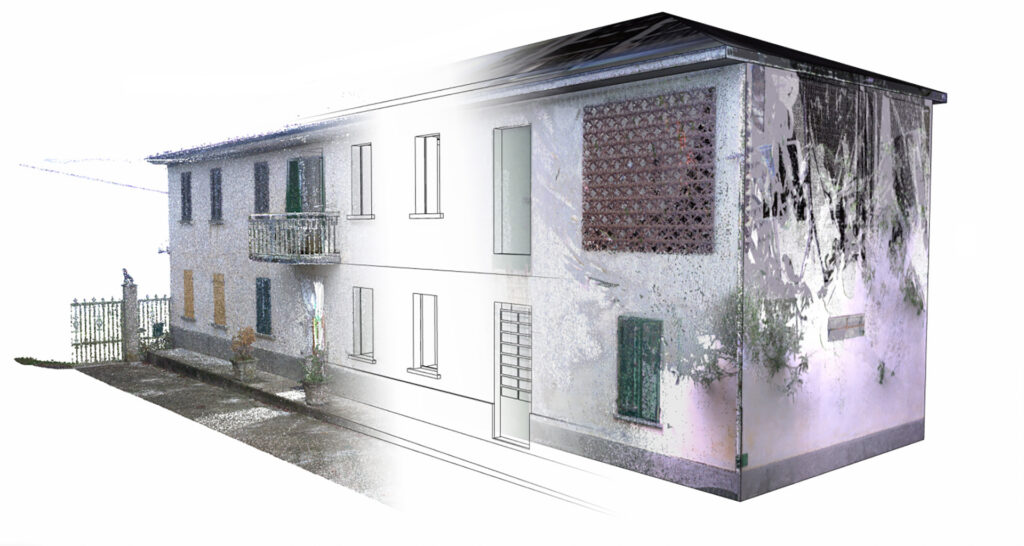
A point cloud is essentially a 3D photograph that can be projected onto your model. From left to right: the point cloud, the 3D model and the point cloud projected onto the model.
Building Virtually
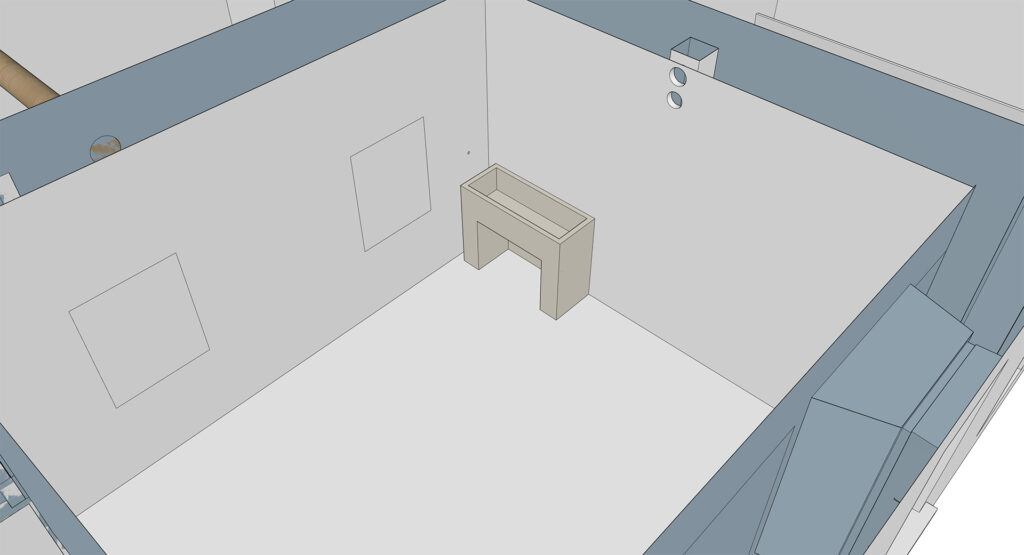
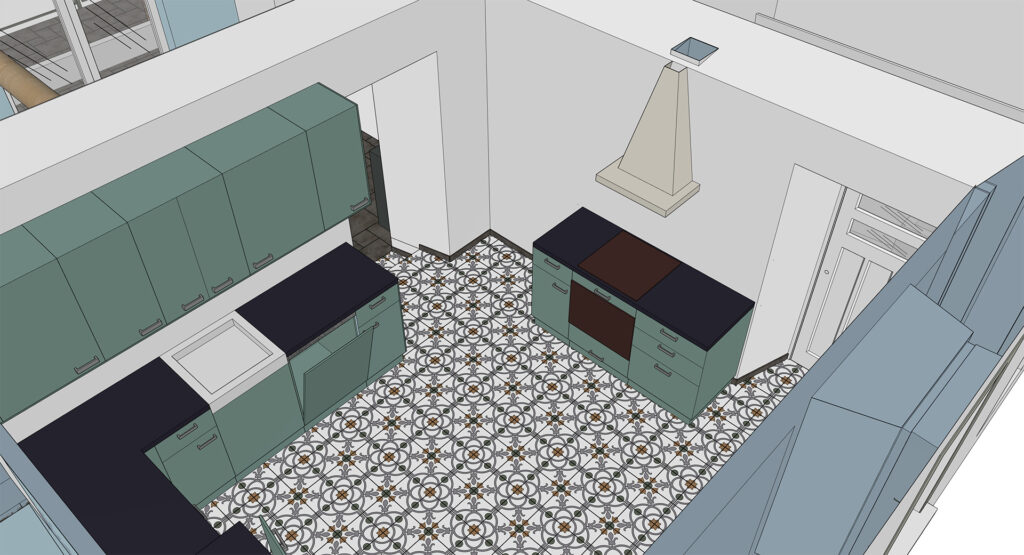
Now that the existing situation has been accurately drawn up, work can begin on designing the renovation. The model is divided up and tagged so that switching between the existing and proposed elements later on is straightforward.
As-built
To complete the full circle, a second 3D scan can be carried out once the renovation is finished. In practice, what gets built often differs slightly from what was originally intended, whether due to an unexpected constraint on site or simply because a better solution presented itself along the way. The thickness of plaster layers is also difficult to predict in advance.

Any such discrepancy is easy to identify by overlaying the new point cloud on top of the design, after which the 3D model can be adjusted to reflect what was actually built. The result is a 100% watertight representation of the building as it stands.
Conclusion
Admittedly, it costs extra money and extra time, and that will not be justified on every project; it depends entirely on the scale of the work involved. But when it comes to renovating an old Italian farmhouse that demands careful attention, this investment pays for itself many times over. 3D scanning gives you an exceptionally detailed picture of the existing situation, including every irregularity, defect and hidden structural element that traditional measurement methods would easily miss.
This level of insight not only helps to prevent surprises during construction, but also supports accurate planning, visualisation and communication with everyone involved. It enables you to make informed decisions, keep costs under control and ultimately deliver an end result that is both authentic and sound.
For a project where history, complexity and fine detail all converge, 3D scanning can be the difference between a grinding renovation and an efficient, well-considered process that comes in on time and on budget.