From Sketch to Realistic Garden Experience
How Marlies Visualizes 150+ Garden Projects per Year with SketchUp
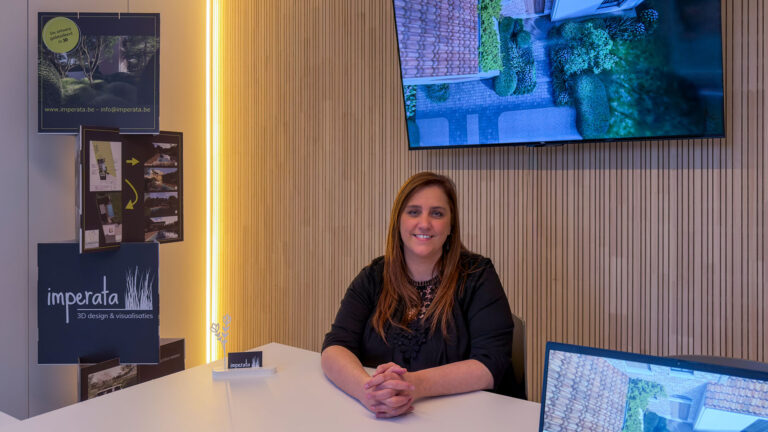
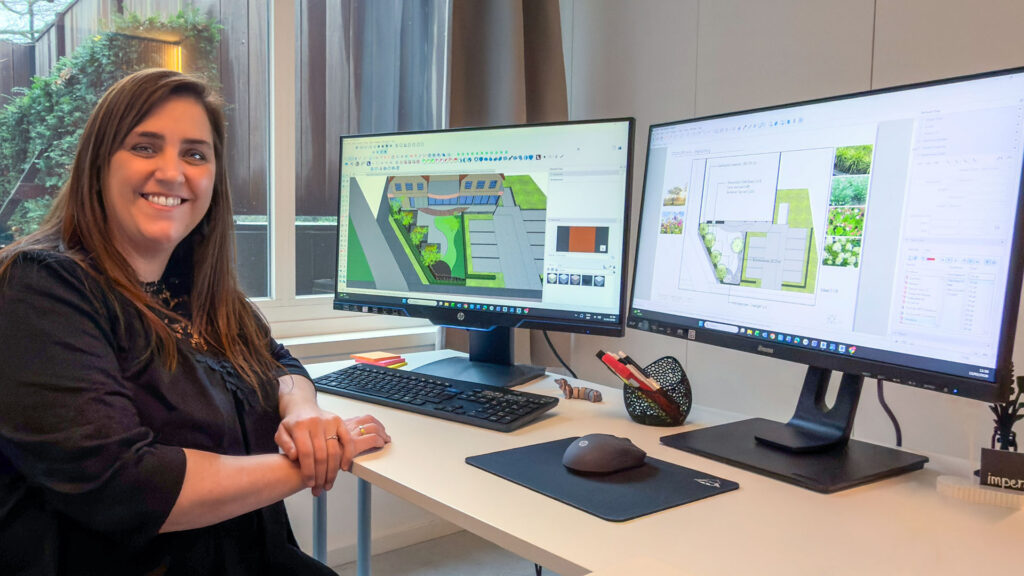
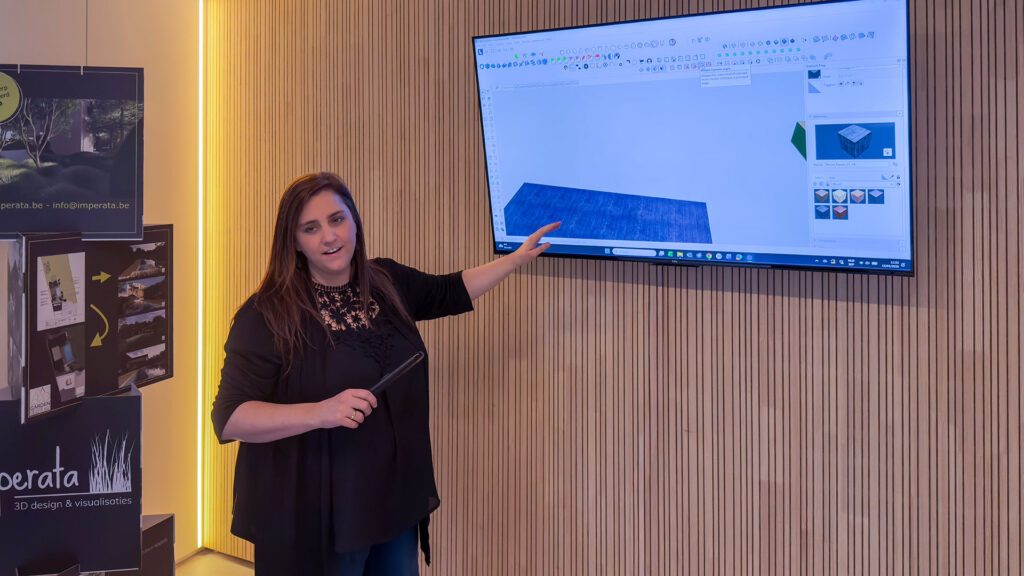
In the world of garden architecture and design, visualisation is essential. Clients need to be able to envision their future outdoor space before the first shovel breaks ground. Marlies Scheppers from design studio Imperata in Belgium plays a crucial role in this. With SketchUp and related software, she creates professional 3D visualisations and technical plans for garden architects and contractors. What began as an emergency solution for her husband’s business grew into a successful studio that visualises around 150 garden projects annually. In this user case, Marlies shares how she uses SketchUp for exterior design, what workflow she employs, and how she works as efficiently as possible.
From YouTube Tutorials to Professional Design Studio
Marlies’ journey into the world of 3D visualisation began organically. “I never studied graphic design or technical drawing,” she explains. “I stumbled into it through my husband, who was a self-employed garden contractor ten years ago. We noticed that clients found it increasingly difficult to picture the design.”
That need for visualisation brought her to SketchUp in 2016. Initially, she taught herself the program through YouTube tutorials, but soon ran into the limitations of self-study. “When you have a garden with a 5-meter height difference from front to back, it becomes complex. You won’t get there with just a few tutorials.”
The breakthrough came in 2018 when Marlies took a basic training course at Masters in SketchUp. “It interested me so much that I decided to make it my profession.” What started as a side job grew into a full-time studio. The demand from garden architects and contractors in the region kept increasing.
Two Workflows for Different Needs
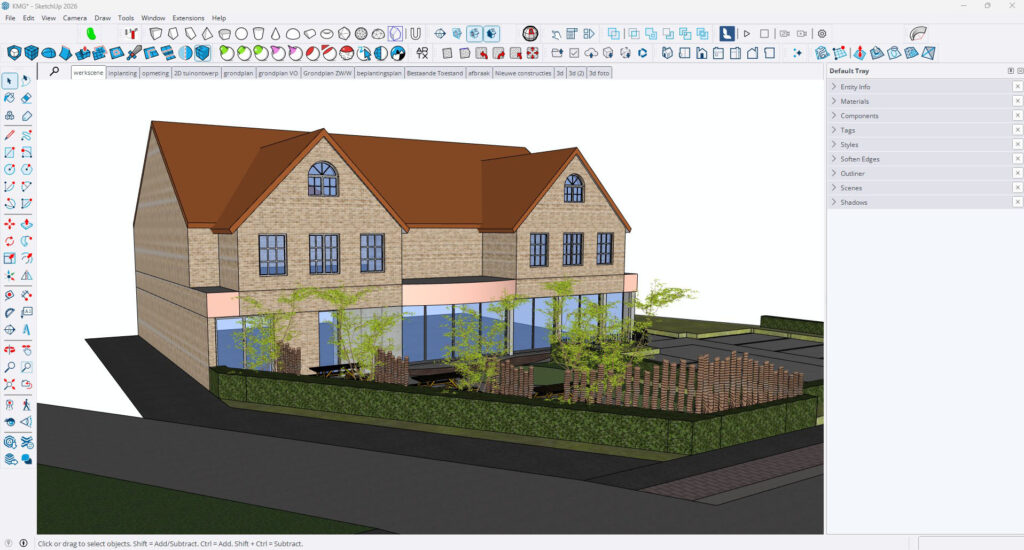
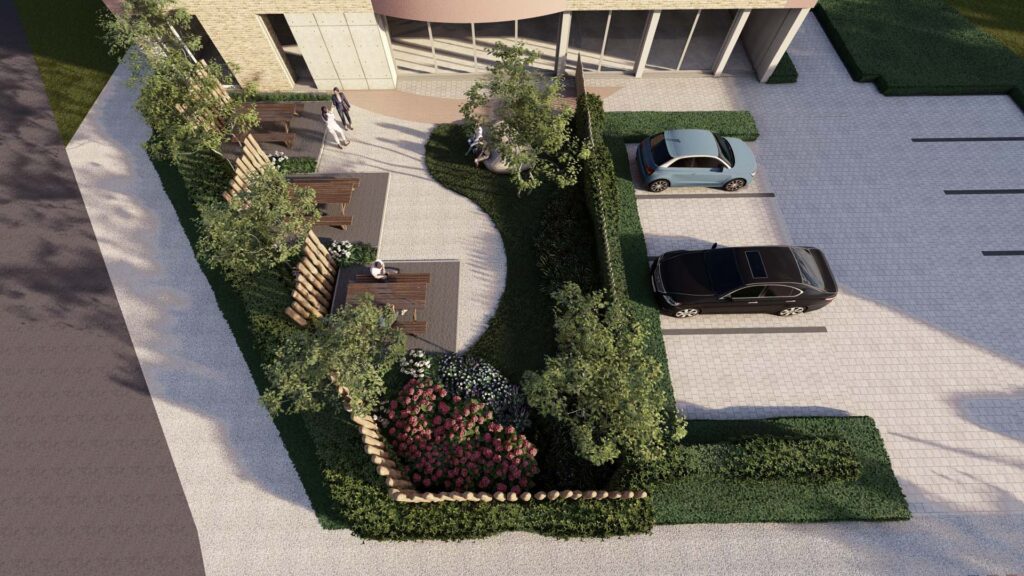
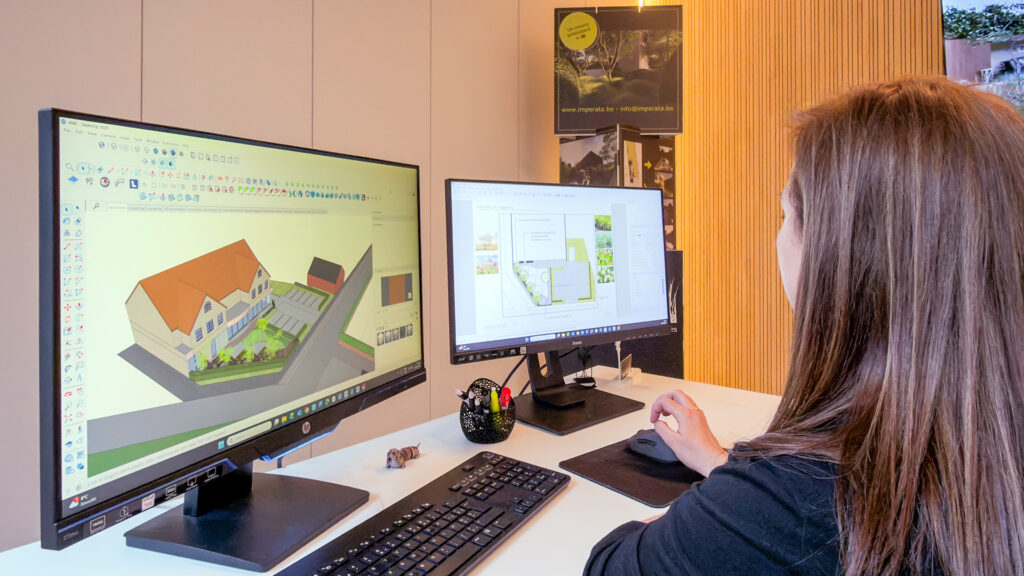
Marlies distinguishes between two working methods, depending on what the client needs. “My first approach is purely 3D visualisations. Then I receive a sketch or design from the garden architect or contractor, which I import into SketchUp. On top of that, I draw out the 3D environment.”
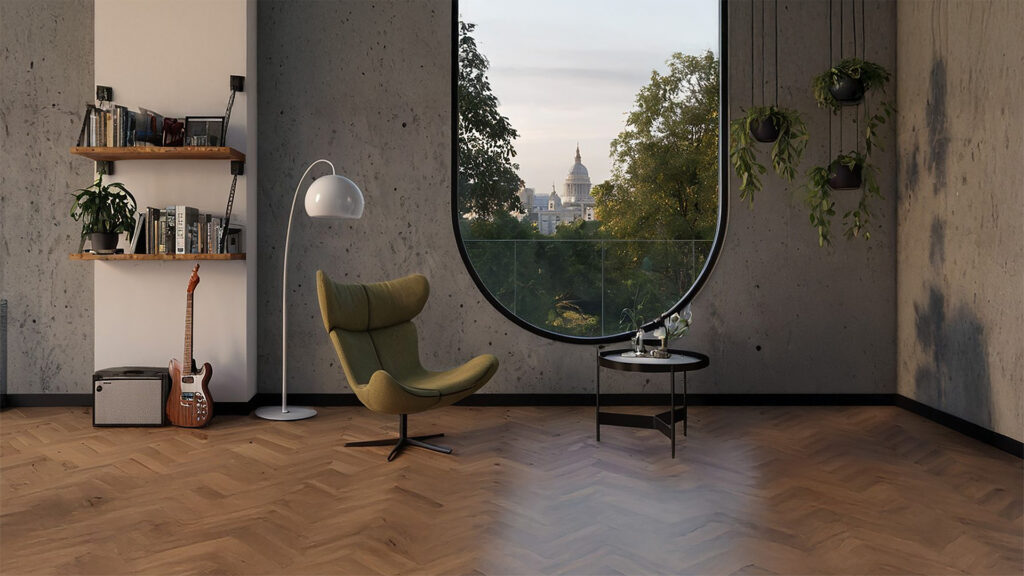
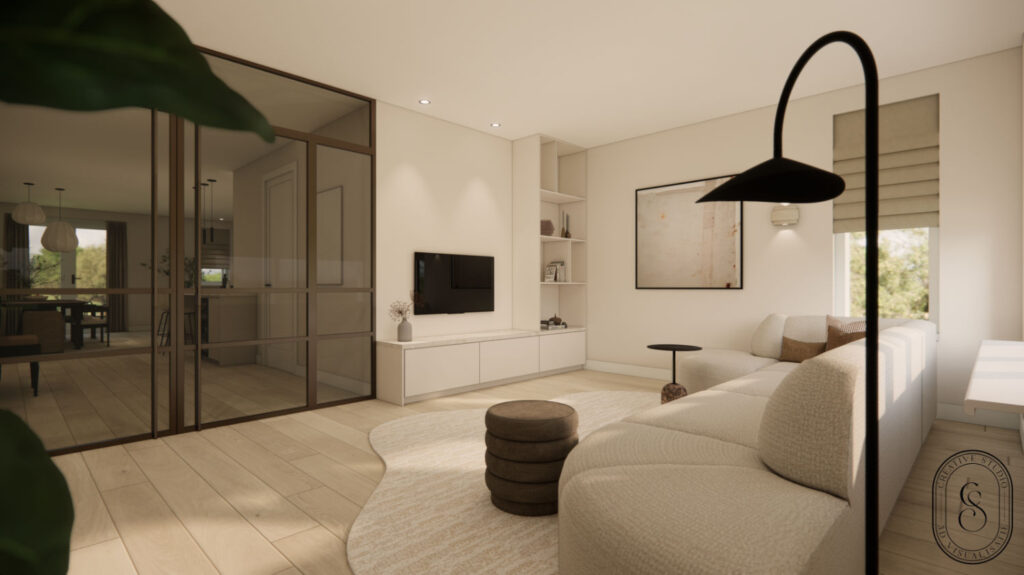
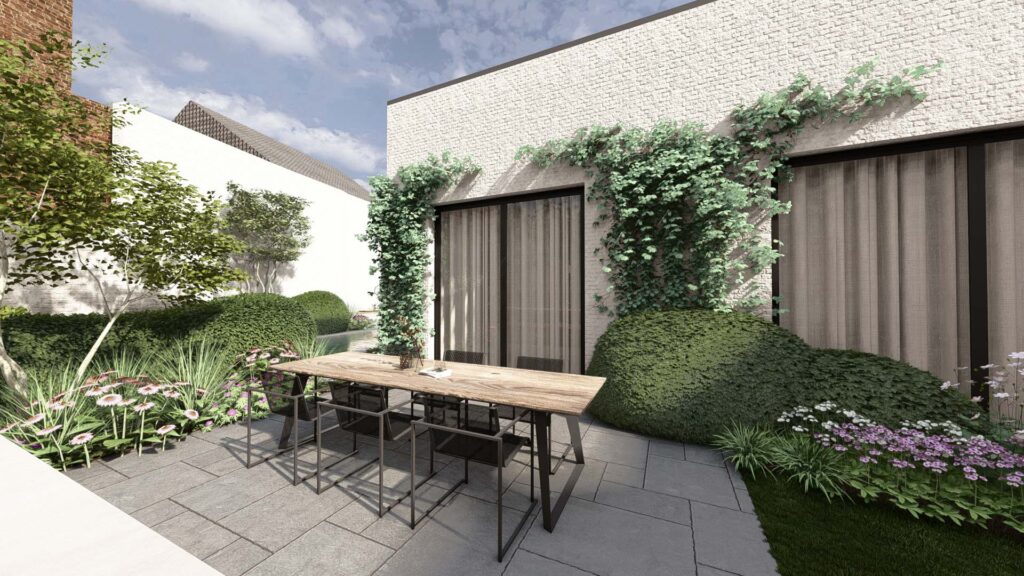
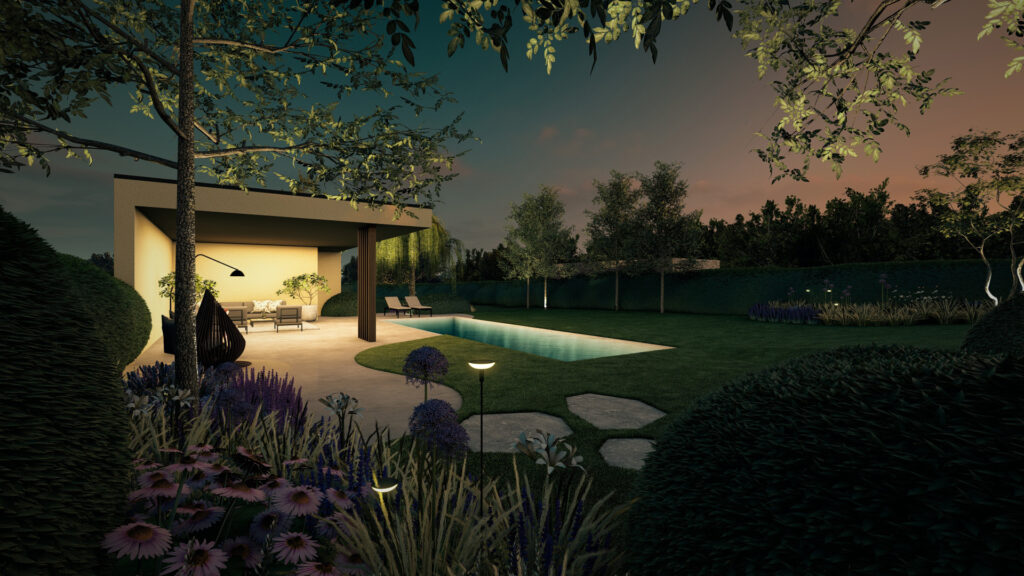
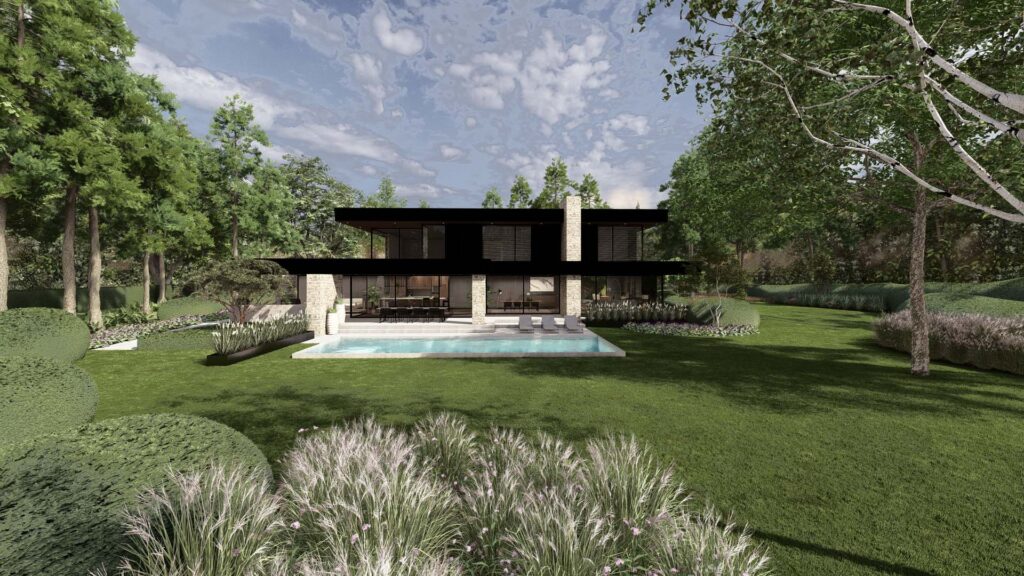
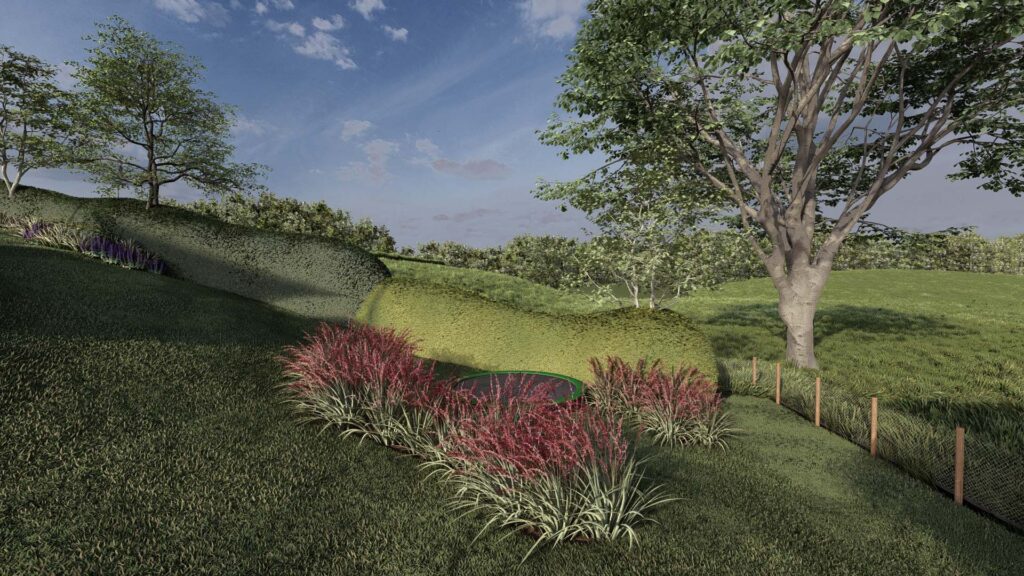
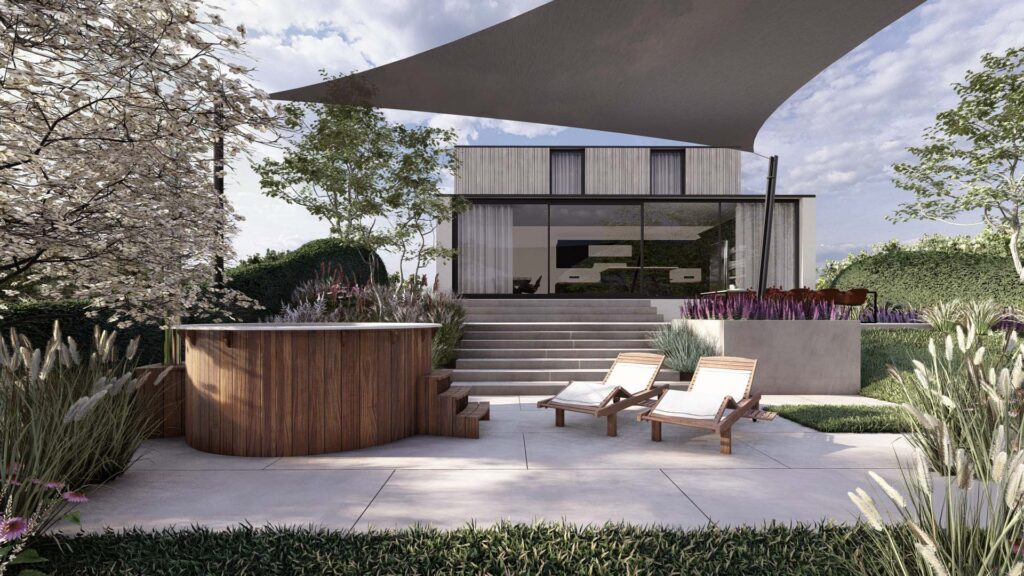
What’s special about her approach is that the SketchUp drawing remains relatively empty. “I do the vegetation with my rendering software, which has an excellent plant library. The house and plot are in SketchUp, but I fill in the rest with plants and materials through rendering. That keeps my SketchUp file light and manageable.”
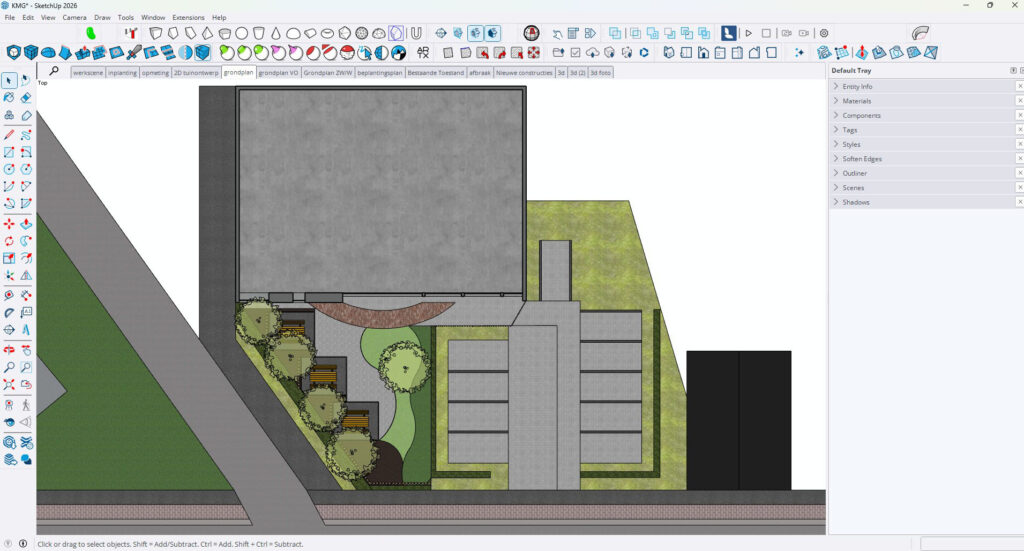
The second workflow comes into play when clients also need 2D technical plans. “Then it becomes much more detailed. I work more intensively with scenes, tags, and styles in SketchUp. For pure visualisation, it needs to go fast: maximum one day per project. For complete plans, I work much more precisely.”
Efficiency as the Key to Success

With 150 projects per year, efficiency is crucial. Marlies has optimised her workflow down to the finest detail. “In the beginning, I really struggled in SketchUp because it took too long. When you do this professionally, it needs to be efficient. You can’t spend more than one day on a visualisation project.”
Her solution? Custom libraries and templates.
“I have an extensive component library where everything is cleaned up as it should be. My material library in SketchUp is linked to my rendering package. With one click, both programs are linked to each other. That saves an enormous amount of time.”
This structured approach enables her to switch quickly. “When I send images to a garden architect, and they call that same day with changes, I’ve usually adjusted and resent the images that same day. That’s possible because I do everything myself and don’t outsource to subcontractors or people abroad.”
The Power of Visualisation in the Sales Process
For Marlies’ clients, the garden architects and contractors, the added value of 3D visualisations is clear. “A 3D visualisation sells the project much better and faster. When garden architects visit with 3D images, it sells much faster than with just a 2D plan. There’s less discussion, less doubt, and less decision stress.”
But the visualisations don’t just help with sales to end clients. “I have garden architects who work with 3D already at the preliminary design stage. Then they receive the images and say, ‘Oh, that doesn’t look quite right yet.’ They can adjust their own design based on the visualisations. That’s also very valuable.”
Marlies consciously positions herself as a link between the professional and the end client. “Garden architects and contractors can focus their time on their core business: designing. They don’t have to waste time learning software. We then combine our tools and skills: they’re good at designing, and I’m good at visualising. That makes a permanent collaboration very valuable!”
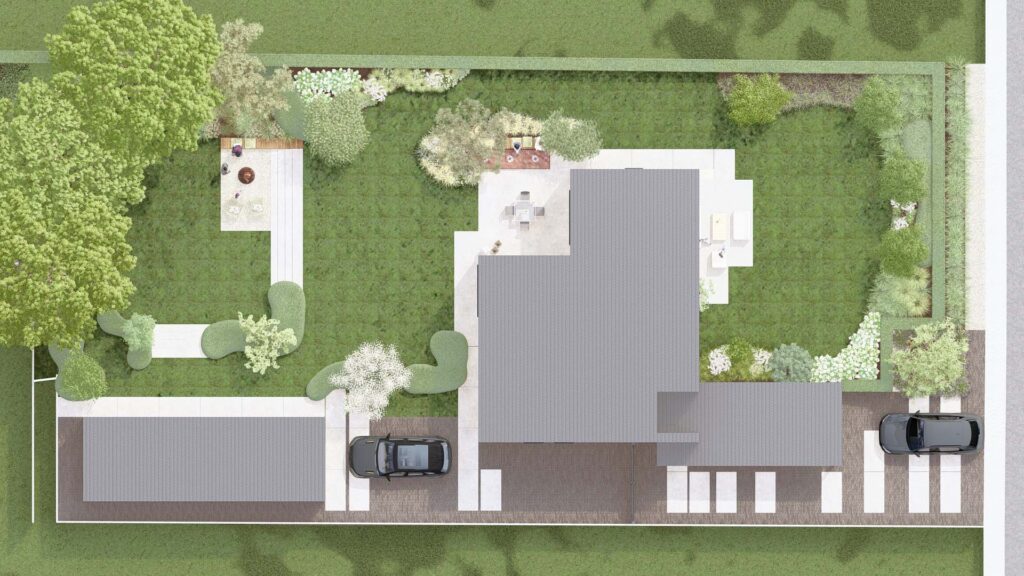
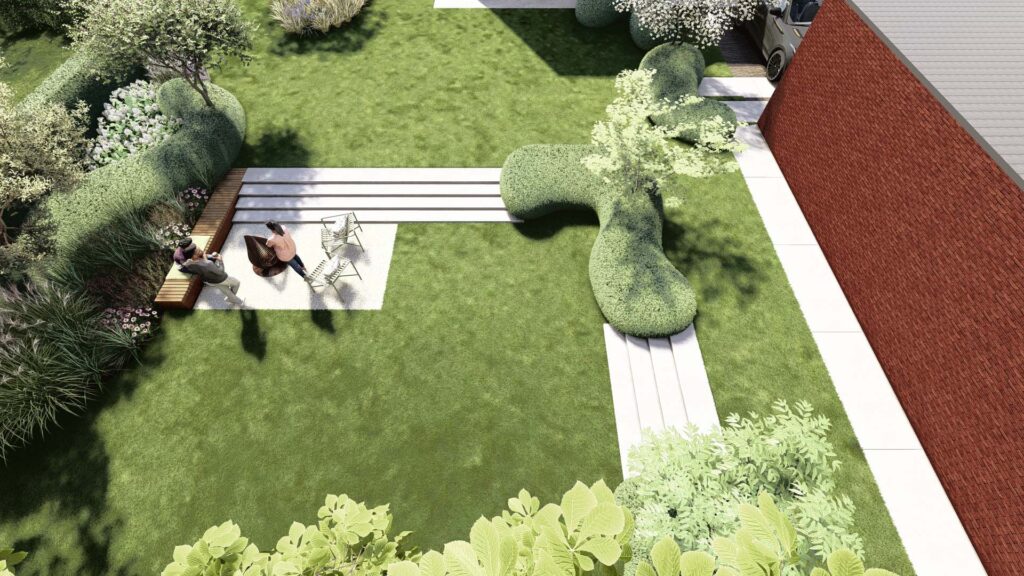
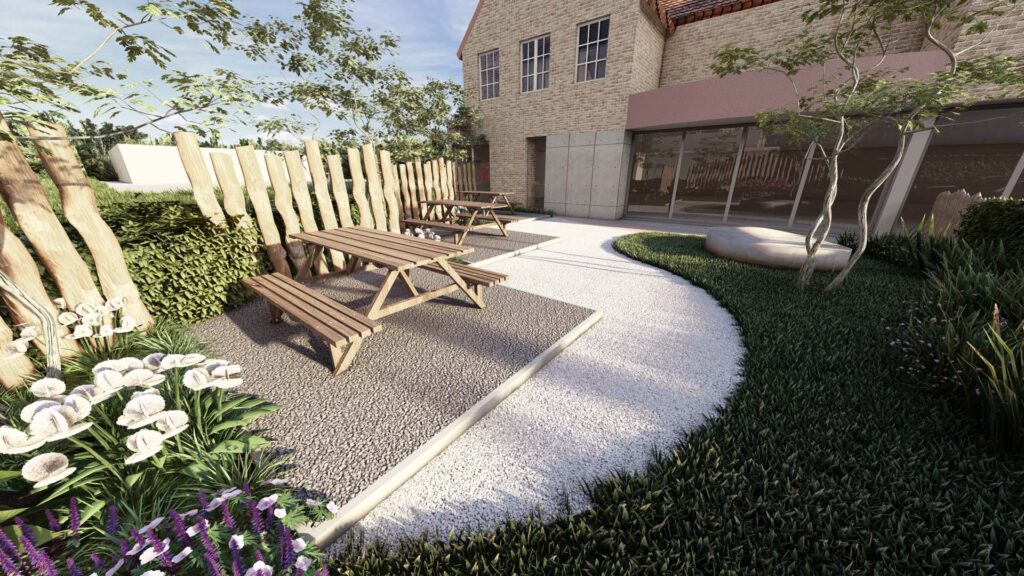
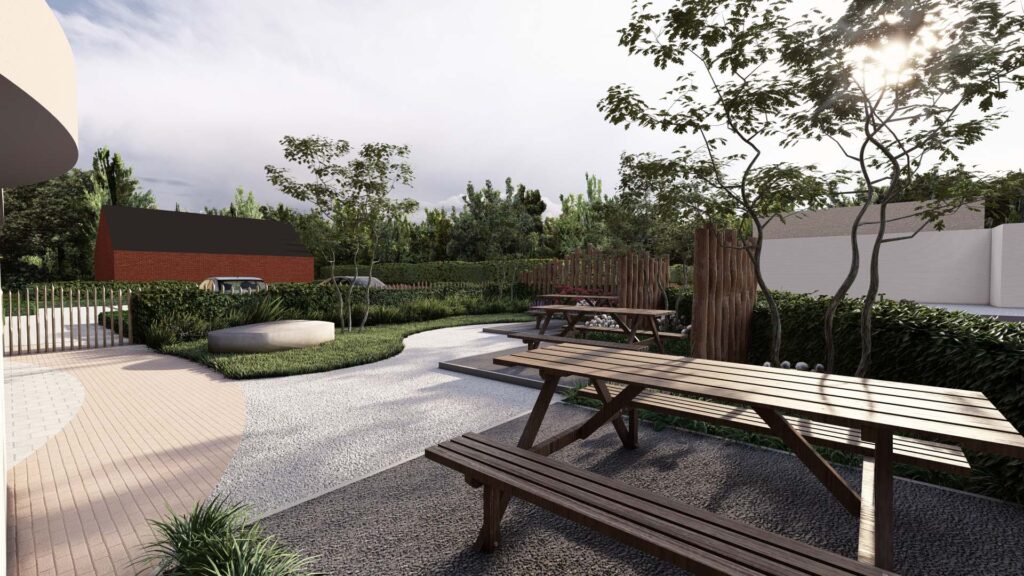
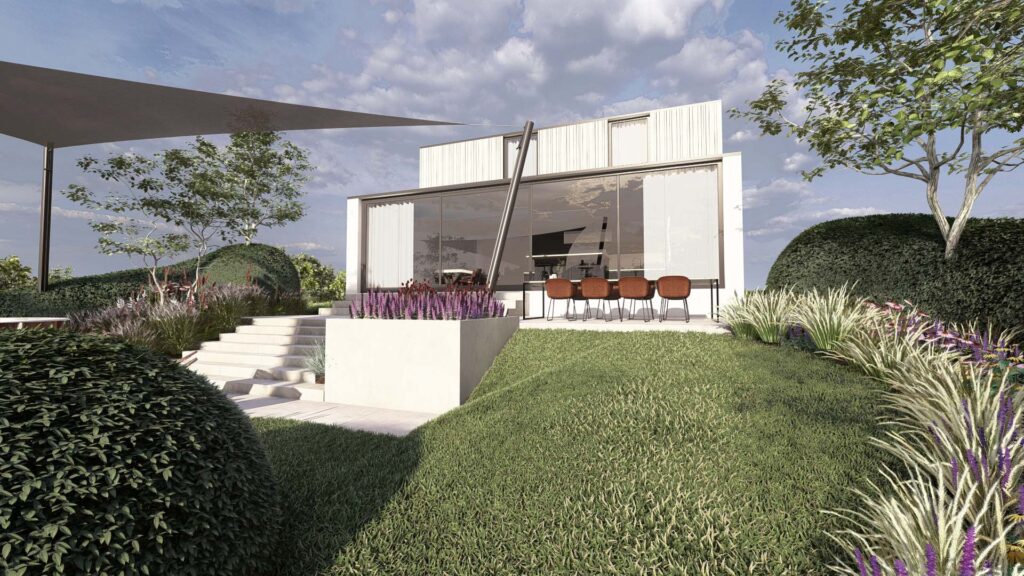
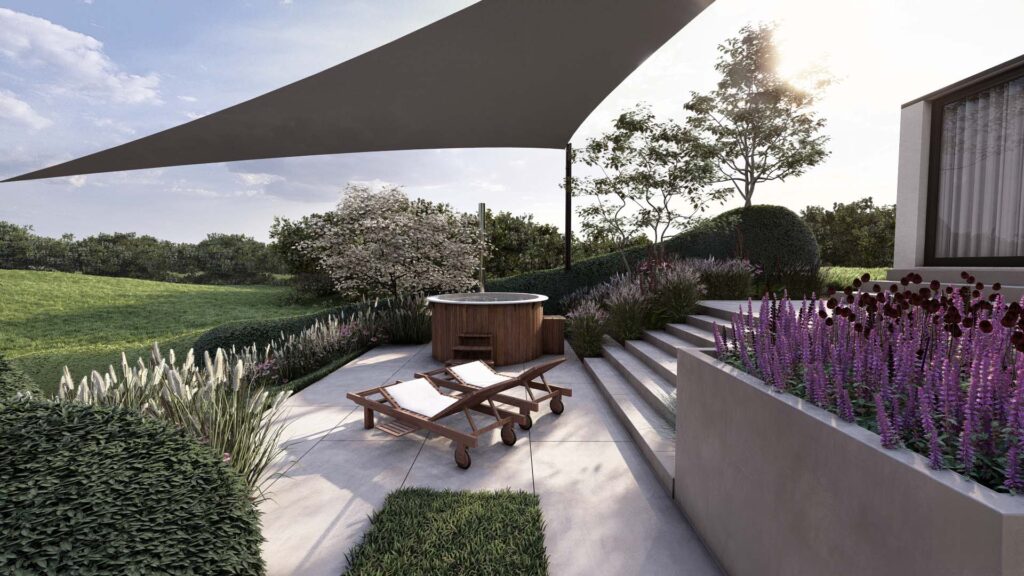
From Small City Gardens to Large Landscape Projects
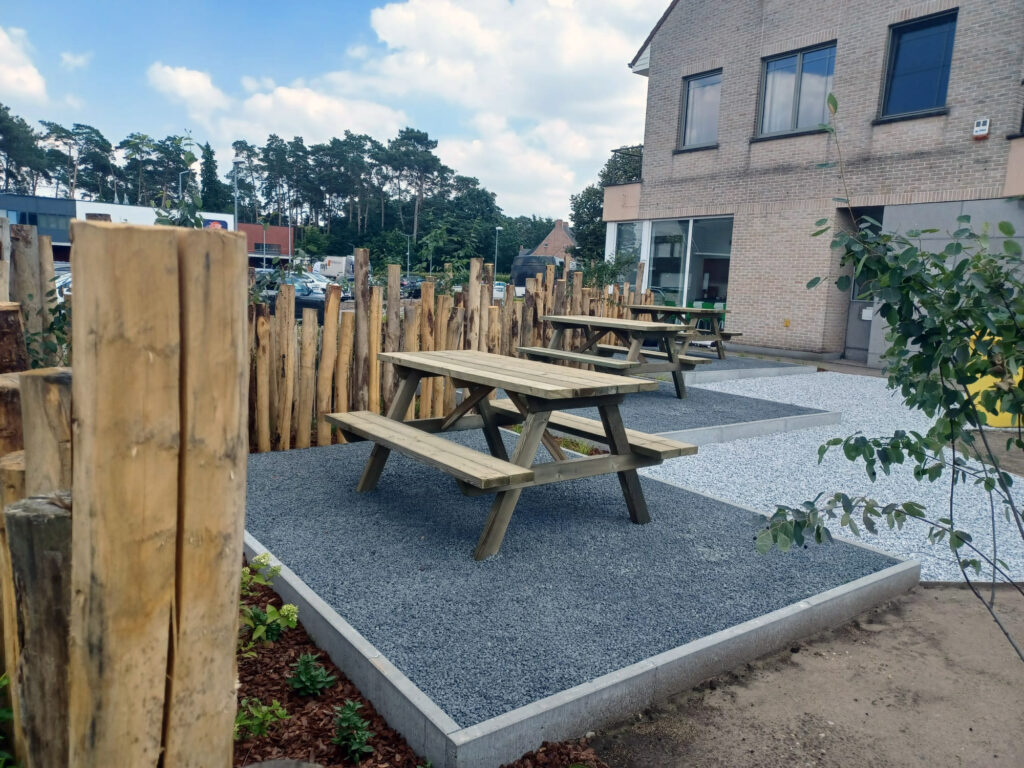
The projects Marlies visualises vary enormously. “It ranges from small city gardens to very large landscape gardens. With large projects, there’s often less detail, more lawn, and large surfaces. The small city gardens are often more fun because there’s much more detail in them.”
A highlight in her career was collaborating with a garden architect for the VTM program ‘Goed Geplant‘ (Well Planted).

“It was a competition between two garden architects, lasting six or seven episodes. I got to provide the 3D images for all episodes. It was quite special to see your work on TV.”
Despite the diversity of projects, Marlies stays strictly within her role. “I don’t do any design myself. I usually receive a detailed plant list and try to render it as realistically as possible. I visualise exactly what the garden architect has designed.”
Technical Elaboration: From 3D to 2D Plans
Besides visualisations, Marlies creates complete technical plans in LayOut, especially for garden contractors who work in practice. “They often come with a hand-drawn sketch. I convert that into 3D and into execution plans: dimension plans, elevation plans, planting plans, lighting plans.”
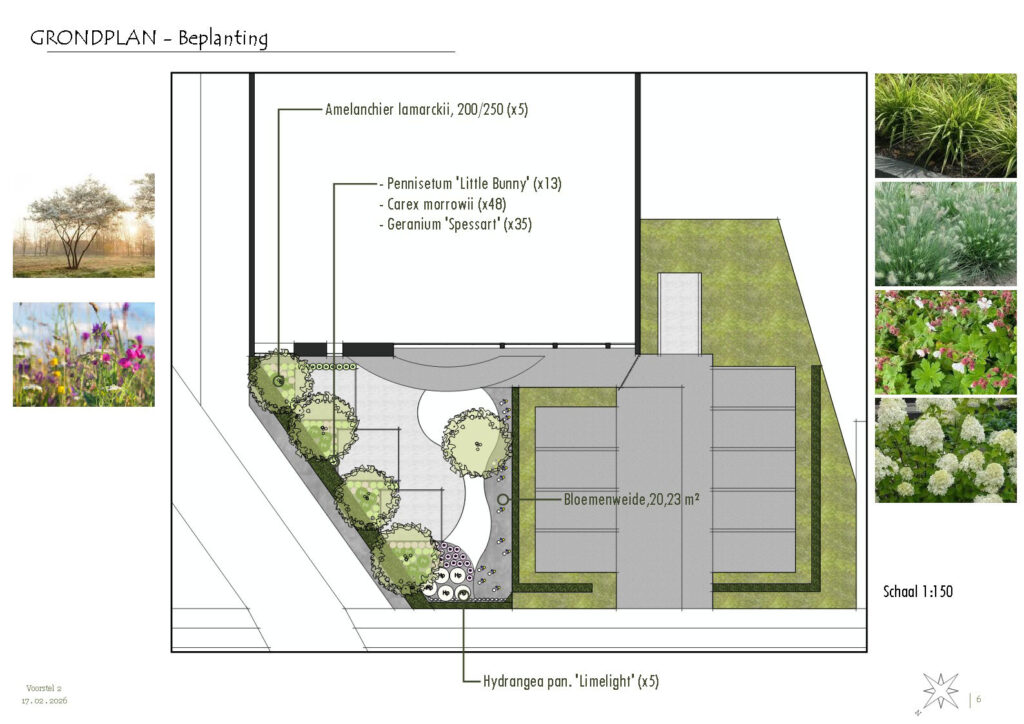
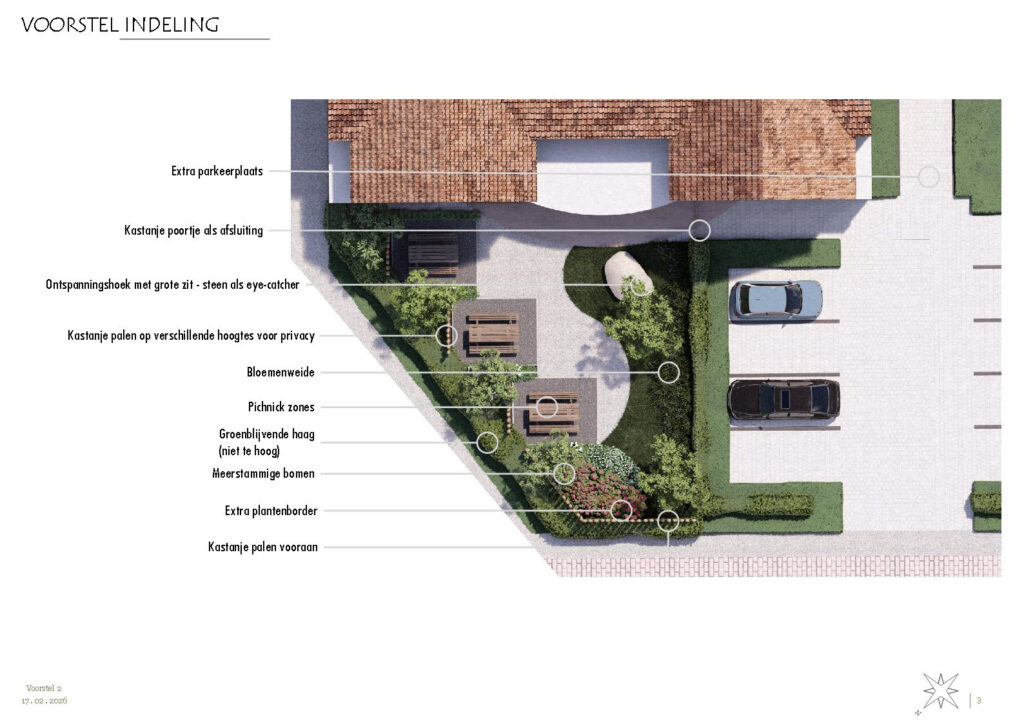
Her approach in LayOut is as thoughtful as in SketchUp. “If you work with LayOut’s defaults, it doesn’t always look professional. I play with styles in SketchUp to generate beautiful plans. In LayOut, I have my own library with scrapbooks containing my complete house style. If you draw well in SketchUp, the plans basically roll out with just a few clicks.”
An advanced technique Marlies uses is stacking viewports. “I create separate scenes in SketchUp for specific details, for example, just the curb stones or a wooden structure. I lay those scenes in LayOut in colour on top of a black-and-white floor plan. That way, I highlight the details. I do the same with plant symbols. By stacking viewports, you get a clear image where the details really stand out.”
Indispensable Tools: Sandbox, Solid Tools, and Artisan
Marlies works with a select set of tools that are essential for garden projects. “The Sandbox tool is indispensable for height differences. Without that tool, height differences would absolutely not look natural. You’d have to draw them manually with the Line tool, but then it doesn’t look flowing.”
However, she does have a wish for improvement. “When you start Sandbox from scratch, you get a nice mesh in neat triangles. But when you use Sandbox for contours, which I do most, it creates a weird subdivision that’s difficult to edit. With really flowing terrains, I sometimes use two planes on top of each other. I’d love to see improvement there.”
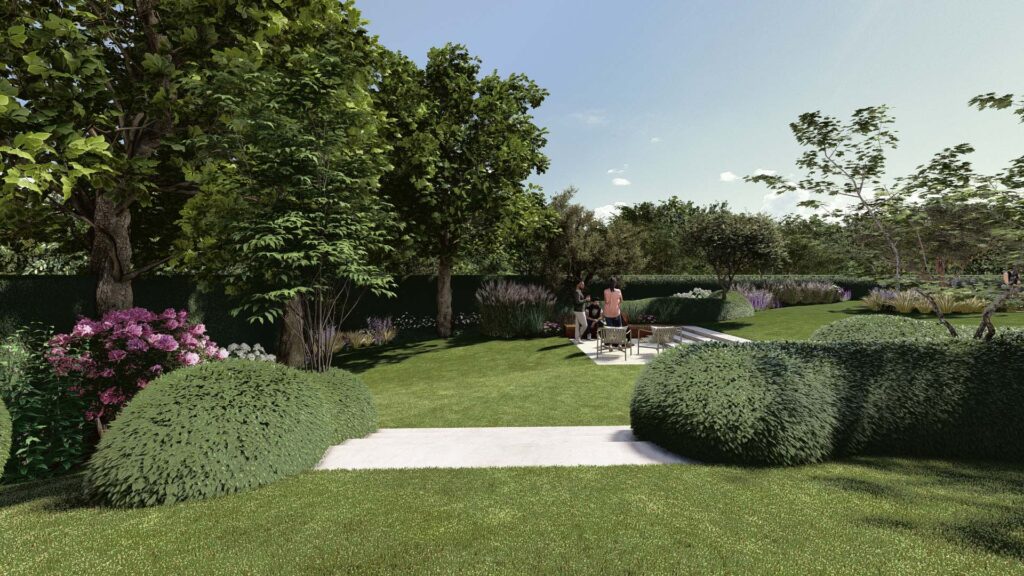
A surprising favorite are the Solid Tools. “You don’t hear them mentioned often, but since I’ve been using them, complex things are very easy to draw. I use them for window openings in curved walls, cutting out dormer windows, but also for hedge clouds. When they need to be against a building, I cut out the piece of the building from the hedge. Additionally, I very easily create a recess for, say, a swimming pond in a sloping terrain with the solid tools.”
For organic forms, the Artisan plugin is indispensable. “The flowing hedge clouds that are trendy now, you can hardly draw them nicely with native tools. Artisan is complex, and I may only use 10% of what it can do, but for m,e it’s daily work.”
AI: Experimenting with the Future
Asked about her future, Marlies immediately thinks of AI. “What I do now, I really enjoy, and it works well. But if we’re realistic, I probably need to adjust.”
She’s cautiously experimenting with AI functions. “Especially in the rendering software for improving images, materials, lighting, and atmosphere. In SketchUp, there’s a new AI tool to create a 3D object from an image. Very cool, but it doesn’t always work perfectly yet. It could eventually help to visualise difficult things, like specific garden sculptures by swimming ponds. This could later also be a nice addition to, for example, a plant library.”
The SketchUp part looks stable for now. “Drawing out a project in detail, an existing situation, AI doesn’t have much to say there yet. But toward rendering, we’ll see what the future brings.”
From Student to Trainer: The Circle is Complete
Since 2021, Marlies has also been a freelance trainer at Masters in SketchUp, where she was a student herself in 2018. “Peter Wuyts (owner of Masters in SketchUp, ed.) sent me a WhatsApp: ‘I see great renders from you on Facebook. Should we talk?” He asked if I wanted to give training as a freelancer. I immediately said yes, but also with some trepidation. My SketchUp skills weren’t then what they are now.”
Giving training proved educational. “By teaching here, I’ve learned a lot myself. The questions you get, you look up yourself. Meanwhile, we’re five years further, and I’ve developed a special training together with a fellow freelancer for garden architects and contractors.”
Six-Day Specialised Training for Garden Professionals
The training that Marlies and colleague Birgit developed is unique in the Netherlands and Belgium. “It’s a six-day live training for groups of four people. We start with two days of standard workflow—basically a basic training with the principles of SketchUp. Then follow four days specifically for garden architects and contractors.”
The focus is on the technical challenges of exteriors. “Drawing out heights and flowing forms is much more complex than a straightforward interior project. We also cover how to extract details: numbers of curb stones, step blocks. And how to keep SketchUp manageable when you have 500 plants in your file.”
There’s a deliberate time between lesson days. “After the first two days, they get a month to practice intensively with their own projects. Only then do they come back for the four in-depth days. We then draw a project together from scratch, from survey to complete template. At the end, they have a working template with all scenes, sections, and tags ready, plus a LayOut template that connects to it.”
The biggest challenge for students? “They often want too much too fast. We say: start with the basics, a small, simple project. No hectare garden right away. Create good templates and libraries—those are worth their weight in gold. And practice! People who do nothing for two months after the training and then start with a deadline, that’s guaranteed to go wrong.”
Marlies‘ Most Important Tips for SketchUp Users
Marlies has clear advice for garden professionals who want to get started with SketchUp:
- Take a training course
“With online tutorials, you’ll get somewhere, but with complex matters like large height differences, you won’t make it. Make sure you know all the tools well, so you know which one to use best in which situation.” - Build up your libraries
“A good component library where everything is cleaned up keeps your file efficient and manageable. That’s essential for professional work. A good material library ensures beautiful and professional images and saves you a lot of wasted time searching.” - Maintain your overview
“1 project equals 1 SketchUp file, even if there are different options or versions. By using tags and scenes cleverly, you don’t need to maintain different files for one project. This way you avoid confusion, duplicate work, and mistakes!” - Work with templates
“If you have templates completely aligned in SketchUp and LayOut, then your biggest work is the drawing. Plans are up-to-date in half an hour.” - Keep practicing
“After a training, really take the time to practice. Start small and build up. Consistency is more important than an occasional big project.”
Marlies’ Mission: Making SketchUp Known in the Garden World
Marlies sees a clear mission in her training work. “Most garden architects still learn AutoCAD or VectorWorks in their education. They have no idea what SketchUp can do. My mission is to show that you can work in one package: SketchUp plus LayOut. The interaction between the two is so powerful. Adjustments in SketchUp, press update, and your plans are correct.”
That integration between 3D design and 2D technical plans is exactly what many garden professionals are looking for. “They need all possible plans, but don’t know that SketchUp and LayOut can deliver that. Once they realise that, a world opens up.”
Conclusion: From Passion to Professional Studio
Marlies’ story illustrates how accessible SketchUp is for people without formal technical education, but also how important targeted training and structured work can be for professional use. From YouTube tutorials to 150 projects per year, it shows what’s possible with the right tools, perseverance, and continuous development.
Her success stems from a clear positioning: she visualises garden architects’ design. Through that focus and her efficient workflow with custom libraries, templates, and the integration between SketchUp and her rendering software, she has created a valuable link in the garden industry.
For garden professionals who want to get started with 3D visualisation and technical plans, Marlies’ approach offers concrete handles: invest in training, build up your libraries, work with templates, and keep practising. The combination of SketchUp and LayOut proves to be a powerful solution for the unique challenges of exterior projects.
About Imperata
Imperata is a specialised design studio based in Belgium, founded and led by Marlies Scheppers. The studio focuses entirely on the green sector and offers professional 3D visualisations and technical 2D plans for garden architects, garden contractors, and landscapers in both Belgium and the Netherlands.
Contact
Website: imperata.be
Specialised in: 3D visualisations and technical plans for garden designs
Working area: België en Nederland
Project scope: From small city gardens to large landscape projects landschapsprojecten